Top-Down Knit Sweater Pattern Guide: Raglan vs Circular Yoke, Steps, Sizing, and Troubleshooting
Top-down sweaters are popular because they let you try on the garment as you go and adjust fit and length before you’ve committed to a finished hem. This guide explains how top-down sweater patterns work, how to choose between raglan and circular yokes, how to size and adjust, and how to fix common fit problems. It also includes a late, clearly labeled section for brands and product teams who want to translate a “top-down look” into manufacturer-ready specs.
Why top-down sweaters are popular
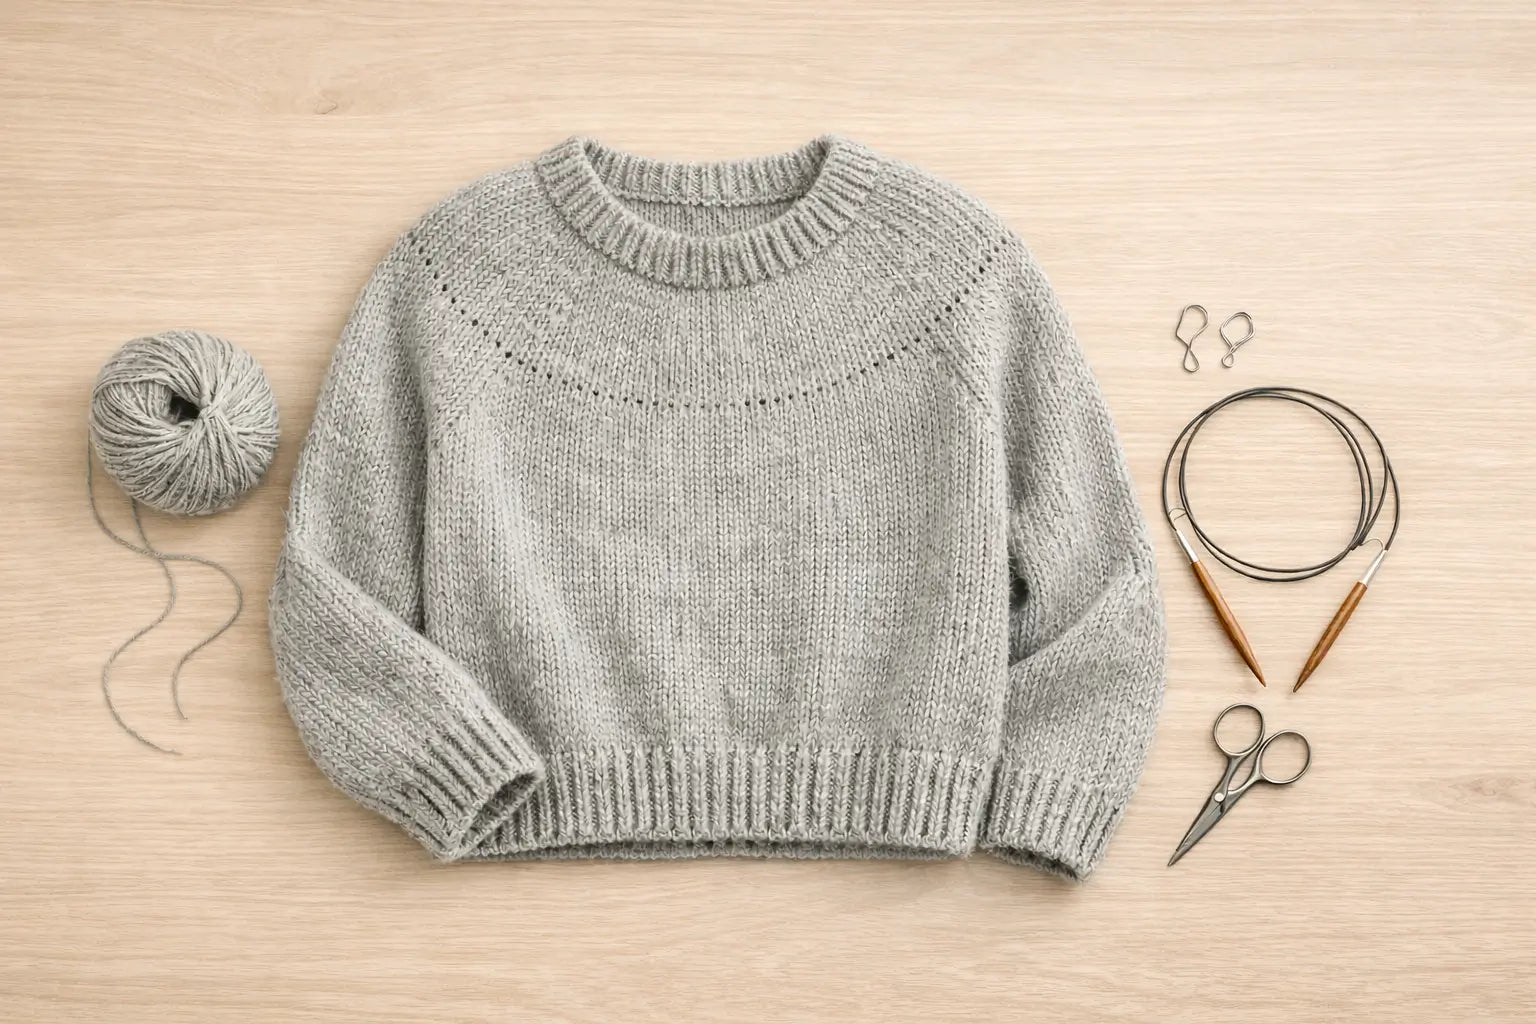
Top-down sweaters are popular because the construction order (neckline first, then down to the hem) makes it easier to check fit early and adjust length as you knit. Sources like DROPS describe top-down knitting as flexible for trying on and making adjustments while working.
(Reference: https://www.garnstudio.com/lesson.php?cid=19&id=71)
- You can often try the sweater on after the yoke is established, before committing to full body or sleeves.
- Length changes are usually simpler: you can knit a bit more (or stop earlier) at the body and sleeves.
- Many top-down patterns are “seamless” (worked in the round), so finishing can be lighter.
Boundary conditions / caveats
- “Top-down” describes construction order, not a guarantee of better fit.
- Final fit still depends on gauge, ease, and shaping choices.
If you want the quickest practical takeaway, the getting started below gives you the definition, the raglan-vs-yoke choice, and the core step flow.
Getting Started
A “top-down sweater pattern” starts at the neckline or yoke and is worked downward, usually letting you try on and adjust fit as you go. The two most common top-down styles are raglan and circular yoke, and they differ mainly in how they shape the shoulders and upper chest.
Key points
- Top-down = knit from neckline/yoke downward; sleeves are separated from the body partway through.
- Raglan = diagonal “lines” from underarm to neckline; circular yoke = shaping distributed around the yoke.
- Fit depends on gauge and ease, even if the construction is top-down.
Raglan vs circular yoke at a glance
| If you want… | Raglan (top-down) | Circular yoke (top-down) |
|---|---|---|
| A classic “raglan line” look | Strong match | Not the focus |
| Shoulder definition | Often clearer | Often softer/rounder |
| Easy mental model for shaping | Usually straightforward | Can be simple, but distribution varies |
| A smooth, continuous upper-body look | Less so (lines are visible) | Strong match |
Core top-down steps (pattern-agnostic)
- Cast on at the neckline and establish the collar/neck edge.
- Begin yoke shaping (raglan increases or yoke increases).
- Try on to check neckline comfort and yoke depth.
- Separate sleeves from the body (put sleeve stitches on hold).
- Work the body to your desired length and finish the hem.
- Return to sleeves, work to length, and finish cuffs.
- Weave in ends and do final finishing/blocking as needed.
Boundary conditions / caveats
- A yarn change can alter gauge and drape, which changes sizing outcomes.
- Some patterns add neckline short rows for comfort; others keep it simpler.
If you’re choosing between the two main styles, the next section gives a clearer, more detailed comparison.
What a top-down sweater pattern means
A top-down sweater pattern is a set of instructions (or a method/recipe) that starts at the neckline or upper yoke and builds the sweater downward, splitting the work into body and sleeves partway through. Many top-down sweaters are worked “seamlessly” in the round, meaning the main body doesn’t require sewn seams.
Key points
- You usually knit: neckline → yoke shaping → sleeve separation → body → sleeves → finishing.
- “Seamless” often means the body is knit in one piece; sleeves may be knit in the round afterward.
- Top-down construction makes it easier to adjust length because you reach body and sleeve lengths later in the process.
Top-down vs bottom-up (practical difference)
| Construction | Typical workflow | Practical implication |
|---|---|---|
| Top-down | Neckline/yoke first, then down | Try-on earlier; length adjustments later |
| Bottom-up | Hem/sleeves first, then join at yoke | Fit check may come later; yoke work comes near the end |
Boundary conditions / caveats
- Top-down does not guarantee fit without gauge/ease alignment.
- There are hybrids and variations (for example, different yoke shaping styles and neckline constructions).
If you’re not sure which style to start with, comparing raglan and circular yokes is the quickest way to narrow your choice.
Raglan vs circular yoke
Raglan and circular yoke are the two most common top-down sweater archetypes, and the best choice depends on the silhouette you want and how you prefer the upper body to fit. Raglan sweaters create diagonal shaping lines, while circular yokes distribute shaping around the upper body for a smoother look.

Key points
- Raglan shaping is easy to recognize and often easy to tweak because the “lines” help you see where increases happen.
- Circular yokes can create a clean, continuous look and are common for colorwork or textured yokes.
- Neither is universally “better”—your body proportions and preferred ease matter.
Comparison table
| Factor | Raglan (top-down) | Circular yoke (top-down) |
|---|---|---|
| Visual look | Diagonal “raglan lines” from underarm to neck | Smooth upper body; shaping feels more “round” |
| Shoulder/upper chest feel | Can feel structured; lines can guide fit | Often softer; distribution affects upper chest fit |
| Ease to modify length | Easy (top-down advantage) | Easy (top-down advantage) |
| Where fit issues show up | Underarm depth, sleeve/body balance | Yoke depth and distribution across upper chest |
| Great for | First sweater workflows, classic casual shapes | Clean silhouettes, round-yoke aesthetics, many colorwork styles |
How to choose (quick heuristics)
- Choose raglan if you like visible shaping lines and want a straightforward mental model for increases and sleeve separation.
- Choose circular yoke if you want a smoother upper-body look or you’re aiming for a round-yoke aesthetic.
Boundary conditions / caveats
- Fit depends on increase distribution, yoke depth, and ease—two circular yoke patterns can fit very differently.
- Hybrid designs exist, so focus on the pattern’s schematic and measurements, not just the name.
Once you pick a style, the next section breaks down the core steps without relying on any one specific pattern’s stitch counts.
Top-down sweater steps
A top-down sweater typically follows the same milestone sequence regardless of the specific pattern: neckline, yoke shaping, sleeve separation, body, sleeves, and finishing. Many well-structured tutorials describe the flow in this order, such as Tin Can Knits’ step-based approach.
(Reference: https://blog.tincanknits.com/2013/10/25/lets-knit-a-sweater/)

Key points
- The big “turning point” is the sleeve split, when sleeves go on hold and you continue with the body.
- Try-on checkpoints are your advantage: you can check neckline comfort and yoke depth early.
- Finishing steps (cuffs/hem/neck edge) often follow the same pattern family (ribbing or a clean edge).
Step-by-step (pattern-agnostic)
- Neckline setup: Cast on and establish the collar/neck edge.
- Mark sections: Place markers (if used) to separate sleeves/front/back (raglan) or segments around the yoke (circular yoke).
- Yoke shaping: Increase or shape until the yoke reaches the depth needed for comfortable arm movement.
- Try-on checkpoint #1: Check neckline comfort and whether the yoke sits as you want.
- Separate sleeves: Put sleeve stitches on hold; cast on or bridge underarm stitches if the pattern calls for it.
- Try-on checkpoint #2: With sleeves on hold, check body circumference and underarm comfort.
- Knit the body: Work down to the desired body length and finish the hem.
- Knit the sleeves: Return sleeve stitches, work sleeves to length, and finish cuffs.
- Finishing: Weave in ends and block or finish as the fabric requires.
Boundary conditions / caveats
- The “right” yoke depth depends on size, ease, and style; patterns vary on when they separate sleeves.
- If you substitute yarn or change gauge, you may need to adjust stitch counts or choose a different size.
If your neckline tends to feel tight or the sweater rides up, understanding neckline short-row shaping can help.
Neckline shaping with short rows
Short rows are used in many top-down sweaters to add extra fabric at the back of the neck so the neckline sits more comfortably—because most bodies need more height at the back than the front. Interweave’s short-row guidance describes neckline comfort as a common reason to use short rows.
(Reference: https://www.interweave.com/article/knitting/ask-the-experts-short-rows/)
Key points
- Short rows are partial rows that create shaping by knitting partway, turning, and knitting back.
- At the neckline, they can raise the back neck relative to the front.
- Many patterns treat them as optional because simpler necklines can still work, especially for some styles.
How to think about it (without pattern math)
- If your sweater feels like it’s pulling up in front or sitting too low in back, short rows may improve comfort.
- If your neckline is already shaped (for example, a deeper front neckline), short rows may be less critical.
Boundary conditions / caveats
- Not every neckline needs short rows; the necessity depends on neckline style and personal preference.
- Different patterns implement them differently, so follow the pattern’s sequence if provided.
If you want your sweater to fit the way you intend, the sizing section below shows how gauge and ease drive the outcome.
Sizing, gauge, and ease
Choosing the right size in a top-down sweater pattern is mostly about aligning your gauge and your desired ease with the pattern’s size chart, then using try-on checkpoints to confirm fit. Many patterns explicitly emphasize swatching and gauge before committing to a size.
(Example of a step-based “choose a size → swatch → cast on” flow: https://blog.tincanknits.com/2013/10/25/lets-knit-a-sweater/)
Key points
- Gauge determines the final measurements: if your stitches are larger/smaller than the pattern, the sweater size changes.
- Ease is the difference between your body measurement and the garment measurement (how fitted or relaxed it is).
- Top-down construction helps because you can try on and adjust as you go, but it doesn’t replace the need for gauge alignment.
Decision checklist (pick a size with less guesswork)
- Measure your chest/bust (and upper arm if the pattern provides that measurement).
- Decide your ease goal (fitted, standard, relaxed) based on the style you want.
- Compare your measurement + ease goal to the pattern’s garment measurements or schematic.
- Swatch or otherwise confirm gauge before committing to the final size decision.
- Plan a try-on checkpoint after the yoke is established and again after sleeve separation.
Mini-table: measurements that matter most
| Measurement | Why it matters | Where you feel it first |
|---|---|---|
| Chest/bust | Main body fit and comfort | After sleeve separation (body circumference) |
| Upper arm (if provided) | Sleeve comfort and mobility | When sleeves are in progress |
| Yoke depth | Underarm comfort and arm movement | Before/at sleeve split |
| Body length | Proportion and wear preference | Near the end of the body |
| Sleeve length | Proportion and practicality | Near the end of sleeves |
Boundary conditions / caveats
- Yarn substitutions can change drape and stretch, even if you match stitch gauge.
- Ease preferences are personal; the “right” ease depends on the style and wearer.
If you mainly want to adjust length, these are the most common “safe” adjustment points in top-down construction.
How to adjust body and sleeve length in top-down sweaters
The simplest top-down adjustments are usually length adjustments, because you reach body and sleeve lengths late in the workflow and can try on as you go.
Key points
- Body length is typically the easiest to customize: knit more for longer, stop earlier for shorter.
- Sleeve length is also straightforward if the sleeve is worked downward from held stitches.
- Try-on checkpoints help you confirm proportions before final cuffs/hem.
Practical adjustment steps
- Try on after sleeve separation (or after a few inches of body) to confirm where you want the hem to land.
- Mark a “target length” for the body and sleeves based on comfort and style.
- Adjust gradually, checking fit before you commit to cuffs or hem finishing.
Boundary conditions / caveats
- Length changes can slightly change how the sweater hangs, especially in heavier yarns.
- If the pattern has texture or motif repeats, you may need to adjust in repeat-friendly increments.
If you’re newer to sweaters, the beginner checklist below helps you choose patterns that are less likely to surprise you mid-project.
Beginner checklist for choosing a top-down pattern
Beginners do best with top-down patterns that clearly show measurements, explain techniques, and provide a predictable workflow—so you spend more time knitting and less time guessing.
Key points
- A good beginner pattern is “complete” (clear size chart, schematic, gauge guidance, and finishing instructions).
- Avoid patterns that hide key info behind marketing copy without showing measurements.
- Strong photo or diagram support can reduce mistakes at the yoke and sleeve split.
Beginner-friendly checklist
- Clear size chart and garment measurements (not just “S/M/L” labels).
- A schematic or at least key measurements for body and sleeves.
- A short list of required techniques (in-the-round, increases, simple finishing).
- A logical step flow (neckline → yoke → sleeve separation → body → sleeves → finishing).
- Notes on fit options (for example: neckline shaping optional or recommended).
Boundary conditions / caveats
- “Beginner” depends on what you already know (e.g., knitting in the round or reading a schematic).
- Yarn choice affects difficulty: slippery yarns or very dark yarns can make mistakes harder to see.
If you’ve started a sweater and something feels off, the troubleshooting section below focuses on the most common top-down fit problems and how to respond.
Troubleshooting top-down sweater fit problems
Most top-down sweater fit problems come from one of three causes: gauge mismatch, ease mismatch, or shaping depth that doesn’t match your body. The good news is that top-down construction often gives you checkpoints where you can catch issues earlier than with some other methods.
Key points
- Check fit at predictable milestones: after the yoke, after sleeve separation, and before finishing cuffs/hem.
- Many problems feel like “tight yoke” or “uncomfortable underarms,” which can point to yoke depth or circumference issues.
- Fix options depend on how far along you are, so act sooner when possible.
Troubleshooting table
| Symptom | Likely cause | Quick fix / response | Prevention checkpoint |
|---|---|---|---|
| Yoke feels tight across upper chest | Too little circumference or too little ease | Re-check gauge; consider switching size or adjusting increase strategy per pattern | Try on at mid-yoke; confirm you can move arms comfortably |
| Underarms feel tight or restrictive | Yoke depth too shallow or underarm join too tight | Add/adjust underarm stitches if pattern allows; reassess yoke depth | Try on right before sleeve split; confirm arm mobility |
| Neckline rides up in front | Neckline shaping doesn’t match body | Add neckline short rows if pattern supports; consider a different neckline style next time | Try on early; notice if front feels “pulled up” |
| Sleeves feel too tight | Sleeve circumference too small or wrong size choice | Re-check size chart and gauge; adjust sleeve decreases more gradually if design allows | Measure upper arm and compare to sleeve measurements |
| Sleeves feel too baggy | Too much ease in sleeve or too few decreases | Add decreases if appropriate; verify sleeve measurements | Check sleeve measurement early, not just at the cuff |
| Body balloons under arms | Too much fabric in upper body or shaping mismatch | Confirm size/ease choice; consider adjusting body shaping if included | Try on after sleeve split; check silhouette |
| Holes at underarms | Join technique or yarn-over gaps | Close gaps during finishing; use a tighter pickup/bridge technique | Inspect underarm joins immediately after splitting |
| Body too long/too short | Length not checked before hem finishing | Undo hem and adjust length if feasible | Try on before committing to hem finishing |
Boundary conditions / caveats
- Some fixes require redoing a section; it’s often easier to adjust earlier than later.
- If you’ve changed yarn or needle size mid-project, re-check gauge—it may explain sudden fit changes.
If you’re still searching for a pattern to start with, the next section shows where to look and how to spot “complete” pattern information.
Where to find patterns and how to evaluate them
You can find top-down sweater patterns on designer sites, yarn brand sites, pattern platforms, and marketplaces, but the key is learning how to evaluate whether the pattern information is complete and reliable for your goal.
Key points
- “Free vs paid” is not a guarantee of quality—look for completeness and clarity.
- A strong pattern listing includes measurement info, gauge info, and a clear technique list.
- Reviews or update notes (errata) can signal that the pattern is maintained.
Sources overview (by category)
| Source type | Pros | Cons | Best for |
|---|---|---|---|
| Designer site or designer blog | Clear design intent; often good support | Quality varies by designer | Popular patterns with strong community support |
| Yarn brand site (free patterns) | Often includes gauge and materials clearly | Style may be yarn-specific | Quick starts and classic basics |
| Pattern platform (catalog + filters) | Easy to browse and filter | You still need to evaluate each listing | Comparing options and saving favorites |
| Marketplaces | Huge variety | Quality control varies | Niche styles (evaluate carefully) |
| Community threads/boards | Real-world feedback and “what people repeat” | Hard to extract a single reliable workflow | Inspiration and shortlists (verify pattern details separately) |
Boundary conditions / caveats
- Always review measurement and gauge info before downloading or buying.
- Availability and language support vary by region.
If you want a quick “screening checklist” before you commit, use the pattern quality checklist below.
Pattern quality checklist before you start
A complete sweater pattern (or method) should make it easy to confirm size and build steps before you cast on.
Key points
- You should be able to answer: “Which size am I making?” and “What measurements will it produce?”
- You should be able to identify: “What techniques does this require?”
Checklist
- Size chart with garment measurements (not only body measurements).
- Gauge guidance (stitch and row gauge if available).
- Schematic or key measurements for body and sleeves.
- Clear step sequence (neckline → yoke → sleeve split → body → sleeves → finishing).
- Technique list (increases, decreases, short rows if used, finishing).
- Update notes/errata or at least a clear version/date, if provided.
Boundary conditions / caveats
- A “recipe” method can still be high quality if it clearly explains how to calculate and check measurements.
If you’re a brand or product team trying to create a similar look for production, the next section shows what to send a manufacturer so sampling is based on measurable specs rather than guesswork.
For brands: what to send a knitwear manufacturer
If you’re a brand aiming for a “top-down look” (raglan lines or a circular yoke silhouette), you’ll get better sampling outcomes when you translate the look into measurable specs: measurements, materials, stitch/texture references, and construction notes. A well-prepared tech pack is widely described as a way to reduce production errors and cut down on sampling back-and-forth.
(Reference: https://techpacker.com/blog/design/what-is-a-tech-pack/)
Key points
- “Top-down look” is an aesthetic target; manufacturers still need measurable specs to reproduce it.
- The most useful inputs are: measurement specs, materials/yarn targets, stitch/texture references, trims, and packaging requirements.
- Clear documentation helps reduce misunderstandings and sampling iterations.
Step-by-step: what to prepare and send
- Inspiration + intent: photos, target customer, and “must-keep” design features (e.g., raglan line visibility, yoke depth, neckline shape).
- Measurement spec: size chart + key garment measurements + fit intent (fitted vs relaxed).
- Material/yarn target: fiber composition target, handfeel goal, and any constraints (e.g., “soft and drapey” vs “structured”).
- Stitch/texture reference: links to swatches, close-up photos, or stitch naming (as specific as you can be).
- Construction notes: define whether you want visible raglan lines, a round-yoke shape, ribbed edges, and any special finishing expectations.
- Colorways: color names/codes if you have them, and placement notes (solid vs yoke detail vs stripes).
- Trims and branding: label placement, label type, hangtags, and packaging needs (if applicable).
- Sample evaluation criteria: what you will judge in the sample (measurements, handfeel, stretch recovery, neckline comfort, and visual accuracy).
Boundary conditions / caveats
- Feasibility depends on yarn availability, gauge, stitch complexity, and size range.
- Inspiration photos alone are rarely enough; measurable specs reduce risk.
If you want a compact reference you can share internally, the checklist below summarizes the essentials.
Tech pack essentials checklist for sampling
A practical knitwear tech pack aims to make the style reproducible without interpretation.
Key points
- Measurements and construction notes are the “non-negotiables.”
- A BOM (bill of materials) is commonly used to list everything needed to manufacture a product, including packaging components.
(Reference: https://www.netsuite.com/portal/resource/articles/erp/bill-of-materials-bom-fashion.shtml)
Checklist
- Flat sketch (front/back) + detail callouts (neckline, cuffs, hem).
- Size chart with garment measurements and grading intent.
- Material/yarn target (composition, handfeel, colorway list).
- Stitch/texture references (photos, swatches, stitch names).
- Construction notes (raglan vs yoke look, edge finishes, any shaping requirements).
- BOM for trims and packaging (labels, hangtags, polybags/boxes if used).
- Fit comments and sample evaluation checklist (what must match).
Boundary conditions / caveats
- If you don’t have exact yarn specs, describe handfeel and performance targets clearly and expect sampling to refine the match.
If you’re preparing to reach out to an OEM/ODM partner, a short, practical “contact packet” can keep early conversations focused and efficient.
Requesting a sample or quote without guesswork
If you’re contacting an OEM/ODM knitwear manufacturer like XTCLOTHES for sampling and bulk production, you’ll usually get faster, clearer feasibility feedback when you share a compact set of inputs up front. XTCLOTHES positions itself as an OEM/ODM knitwear partner offering sampling, bulk production, custom labels/packaging support, and logistics/customs support (as stated in the project configuration).
- Your tech pack (or sketches + measurement spec + stitch/texture reference)
- Target quantities (even a rough range), target ship window, and size range
- Material/yarn preferences and colorways
- Label/packaging requirements and destination region (for logistics support)
Timelines, MOQ, and feasibility can vary by design complexity, materials, and order size, so treating early conversations as a “feasibility + sampling plan” discussion is often more productive than asking for a single fixed promise.
If you want to reduce surprises later, it helps to understand how the “raglan look” or “yoke look” maps to production methods and QC checkpoints.
Manufacturing mapping and QC checkpoints
A “raglan look” or “circular yoke look” can be achieved with different production approaches, so the key is clarifying the method expectations and the QC checkpoints you’ll use to judge consistency during sampling.
Key points
- The same visual concept can be produced using different construction approaches.
- QC is easier when the tech pack specifies what “must match” (measurements, stretch behavior, neckline shape, and finishing quality).
- Sampling is the best time to confirm method choices before bulk.
Mini-table: look → what to clarify
| Design goal | What to clarify in specs | Why it matters in production |
|---|---|---|
| Visible raglan lines | Where lines should sit; shaping emphasis | Affects shoulder look and fit consistency |
| Clean round yoke silhouette | Yoke depth and distribution intent | Impacts upper chest fit and drape |
| Smooth finishing at edges | Ribbing type and edge finish expectations | Affects durability and appearance |
| Consistent measurements in bulk | Measurement tolerances and checkpoints | Prevents size drift across batches |
| Comfort and mobility | Underarm depth and sleeve/body balance | Reduces returns and fit complaints |
QC checkpoints to review in samples
- Confirm key measurements match your spec sheet (chest/bust, sleeve width, length).
- Check neckline comfort and whether the garment rides up or sits as intended.
- Check underarm comfort and arm mobility.
- Inspect finishing consistency (edges, joins, and any visible lines).
- Evaluate handfeel and stretch recovery against your target wearer experience.
Boundary conditions / caveats
- Feasibility and consistency depend on yarn, gauge, stitch complexity, and the size range you’re producing.
- If you’re unsure about method details, define outcomes (measurements + appearance + feel) clearly and align on method during sampling.
If you’re here primarily as a knitter, the FAQ below summarizes the most common questions people ask after searching for “top-down sweater pattern.”
FAQ
What does “top-down sweater pattern” mean
-
Q: What does “top-down sweater pattern” mean?
A: It means you start knitting at the neckline or yoke and work downward, separating sleeves from the body partway through. Fit still depends on gauge and ease, but top-down construction often gives you earlier try-on checkpoints.
What is the difference between top-down raglan and circular yoke
-
Q: What’s the difference between a top-down raglan and a top-down circular yoke sweater?
A: Raglan sweaters use diagonal shaping lines from underarm to neckline, while circular yokes distribute shaping around the yoke for a smoother, rounder look. The best choice depends on the silhouette you want and how you prefer the shoulders and upper chest to fit.
When do you split for sleeves in a top-down sweater
-
Q: When do you split for sleeves in a top-down sweater?
A: You split for sleeves after the yoke is deep enough for comfortable arm movement and the body circumference is close to your target fit. The exact point depends on the pattern, size, and ease, so try-on checkpoints help confirm timing.
Why do top-down sweaters use short rows at the neckline
-
Q: Why do top-down sweaters use short rows at the neckline?
A: Short rows add extra height at the back of the neck so the neckline sits more comfortably for many bodies. They’re often optional because some neckline styles or wearer preferences don’t require the extra shaping.
How do I choose the right size and ease for a top-down sweater
-
Q: How do I choose the right size and ease for a top-down sweater?
A: Start with your chest/bust measurement, choose the ease you want (fitted vs relaxed), then match your gauge to the pattern’s gauge before finalizing size. Yarn swaps and gauge changes can shift outcomes, so swatching and try-ons reduce risk.
What is the most common mistake that makes a top-down sweater not fit
-
Q: What’s the most common mistake that makes a top-down sweater not fit?
A: A gauge mismatch or an ease choice that doesn’t match the intended fit is a very common cause of unexpected sizing. Catching issues early—after the yoke and after sleeve separation—usually makes fixes easier than waiting until finishing.
Where can I find top-down sweater patterns free vs paid
-
Q: Where can I find top-down sweater patterns (free vs paid)?
A: You can find them on designer sites, yarn brand sites, pattern platforms, and marketplaces, plus community threads for inspiration. Free vs paid isn’t a guarantee of quality, so look for complete measurements, gauge info, a clear step sequence, and a technique list before committing.
Summary and next steps
Top-down sweaters are popular because you can check fit earlier and adjust length as you knit, but gauge and ease still determine the final outcome.
Takeaways
- Pick raglan for visible shaping lines and a classic top-down workflow; pick circular yoke for a smoother upper-body look.
- Use try-on checkpoints: mid-yoke, right after sleeve separation, and before final cuffs/hem.
- If fit feels off, troubleshoot by checking gauge/ease first, then yoke depth and sleeve/body balance.
- Choose patterns by completeness: measurements, gauge info, schematic, technique list, and a clear step sequence.
If you’re a brand/product team
- Translate the “look” into measurable specs: size chart, materials, stitch references, and construction notes.
- Use sampling to confirm method choices and QC checkpoints before bulk.
- If you already have a tech pack or sketches and measurements, sharing them early helps align expectations (without relying on guaranteed promises).