How to Crochet a Sweater – My Step-by-Step Beginner’s Guide
Introduction: I Thought Crocheting a Sweater Was Hard—Until I Tried It!
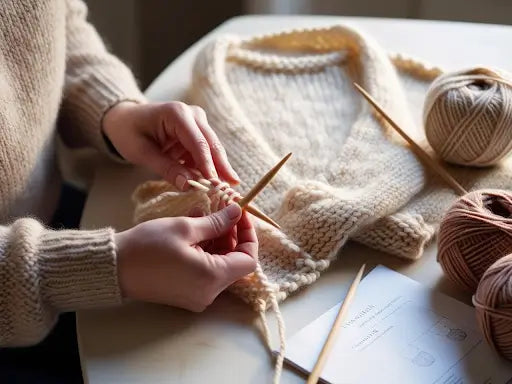
I’ll never forget the first time I decided to crochet a sweater. I had been making scarves and hats for a while, but the thought of tackling an entire sweater felt overwhelming—what if I got the sizing wrong? What if my stitches were uneven? Would it even fit me?!
But after taking the leap, I realized something amazing: crocheting a sweater is totally doable—even for beginners! Once you understand a few key techniques and follow the right steps, you’ll be able to create a sweater that looks like it came straight from a boutique.
What You’ll Learn in This Guide
✔ How to choose the best yarn & hook for sweater-making
✔ Step-by-step instructions for crocheting a sweater from start to finish
✔ How to fix common beginner mistakes (gauge issues, uneven edges, etc.)
✔ How to customize your sweater for the perfect fit & style
Let’s dive in!
Choosing the Right Yarn, Hook, and Pattern
When I crocheted my first sweater, I made one huge mistake—I picked the wrong yarn. It was beautiful in the skein but too stiff and scratchy, and the finished sweater felt like wearing a burlap sack.
Since then, I’ve learned that choosing the right materials makes all the difference. The right yarn, hook, and pattern will determine how soft, stretchy, and wearable your crochet sweater turns out.
1. Best Yarn for Crocheting a Sweater
Not all yarns are sweater-friendly! Here’s a breakdown of the best types of yarn for different sweater styles.
|
Yarn Type |
Pros |
Best For |
|
Cotton |
Breathable, durable |
Lightweight, summer sweaters |
|
Acrylic |
Affordable, easy-care |
Everyday sweaters, beginner projects |
|
Wool |
Warm, stretchy |
Winter sweaters, structured designs |
|
Alpaca |
Super soft, insulating |
Cozy, oversized sweaters |
|
Bamboo Blend |
Silky, drapey |
Flowy cardigans, loose-fit sweaters |
🎯 Pro Tip:
For beginners, I recommend worsted-weight acrylic or wool blend yarn—it’s easier to work with and holds its shape well.
🔗 Recommended YouTube Video:
🎥 YouTube: "Best Yarns for Crocheting a Sweater"

2. Choosing the Right Hook Size
The hook size you use can make or break your sweater. Too small? Your fabric will be stiff and tight. Too large? The stitches will be loose and shapeless.
|
Hook Size |
Best For |
Stitch Effect |
|
3.5mm – 4.5mm |
Fine yarn, tight fabric |
Firm, structured sweater |
|
5.0mm – 6.5mm |
Worsted weight yarn |
Medium drape |
|
7.0mm+ |
Chunky yarn |
Loose, oversized sweaters |
🎯 Pro Tip:
If your sweater turns out too stiff, try going up a hook size to loosen the stitches and improve drape.
🔗 External Reference:
📰 The Spruce Crafts: "How to Choose the Right Crochet Hook for Your Project"

3. How to Read a Crochet Sweater Pattern
When I first tried reading a crochet sweater pattern, I felt completely lost—so many abbreviations, stitch counts, and special instructions! But once I learned how to decode a pattern, it became much easier.
Here’s a quick cheat sheet of common pattern abbreviations:
|
Abbreviation |
Meaning |
Example |
|
ch |
Chain |
ch 20 (Chain 20 stitches) |
|
sc |
Single Crochet |
sc across row |
|
hdc |
Half Double Crochet |
hdc 10 (Half-double crochet 10 stitches) |
|
dc |
Double Crochet |
dc in next stitch |
|
sl st |
Slip Stitch |
sl st to join |
|
rep |
Repeat |
Rep row 3-5 |
🎯 Pro Tip:
If you’re new to reading patterns, start with a basic pullover or raglan-style sweater before trying complex shaping techniques.
🔗 Recommended YouTube Video:
🎥 YouTube: "How to Read a Crochet Pattern for Beginners"

Final Thoughts on Choosing Materials
Once I switched to the right yarn, hook, and beginner-friendly patterns, crocheting sweaters became so much easier.
✔ Pick the right yarn for stretch, drape, and comfort.
✔ Use the correct hook size to achieve even stitches.
✔ Learn basic pattern abbreviations to follow instructions smoothly.
With these basics in place, you’re ready to start your first crochet sweater!
How to Crochet a Sweater (Step-by-Step Guide)
I remember the first time I tried to crochet a sweater—I was excited, but also overwhelmed. Where do I start? How do I make sure it actually fits? I made a lot of mistakes (hello, sweater three sizes too big!), but over time, I figured out a process that works.
If you’re ready to crochet your first sweater, follow these simple steps and you’ll have a handmade, cozy sweater in no time!
Step 1: Crochet a Gauge Swatch (Don’t Skip This!)
Gauge matters so much more than you think—especially with sweaters! If your stitches are too loose, your sweater will turn out too big. Too tight? It won’t fit at all.
How to Make a Gauge Swatch:
-
Follow your pattern’s recommended hook size and stitch pattern.
-
Crochet a 4x4 inch (10x10 cm) square.
-
Count the number of stitches and rows per inch.
-
If your stitches are too small, go up a hook size. If they’re too big, go down a hook size.
🎯 Pro Tip:
Even if you hate swatching, trust me—spending 10 minutes on a swatch can save hours of unraveling a too-big or too-small sweater!
🔗 Recommended YouTube Video:
🎥 YouTube: "How to Check Your Crochet Gauge"

Step 2: Choose Your Sweater Construction Style
Crochet sweaters are made in two main ways:
|
Sweater Type |
How It’s Made |
Best For |
|
Panel Sweater |
Made with a front, back, and sleeves, then sewn together |
Beginners |
|
Top-Down Seamless Sweater |
Made in one piece, working in rounds |
More advanced |
🎯 Pro Tip:
If you’re a beginner, start with a simple panel sweater—they’re easier to adjust for fit!
🔗 External Reference:
📰 The Spruce Crafts: "Understanding Crochet Sweater Construction"

Step 3: Crochet the Body (Front & Back Panels or Yoke)
For Panel Sweaters (Best for Beginners)
-
Start with the back panel—this gives you an idea of the fit before making the front.
-
Use single crochet (sc) or half-double crochet (hdc) stitches for a sturdy fabric.
-
Work until the panel matches your desired sweater length.
For Seamless Top-Down Sweaters
-
Start by crocheting a yoke (the upper part of the sweater).
-
Increase stitches at the shoulders to create shaping.
-
Continue working in the round until the body is the right length.
🎯 Pro Tip:
For a lighter, drapier sweater, use double crochet (dc) stitches instead of single crochet.
🔗 Recommended YouTube Video:
🎥 YouTube: "How to Crochet the Body of a Sweater"

Step 4: Crochet the Sleeves
✔ If making a panel sweater, crochet two separate sleeve panels and sew them on later.
✔ If making a seamless sweater, crochet the sleeves directly onto the armholes.
✔ Work in the round for a smooth, professional finish.
🎯 Pro Tip:
For fitted sleeves, decrease stitches gradually as you work down. For a loose, oversized sleeve, keep the stitch count the same.
🔗 Recommended YouTube Video:
🎥 YouTube: "How to Crochet Sweater Sleeves"

Step 5: Assemble the Sweater (Joining Panels or Finishing Seams)
✔ For panel sweaters, use slip stitch or whip stitch to join the panels.
✔ For seamless sweaters, weave in any remaining loose ends.
✔ Block the sweater to soften the fabric and even out stitches.
🎯 Pro Tip:
Use a mattress stitch for nearly invisible seams on panel sweaters—it looks much cleaner than a whip stitch!
🔗 Recommended YouTube Video:
🎥 YouTube: "How to Seam a Crochet Sweater Neatly"

Final Thoughts on Crocheting a Sweater
The first time I finished crocheting a sweater, I couldn’t believe I actually made it myself. The best part? Every sweater you make gets better, faster, and easier as you go.
✔ Start with an easy pattern and focus on consistency.
✔ Take your time with gauge—it’s the key to a perfect fit.
✔ Don’t be afraid to customize your sweater to make it your own!
Once you finish your first sweater, you’ll be hooked (literally!) on making more.
Common Beginner Mistakes & How to Fix Them
I won’t lie—my first crochet sweater was a disaster. It was three sizes too big, uneven, and had weird gaps in the stitches. But every mistake taught me something valuable, and now I can make sweaters that actually fit!
Here are some of the biggest mistakes beginners make—and how to fix them before they ruin your project.
1. My Sweater Turned Out Too Small or Too Big! (Gauge Issues)
Mistake:
✔ You followed the pattern exactly but your sweater doesn’t fit—it’s either too tight or way too loose.
Why It Happens:
✔ Your gauge was off—even a small difference in stitch size adds up across a full sweater.
How to Fix It:
✔ Always crochet a gauge swatch before starting your sweater.
✔ Adjust your hook size—if your stitches are too tight, go up a size; if they’re too loose, go down a size.
✔ Measure your swatch after blocking (some yarns expand when wet).
🎯 Pro Tip:
If you’re in the middle of a sweater and realize it’s too small, try adding extra rows or using a looser stitch to fix the fit instead of starting over!
🔗 Recommended YouTube Video:
🎥 YouTube: "How to Adjust Gauge in Crochet"

2. Uneven Edges (How to Keep Your Rows Straight)
Mistake:
✔ Your sweater edges look wavy, jagged, or uneven instead of forming a clean rectangle.
Why It Happens:
✔ You accidentally added or skipped stitches at the beginning or end of rows.
✔ You’re not counting stitches after each row.
How to Fix It:
✔ Always count stitches at the end of every row.
✔ Place stitch markers in the first and last stitch to keep track.
✔ Use a turning chain guide—some stitches (like single crochet) need a turning chain, while others (like slip stitches) don’t.
🎯 Pro Tip:
If your edges are already wavy, block your sweater after finishing—light steaming can help smooth out uneven stitches!
🔗 External Reference:
📰 The Spruce Crafts: "How to Keep Crochet Rows Straight"

3. Gaps Between Stitches (Loose Tension Problems)
Mistake:
✔ Your sweater has unwanted gaps or holes, even though the pattern doesn’t call for them.
Why It Happens:
✔ Your tension is inconsistent—you’re pulling yarn too tight on some stitches and too loose on others.
✔ You may have accidentally skipped stitches or crocheted into the wrong loop.
How to Fix It:
✔ Practice even tension by crocheting slowly and adjusting your grip.
✔ Use a smaller hook size to tighten stitches if needed.
✔ Double-check stitch placement—make sure you’re working into the correct loops.
🎯 Pro Tip:
If gaps are still appearing, try using a denser stitch pattern like half-double crochet (hdc) instead of double crochet (dc).
🔗 Recommended YouTube Video:
🎥 YouTube: "How to Fix Loose Crochet Stitches"

4. Bulky Seams (How to Join Sweater Pieces Neatly)
Mistake:
✔ Your sweater seams look thick, bulky, or uneven, making the finished sweater look homemade instead of polished.
Why It Happens:
✔ You used a whip stitch or slip stitch that’s too tight, which adds bulk.
✔ You didn’t match stitch counts between panels before seaming.
How to Fix It:
✔ Use the mattress stitch for invisible, seamless joins.
✔ Always block pieces before seaming—this helps stitches line up better.
✔ If using a slip stitch seam, work loosely to prevent stiffness.
🎯 Pro Tip:
For top-down seamless sweaters, you won’t have seams at all—so if seaming is a struggle, try seamless patterns!
🔗 External Reference:
📰 The Spruce Crafts: "Best Ways to Seam Crochet Pieces Together"

Final Thoughts on Fixing Crochet Sweater Mistakes
Every mistake I made taught me something about crocheting sweaters, and now I can confidently say it gets easier with practice.
✔ Check your gauge before starting—it prevents sizing issues.
✔ Count stitches to keep edges even—it makes assembling the sweater easier.
✔ Use the right seam method—it gives the sweater a professional finish.
If your first sweater doesn’t turn out perfect, don’t worry! Every mistake is just part of learning, and by your second or third sweater, you’ll feel like a pro.
How to Customize Your Crochet Sweater
One of the best things about crocheting your own sweater is that you can make it exactly how you want it. When I started, I followed patterns exactly as written—but over time, I realized that tweaking small details could make my sweaters more comfortable, stylish, and unique.
If you want to add personality to your crochet sweater, here are some fun ways to customize it!
1. Adjusting the Fit: Oversized, Cropped, or Fitted?
I used to struggle with sweaters that didn’t fit quite right—until I learned how to adjust the shape. Whether you want a cozy oversized sweater, a fitted top, or a trendy cropped look, it’s easy to modify the design.
How to Customize Fit:
✔ For an oversized sweater → Use a larger hook size or add extra stitches to the width.
✔ For a cropped sweater → Stop crocheting the body sooner or skip the ribbing at the hem.
✔ For a more fitted look → Add shaping decreases at the waist for a snug fit.
🎯 Pro Tip:
Before making major adjustments, try crocheting a small test swatch with your desired modifications—it saves time and prevents unraveling later.
🔗 Recommended YouTube Video:
🎥 YouTube: "How to Modify a Crochet Sweater for the Perfect Fit"

2. Adding Stripes, Color Blocking, or Textures
A solid-colored sweater is classic, but sometimes I want a bit more personality. That’s when I experiment with stripes, color blocking, and stitch textures.
Ways to Add Color & Texture:
✔ Stripes: Change yarn colors every few rows for a classic stripe look.
✔ Color Blocking: Crochet different sections of the sweater in contrasting colors.
✔ Textured Stitches: Use puff stitch, bobble stitch, or ribbing to create depth.
🎯 Pro Tip:
If using multiple colors, make sure to carry your yarn neatly along the edge or weave in ends as you go—trust me, weaving in 100 loose ends at the end is not fun!
🔗 External Reference:
📰 The Spruce Crafts: "How to Add Stripes to Crochet Projects"

3. Turning a Pullover into a Cardigan (Zipper or Buttons?)
I love the look of pullovers, but sometimes I want a versatile cardigan instead. The good news? You don’t have to start over!
How to Convert a Pullover into a Cardigan:
✔ Method 1: Crochet a Vertical Front Opening – Work extra rows in front post/back post ribbing along the opening for a clean edge.
✔ Method 2: Add a Zipper – Sew a crochet-friendly zipper for a modern, sleek look.
✔ Method 3: Sew on Buttons – Create evenly spaced buttonholes along the edge for a classic button-up design.
🎯 Pro Tip:
If you’re unsure about making a permanent cardigan, use removable buttons or a zipper tape before committing!
🔗 Recommended YouTube Video:
🎥 YouTube: "How to Turn a Crochet Sweater into a Cardigan"

4. Adding Pockets, Hood, or Thumbholes for Extra Style
Sometimes I want my sweaters to be as functional as they are stylish. That’s why I started adding practical elements like pockets, hoods, and thumbholes.
Fun Customization Ideas:
✔ Add front pockets → Crochet small rectangles and attach them to the front panels.
✔ Attach a hood → Extend the neckline with half-double crochet rows to create a slouchy hood.
✔ Create thumbholes → Leave a gap in the sleeve cuffs for built-in thumbholes—perfect for cozy fall days!
🎯 Pro Tip:
For pockets, use a denser stitch (like single crochet) so they hold their shape and don’t stretch too much over time.
🔗 External Reference:
📰 The Spruce Crafts: "How to Crochet Pockets for Sweaters"

Final Thoughts on Customizing Crochet Sweaters
Once I started customizing my sweaters, I never looked back. Being able to make a one-of-a-kind sweater that fits my exact style is one of the best parts of crocheting my own clothes!
✔ Adjust the fit—oversized, cropped, or fitted, it’s up to you.
✔ Play with color and texture—stripes, color blocking, and stitch variations add personality.
✔ Add functional details—pockets, hoods, and thumbholes make sweaters even better.
The best part? You can experiment and make every sweater your own!
How to Wash & Care for a Handmade Crochet Sweater
After spending hours (or even weeks!) crocheting a sweater, the last thing you want is to ruin it in the wash. I’ve made a few mistakes in the past—like tossing my first crochet sweater into the washing machine (bad idea)—but now I know how to keep crochet garments looking great for years.
1. How to Wash a Crochet Sweater Without Stretching It
✔ Step 1: Check the Yarn Label – Some yarns are machine washable, while others must be hand washed.
✔ Step 2: Use Cold Water & a Wool-Friendly Detergent – Hot water can shrink or warp fibers.
✔ Step 3: Gently Soak (Don’t Agitate!) – Swish the sweater in the water, but don’t rub or wring it out.
✔ Step 4: Rinse & Remove Excess Water – Lay the sweater on a towel and press gently to absorb moisture.
🎯 Pro Tip:
Never use fabric softener on crochet sweaters—it can leave a waxy coating and make the fibers lose their natural texture.
🔗 Recommended YouTube Video:
🎥 YouTube: "How to Hand Wash Crochet Clothing"

2. Blocking Your Sweater for a Professional Finish
When I finished my first crochet sweater, I noticed the stitches looked uneven and the seams weren’t laying flat. That’s when I learned about blocking—a simple technique that relaxes fibers and gives sweaters a polished look.
How to Block a Crochet Sweater:
✔ Step 1: Lay the sweater flat on a blocking mat or clean towel.
✔ Step 2: Gently pin it into shape, adjusting the sleeves and body.
✔ Step 3: Lightly mist it with cool water or steam.
✔ Step 4: Let it dry completely before removing the pins.
🎯 Pro Tip:
For wool and natural fibers, use steam blocking with a garment steamer instead of full wet blocking—it’s faster and still works great!
🔗 External Reference:
📰 KnitPicks: "How to Block Crochet Sweaters for a Perfect Fit"

3. Storing Crochet Sweaters to Prevent Stretching & Pilling
The way you store a crochet sweater makes a huge difference—trust me, I’ve learned this the hard way!
Best Ways to Store Crochet Sweaters:
✔ Fold instead of hanging – Hanging can stretch out the stitches over time.
✔ Use breathable storage bags – Avoid plastic bins, which trap moisture and cause mildew.
✔ Add moth protection – Place cedar blocks or lavender sachets in your storage space.
🎯 Pro Tip:
If you must hang a crochet sweater, use the fold-over hanger method (see previous section) to prevent stretching.
🔗 Recommended YouTube Video:
🎥 YouTube: "How to Store Crochet Garments Properly"

4. How to Prevent Pilling & Keep Crochet Sweaters Looking New
Over time, crochet sweaters can develop fuzz and little fiber balls (pilling)—especially on areas that get a lot of friction (like underarms and sleeves).
How to Reduce & Remove Pilling:
✔ Wash sweaters inside out to reduce friction.
✔ Use a fabric shaver or cashmere comb to remove fuzz.
✔ Store sweaters folded to prevent fiber wear.
🎯 Pro Tip:
If your sweater starts looking worn, try re-blocking it with steam—it can refresh the stitches and smooth out wrinkles!
🔗 External Reference:
📰 Real Simple: "How to Prevent & Remove Pilling from Knitwear"

Final Thoughts on Crochet Sweater Care
Once I started washing, blocking, and storing my crochet sweaters properly, they stayed softer, looked neater, and lasted much longer.
✔ Hand wash in cold water to protect fibers.
✔ Block after washing for an even, professional shape.
✔ Store sweaters folded, not hanging, to avoid stretching.
Taking a little extra care means your handmade crochet sweater will stay beautiful for years—and trust me, it’s totally worth it!
FAQs: Answering Common Crochet Sweater Questions
If you’re making your first crochet sweater, you probably have a few questions—I know I did! Here are some of the most common questions I had (and the answers I wish I had from the start!).
1. How Long Does It Take to Crochet a Sweater?
It depends on the size, stitch type, and your crochet speed.
✔ Beginner sweaters → 2 to 4 weeks (working a few hours per day).
✔ Intermediate patterns → 3 to 6 weeks, depending on complexity.
✔ Advanced sweaters → 6+ weeks, especially for intricate stitchwork.
🎯 Pro Tip:
If you want to crochet faster, work on your sweater 15-30 minutes a day instead of doing long, exhausting sessions.
🔗 Recommended YouTube Video:
🎥 YouTube: "How Long Does It Take to Crochet a Sweater?"

2. What’s the Easiest Sweater Pattern for Beginners?
✔ Best for first-timers: A basic panel sweater (front, back, and sleeves sewn together).
✔ Best for no-sew projects: A top-down raglan sweater (made in one piece).
✔ Best for lightweight crochet: A granny square sweater (easy stitch repeats).
🎯 Pro Tip:
Choose a pattern that uses worsted weight yarn and simple stitches—it’s easier to work with and holds its shape better.
🔗 External Reference:
📰 The Spruce Crafts: "Easy Crochet Sweater Patterns for Beginners"

3. Can I Crochet a Sweater Without a Pattern?
✔ Yes! You can freestyle a sweater by following these steps:
-
Take your measurements (bust, arms, and torso).
-
Crochet a gauge swatch to determine stitches per inch.
-
Start with a rectangle for the back and front panels, then add sleeves.
-
Adjust length, width, and shaping as you go.
🎯 Pro Tip:
If you want a more fitted sweater, add shaping increases & decreases at the waist for a better fit.
🔗 Recommended YouTube Video:
🎥 YouTube: "How to Crochet a Sweater Without a Pattern"

4. How Do I Fix a Mistake in My Crochet Sweater?
We all make mistakes—I’ve frogged (unraveled) whole sweaters before! Here’s how to fix common crochet errors without starting over.
✔ Wrong stitch count? Undo a few rows and rework them.
✔ Too small? Add a few extra rows or stitches at the sides.
✔ Too big? Use a smaller hook for tighter stitches in key areas.
✔ Uneven edges? Block the sweater to smooth it out.
🎯 Pro Tip:
If your sweater is finished but doesn’t fit right, try adding a ribbed border to adjust the length or width instead of undoing the whole thing.
🔗 Recommended YouTube Video:
🎥 YouTube: "How to Fix Crochet Mistakes Without Starting Over"

5. Can I Machine Wash a Crochet Sweater?
❌ Not all crochet sweaters are machine washable!
✔ Machine washable? Use acrylic, cotton, or superwash wool.
✔ Hand wash only? Wool, alpaca, and delicate fibers need extra care.
How to Machine Wash a Crochet Sweater Safely:
-
Use cold water and the gentlest cycle.
-
Place the sweater inside a mesh laundry bag to prevent stretching.
-
Lay flat to dry—never use the dryer!
🎯 Pro Tip:
If in doubt, hand wash your crochet sweater—it’s always the safest option!
🔗 External Reference:
📰 The Laundress: "How to Wash Handmade Crochet & Knitwear"

Final Thoughts: Wear Your Handmade Sweater with Pride!
Crocheting a sweater is a labor of love, and once you finish one, you’ll feel unstoppable. Whether you followed a pattern or made one from scratch, you created something completely unique!
✔ Don’t stress over mistakes—they’re part of learning.
✔ Experiment with colors and patterns—make it your own!
✔ Wear your sweater proudly—you made it with your own hands!
If you have any other crochet sweater questions, drop a comment—I’d love to help!