Sweater Knitting Pattern Guide: How to Choose a Pattern That Fits (Gauge, Ease, Construction)
How to choose a sweater knitting pattern that fits
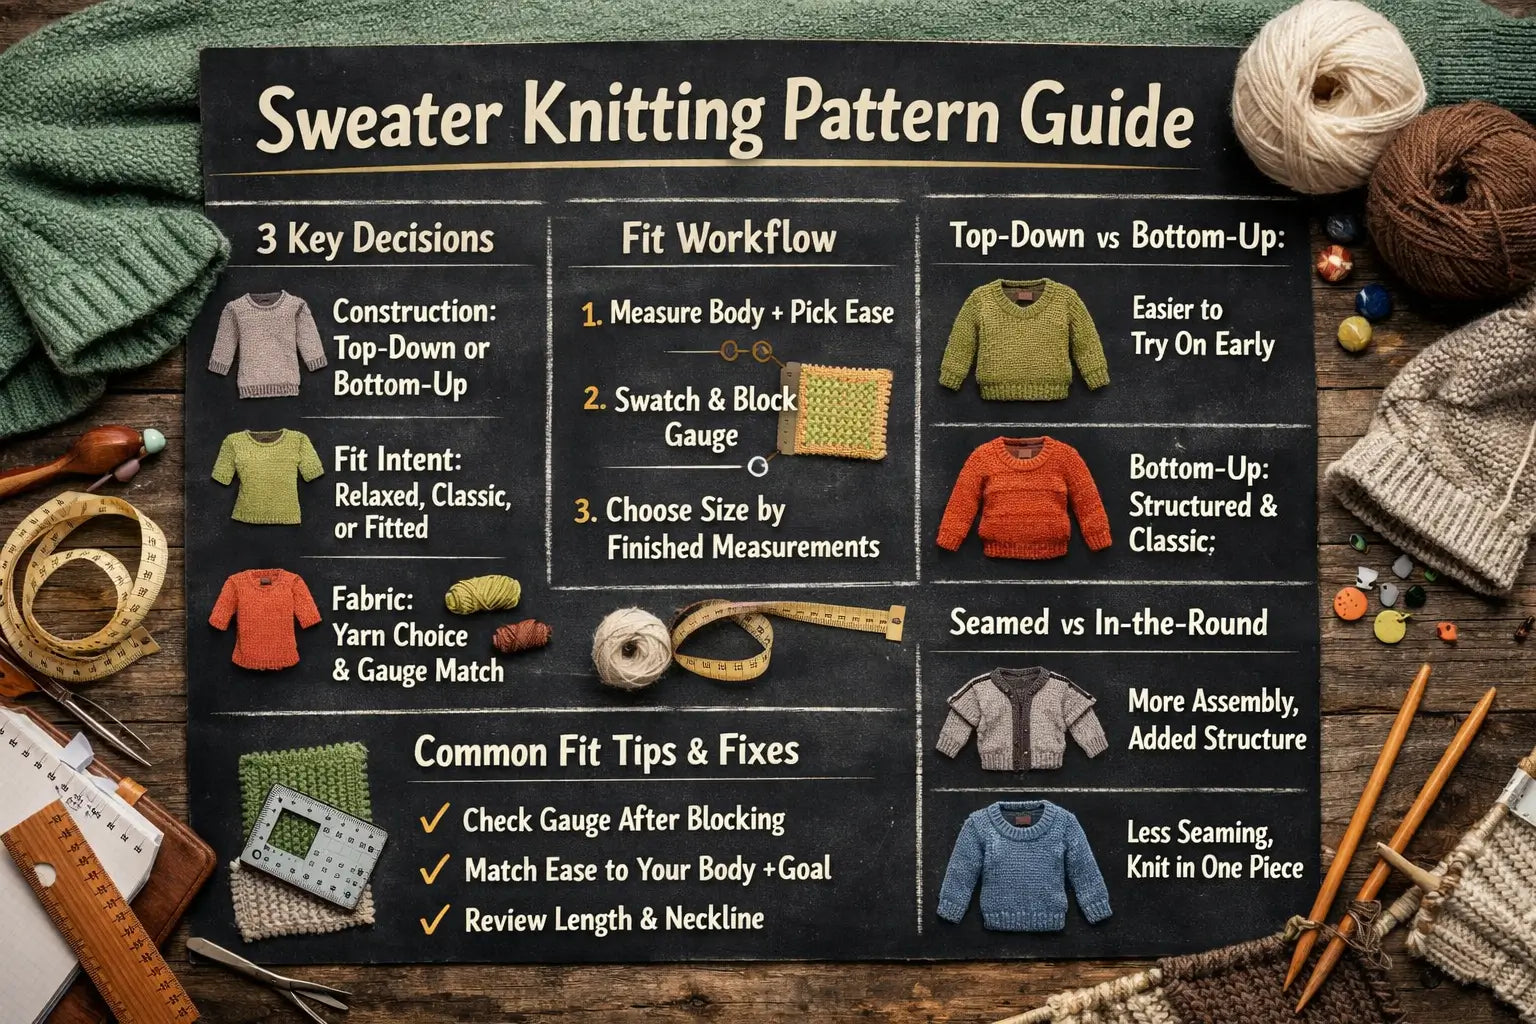
Pick your sweater pattern by matching construction (how it’s built), fit plan (ease + sizing), and fabric plan (yarn + real, blocked gauge). Then choose the pattern size using finished measurements, not your usual clothing size.
3 decisions + 5-step fit workflow
The 3 decisions
- Construction: top-down vs bottom-up; seamed vs in-the-round
- Fit intent: relaxed / classic / fitted (translated into ease)
- Fabric: yarn choice + whether you can match gauge after washing/blocking
5-step workflow
- Pick the style (pullover/cardigan, neckline, sleeve shape).
- Choose construction (top-down/bottom-up; seamed/in-the-round).
- Decide fit intent (ease type: positive / negative / no ease).
- Knit a gauge swatch in the pattern stitch, then wash/block it.
- Select size by comparing (your body measurement + desired ease) to the pattern’s finished measurements.
Caveats
- Gauge can change after washing/blocking; measure after finishing your swatch.
- “Beginner-friendly” depends on what techniques you already know.
What a sweater knitting pattern includes (and how to read the essentials)
A sweater knitting pattern is a recipe for a garment: it tells you materials, gauge, sizes/measurements, and a construction sequence so you can reproduce the designer’s intended fabric and fit.
What you should expect to see
- Materials: yarn weight/type, needles, notions
- Gauge: stitch/row gauge in a specific stitch pattern
- Sizes: finished measurements and/or size selection guidance
- Instructions: steps for body, sleeves, yoke/armholes, neckline, finishing
- Techniques: increases/decreases, short rows, charts, seaming (as needed)
Checklist: what a “good” sweater pattern page should show
- Finished garment measurements (or a clear schematic)
- Fit intent (e.g., “designed with positive ease” / “close-fitting”)
- Gauge and the stitch pattern used to measure it
- Skills/techniques list (so you can judge difficulty)
- Clear multi-size formatting (so you can follow the correct size line)
Caveats
- Some patterns assume you already understand abbreviations/charts.
- If finished measurements aren’t clear, treat that pattern as higher-risk (more guesswork).
Beginner-friendly sweater patterns: what to pick for your first sweater
For a first sweater, pick a pattern with simple shaping, clear sizing notes, and a construction that lets you check fit early—so you learn without fighting the pattern.
Beginner-friendly features
- Simple silhouettes (often basic raglan or drop shoulder)
- Minimal special techniques (avoid stacking many new skills)
- Clear measurement guidance and photos/tutorial support
Steps: a beginner pattern filter
- List the techniques you already know (knit/purl, simple ribbing, etc.).
- Choose 1–2 new skills max for this project (example: “knit in the round”).
- Prefer a forgiving fit (classic/relaxed) rather than very fitted.
- Choose a pattern with finished measurements + clear gauge instructions.
- Swatch early—don’t “hope” the fit works out later.
Caveats
- Even “easy” sweaters are a lot of knitting—pace yourself.
- Fit problems usually trace back to ease + gauge, not “bad luck.”
Construction choices: Top-down vs bottom-up

Top-down starts at the neckline and works down; bottom-up starts at the hem and works up. This affects when you can try on, when key fit decisions lock in, and how neckline/finishing is handled.
Comparison table: Top-down vs Bottom-up
| Decision factor | Top-down | Bottom-up |
|---|---|---|
| Try on while knitting | Often easier earlier | Often later (varies by pattern) |
| Adjusting length | Usually easy (add/subtract) | Often easy too, but may be later |
| Adjusting yoke/armholes | Often adjustable early | Often planned before joining |
| Neckline | Built first | Often finished last |
| Best for | Iterative fit checkers | Those who like modular pieces / classic workflows |
Caveats
- Direction doesn’t automatically mean seamless or seamed (that’s a separate choice).
- Many patterns are hybrids.
Construction choices: Seamed vs in-the-round

In-the-round reduces seaming; seamed adds finishing work but can add structure. Either can fit well if the pattern’s shaping and measurements are clear.
Comparison table: In-the-round vs Seamed
| Decision factor | In-the-round | Seamed |
|---|---|---|
| Finishing time | Usually less seaming | More assembly steps |
| Structure | Depends on fabric | Seams can add stability |
| Skill focus | Circular knitting, managing stitches | Seaming, finishing accuracy |
| Best for | People who dislike seaming | People who want structure and don’t mind finishing |
Caveats
- Many garments mix methods (e.g., body in the round, sleeves seamed).
- “Less seaming” doesn’t mean “no finishing” (neckline/edges still matter).
Fit workflow: measurements, ease, gauge swatch, and selecting your size
Great sweater fit comes from aligning your measurements, your intended ease, and your blocked gauge—then choosing the pattern size whose finished measurements match your target.
Key terms (quick glossary)
- Gauge: stitches/rows per measured area in a specific stitch pattern
-
Ease: difference between body measurement and finished garment measurement
- Positive ease: roomier
- Negative ease: stretches to fit
- No ease: close to body measurement
Steps: the repeatable fit workflow
- Measure your body at the pattern’s main points (usually chest/bust; sometimes upper arm).
- Decide the intended fit (relaxed/classic/fitted) → choose an ease type.
- Swatch in the pattern stitch, large enough to measure accurately.
- Wash/block the swatch like the finished sweater will be treated.
- Measure gauge after blocking; adjust needles/yarn if needed.
- Choose size by finished measurement target (body measurement + desired ease).
Mini checklist: before you cast on
- I know whether the pattern sizes are based on finished measurements
- I chose ease intentionally (not accidentally)
- I measured gauge after washing/blocking
- I picked size using finished measurement targets
Caveats
- Small gauge differences compound across a whole sweater.
- Different fibers and stitch patterns can grow/shrink; the blocked swatch is your reality check.
Yarn choice and safe substitution (without ruining fit)
You can substitute yarn, but do it safely: match yarn weight, test blocked gauge, and confirm the fabric feels right (drape/structure) before committing.
Safe substitution checks
- Can I match the stitch gauge after blocking?
- Does the fabric look/feel right (not too stiff, not too floppy)?
- Did I swatch in the same stitch pattern used for gauge?
- If I changed fiber a lot, am I okay with different drape/elasticity?
Caveats
- Matching gauge doesn’t guarantee the same feel—fabric behavior matters too.
- Texture patterns (cables, colorwork) can look different with different fibers even if gauge matches.
Common mistakes + troubleshooting (quick fixes)
Most sweater problems map to a short list: gauge, ease/size selection, and length decisions. Diagnose by checking measurements against your swatch and intended finished measurements.
Troubleshooting table (symptom → likely cause → fix)
| Symptom | Likely cause | Fix (general) |
|---|---|---|
| Sweater too big / too small | Gauge off; wrong ease/size logic | Recheck blocked gauge; adjust needles/yarn; reselect size using finished measurements |
| Sleeves too long/short | Length not checked during knitting | Adjust at the sleeve-length section; compare to a sweater you like |
| Neckline feels uncomfortable | Neckline style/finishing mismatch | Review neckline options; confirm bind-off/finishing matches pattern intent |
| Fabric feels stiff/floppy | Yarn/fiber mismatch; needle size | Swatch again; change needle size or yarn; choose fabric behavior you want |
| Size changed after washing | Swatch not washed/blocked | Always wash/block swatch as you will treat the sweater |
Caveats
- Fix options depend on project stage; some changes are easier earlier (before finishing neckline or sleeve separation).
If you’re a brand: from “pattern idea” to factory sample (tech pack essentials)
In manufacturing, “knitting pattern” becomes a tech pack/spec package: measurable specs and construction callouts so a factory can make a sample that matches your intent.
This section is optional and is aimed at brands/designers producing knitwear. It’s not a promise of timelines, MOQ, or outcomes.
Minimum viable tech pack checklist (for a sweater sample request)
- Style intent: sketches + reference images + “must match” notes
- Construction callouts: silhouette, neckline, sleeve shape, seam/seamless intent, stitch structures (rib/jersey/cable/jacquard, etc.)
- Measurement spec sheet (POM): points of measure + how to measure + size chart
- Grading intent: base size + how other sizes should scale (conceptual rules)
- Materials: fiber preference or handfeel target; yarn weight/count target; colorways
- Trims + packaging: labels, hangtags, folding/polybag/box requirements
- Sample acceptance checklist: pass/fail on measurements, fit, appearance, handfeel (plan for revisions)
Copy/paste “factory email” checklist
- Reference images + sketches
- Construction notes (seamed vs seamless; stitch structures)
- POM measurement sheet + size chart
- Material target + colorways
- Trims + packaging requirements
- Sample acceptance criteria (measurements/fit/appearance)
Caveats
- Sampling and revision cycles vary by design complexity, materials, and approvals.
- “Logistics/customs clearance support” should be treated as support, not a legal or tax guarantee.
FAQ: sweater knitting patterns, sizing, gauge, and sampling
1) What does a sweater knitting pattern include?
Materials, gauge, sizes/measurements, and step-by-step construction + finishing instructions.
2) What is ease in knitting a sweater?
Ease is the difference between body measurements and finished garment measurements (positive = roomier; negative = stretches; none = close).
3) Do I really need to swatch gauge for a sweater?
If fit matters, yes—swatching (and measuring after washing/blocking) is the best way to avoid size surprises.
4) Top-down vs bottom-up: which is better?
Neither is universally better. Choose top-down if you want easier try-on adjustments; choose bottom-up if you like a modular workflow or the pattern is designed that way.
5) How do I choose my sweater size from a pattern?
Choose the size whose finished measurement matches your target (your body measurement + intended ease), using your blocked gauge as the reality check.
6) Can I substitute yarn and still get the same size?
Often yes—if you can match blocked gauge and the fabric behaves the way you want.
7) What information does a factory need to make a sweater sample?
A tech pack: style intent, construction callouts, POM measurement sheet + size chart, materials, trims/packaging, and acceptance criteria.
)