
Crochet Sweater Vest Pattern (Free Template): Panels vs Granny Squares + Fit & Neckline Fixes
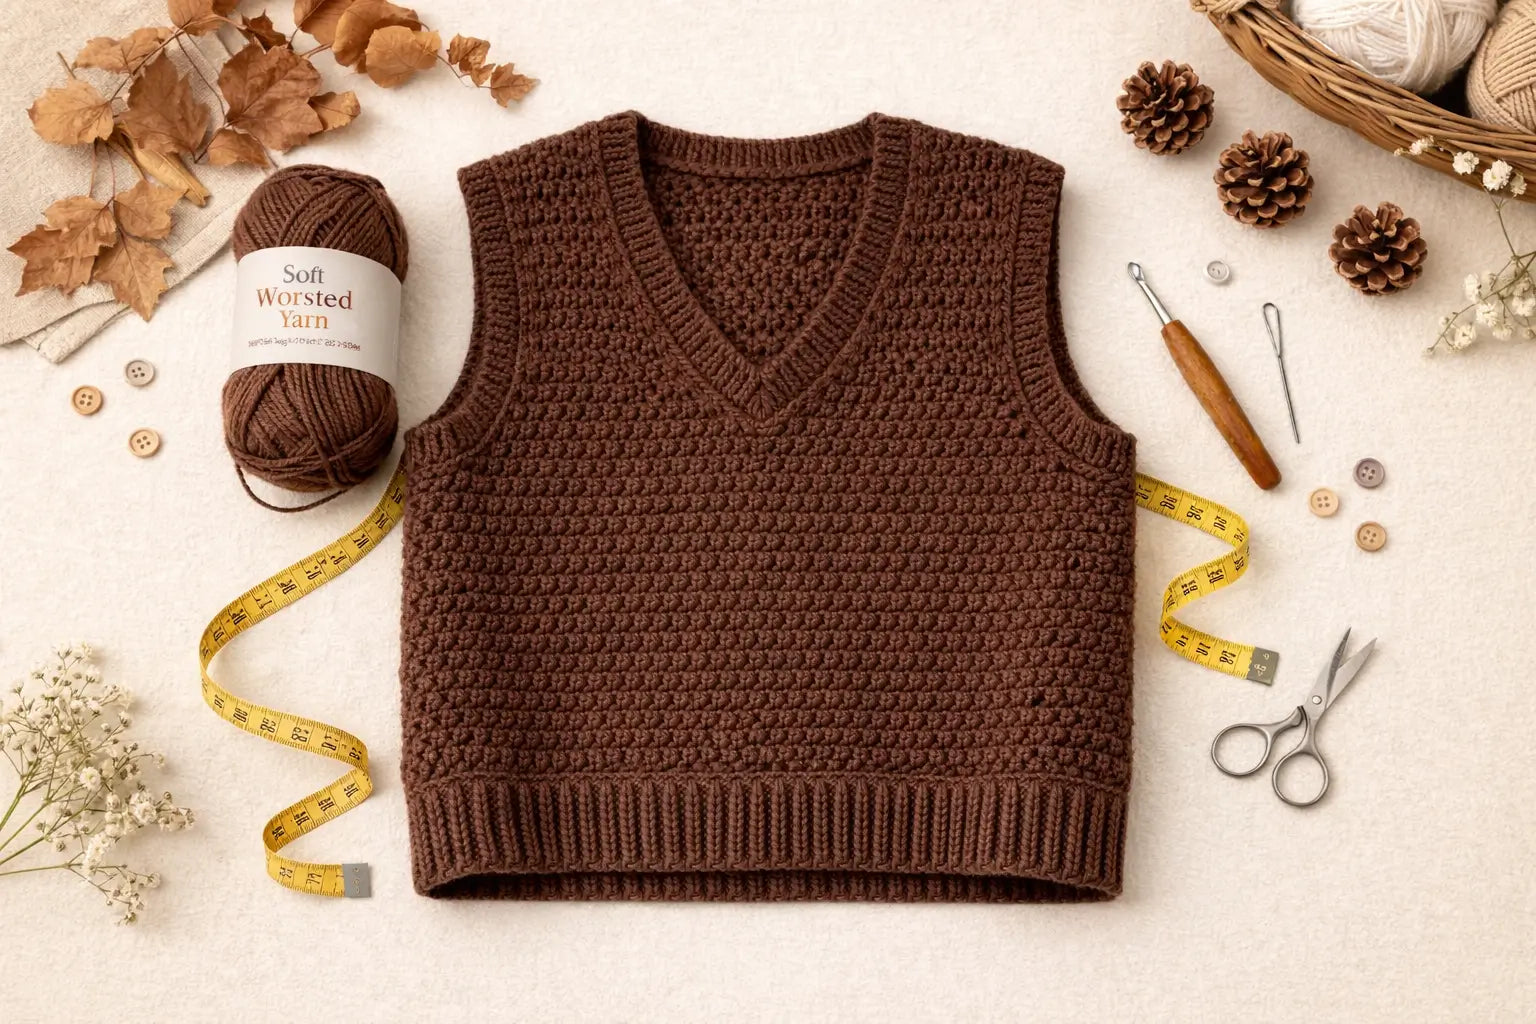
Pick a Method + Beginner Check + What You Need
A crochet sweater vest is one of the most beginner-friendly garments—if you choose a construction method that matches your comfort level and you plan for gauge and finishing early.
- Easiest “first garment” path: two flat panels (front + back) with simple seaming and finishing.
- Fastest “repeatable” path: granny squares/motifs if you enjoy repetitive units and don’t mind joining.
- Cleanest “minimal seams” path: one-piece construction if you’re comfortable tracking shaping as you go.
- If you only do one thing: make a small gauge swatch before you commit to panel width or neckline depth.
| Method | Best for | Main challenge | What you’ll love |
|---|---|---|---|
| Panels (front + back) | Beginners, clean fit control | Seaming neatly | Simple measuring and corrections |
| Granny squares / motifs | Repetition lovers, bold looks | Joining + edge waviness | Modular progress, easy style changes |
| One-piece | Seam-averse makers | Shaping attention | Fewer seams, smoother sides |
- What you need (minimum): yarn, hook, stitch markers, tape measure, yarn needle, scissors.
- What you need (strongly recommended): blocking tools (pins + mat or towels) and a notebook to track measurements.
This quick selector helps you pick a path in under a minute, then the rest of the guide shows you how to size and finish it cleanly.
Quick “Choose Your Path” Selector (30-second pick)
If you’re not sure which style to start, use this:
- Choose panels if you want the simplest measuring and the easiest mid-project corrections.
- Choose granny squares if you like repeating the same unit and you’re okay spending time joining and edging.
- Choose one-piece if you want fewer seams and you don’t mind keeping close track of shaping and stitch counts.
If you’ve picked a method, the next step is making sure your pattern (or template) includes the info you need before you start.
Beginner-Friendly, Really: Skills + What a “Complete Pattern” Includes
A beginner can absolutely crochet a sweater vest—the key is choosing instructions that include sizing, gauge, and finishing (not just “make two rectangles”) and using a stitch you can repeat consistently.
- Minimum skills to start: chaining, single crochet (sc) or half double crochet (hdc) or double crochet (dc), counting stitches/rows, and weaving in ends.
- Nice-to-have skills: simple decreases, basic seaming (mattress stitch or whip stitch), and edging/ribbing.
-
A complete vest pattern (or template) should include:
- materials list (yarn weight/fiber, hook size, notions)
- gauge (stitch and row gauge) + blocking note
- sizes/measurements (or measurement-based formula)
- construction overview (panels / motifs / one-piece)
- finishing steps (neckline + armholes + hem)
- abbreviations/terms key (US terminology is common)
If you ever see abbreviations you don’t recognize, check the pattern’s key first—then compare with an industry reference like the Craft Yarn Council crochet abbreviations list. (Official reference: https://www.craftyarncouncil.com/standards/crochet-abbreviations)
-
Boundary notes:
- “Beginner-friendly” changes with yarn choice and stitch height (dc fabric behaves differently than sc fabric).
- Designers sometimes use custom abbreviations, so the pattern’s own key overrides any general list.
Before you commit, run a quick preflight check so you don’t discover missing info halfway through.
“Before You Start” Checklist (Pattern + Materials + Fit Plan)
- Confirm you have: yarn, hook, stitch markers, needle, tape measure.
- Confirm the instructions include: gauge, sizing, and finishing (neckline + armholes).
- Decide your fit goal: fitted / relaxed / oversized (this changes ease and armhole depth).
- Plan a gauge swatch (same stitch pattern you’ll use on the vest body).
- Plan finishing allowance: ribbing/edging changes measurements slightly, so leave room for it.
- If anything is unknown, write “TBD” instead of guessing (especially for measurements and finishing widths).
Once you have the basics ready, it’s much easier to choose a construction style with confidence.
Choose Your Construction: Panels vs One-Piece vs Granny Squares
The “best” construction method is the one that matches what you enjoy: measuring and seaming (panels), repeating and joining (motifs), or shaping as you go (one-piece).
- Panels are usually the easiest for fit control.
- Motifs are great for style and modular progress, but joining and edges can be the make-or-break part.
- One-piece feels elegant when it works, but shaping requires consistent attention.
| Method | Best for | Fit control | Finishing workload | Common pitfalls |
|---|---|---|---|---|
| Panels (front + back) | First garment, clean sizing | High | Medium | Uneven panels, messy seams |
| One-piece (minimal seams) | Seam-averse makers | Medium | Medium | Missed shaping, uneven neckline |
| Granny squares / motifs | Bold looks, modular making | Medium | High | Joining bulk, wavy edges/armholes |
-
Boundary notes:
- If you hate seams, one-piece might feel “easier” even if shaping is more complex.
- If you hate shaping math, motifs or panels will feel easier than one-piece.
Now that you’ve picked a method, choosing the right yarn and hook will make everything else smoother—especially fit and finishing.
Yarn + Hook Choice (and a Safe Substitution Rule)
The yarn you choose controls drape, warmth, and how stable your neckline and armholes feel after wear—so pick yarn for your goal first, then match your hook to hit gauge.
- Drape-first (soft, flowy): lighter yarn weights and smoother fibers; avoid overly stiff stitches.
- Warmth-first (layering piece): wool or wool blends; consider slightly denser fabric.
- Easy-care-first: acrylic blends or machine-wash-friendly fibers.
- If you only do one thing: pick yarn weight from a standard system, then confirm with a swatch.
A helpful reference for yarn categories and symbols is the Craft Yarn Council “Standard Yarn Weight System.” (Official reference: https://www.craftyarncouncil.com/standards/yarn-weight-system)
| Goal | Yarn direction | What to watch for |
|---|---|---|
| Soft drape | lighter weight + smooth fiber | fabric can stretch at edges |
| Warm + structured | medium weight + wool blend | can feel bulky if stitch is too dense |
| Easy care | acrylic or blends | may “grow” with wear if loose |
Safe substitution rule (works for most vests):
- Match the yarn weight category first (don’t jump multiple categories).
- Make a gauge swatch in your chosen stitch pattern.
- Adjust hook size to hit gauge (or keep hook and adjust stitch counts using the template math).
- Confirm the fabric feel: does it drape, or does it stand up?
- Only then start the vest body.
-
Boundary notes:
- Yarn labels can vary by brand; the swatch is the truth.
- Fiber elasticity affects edges—some yarns relax more after wear.
Once yarn and hook are decided, you can estimate yarn needs without guessing a single “skein count” that won’t fit everyone.
How Much Yarn Do You Need? A Reusable Estimation Method
There isn’t one universal skein number for a sweater vest—yarn needed depends on size, length, stitch density, and how much ribbing/edging you add—so use a quick swatch-based method instead.
- Yarn use increases with: bigger size, longer length, denser stitch, wider ribbing/edging, and textured stitches.
- Yarn use decreases with: shorter/cropped length and airier stitch patterns.
Swatch-based estimate (simple and reliable):
- Make a swatch at least 6 in x 6 in in your vest stitch pattern.
- Block it the way you’ll block the vest.
- Weigh the swatch (or track yardage used if you can measure it).
- Estimate the vest fabric area:
- Panels method: (front area + back area) minus neckline/armhole cutouts (roughly)
- Scale up from the swatch:
- If your swatch is 36 sq in, and your vest fabric is ~720 sq in, that’s about 20 swatches worth of yarn.
Example math (illustrative only):
- If your swatch used 10 g of yarn, and your vest is ~20 swatches of area, you might need ~200 g plus a buffer for ribbing and mistakes.
-
Boundary notes:
- Add a safety buffer if you’re using long edging or textured stitches.
- Dye lots can differ, so buying enough up front can help color consistency.
With yarn decisions made, the next step is fit—because garments are won or lost on measurements and gauge.
Fit Workflow: Measure → Ease → Swatch → Adjust → Checkpoints → Block

A sweater vest fits well when you treat it like a measurement project: decide your ease, lock your gauge, and check key points before you seam and edge.
- Gauge controls size. If gauge changes, the whole vest changes.
- Ease controls comfort. Vests meant for layering usually need more room than fitted tops.
- Blocking changes measurements. Measure after blocking for your “final truth.”
-
Measure your target garment (or your body over the layer you’ll wear under it):
- bust/chest circumference
- desired body length
- armhole depth (comfort + movement)
- neckline depth (if using V-neck)
-
Choose ease (how much extra room you want):
- fitted = less ease
- relaxed/oversized = more ease
- Swatch in your actual stitch pattern, then block the swatch.
-
Adjust:
- change hook size to match gauge, or
- keep hook and calculate new stitch counts using your gauge
-
Build with checkpoints:
- after a few inches (is fabric behaving?)
- at mid-body (width still correct?)
- at armhole start (does it feel comfortable?)
- before seaming (do panels match?)
- Block the finished pieces (or the whole vest), then do final finishing/edging.
Quick risk checklist (avoids common fit problems):
- Track row counts so your front and back match.
- Measure at the same points each time (don’t “eyeball” one panel and measure the other).
- If you change tension between sessions, re-check width before you go too far.
-
Boundary notes:
- If your swatch is off, fixing it later is harder than changing hook size early.
- Some stitches “grow” with wear; consider that when choosing ease.
To reduce guesswork, use a clear measuring guide and keep your key measurements in one place.
Where to Measure (Quick Diagram + Checklist)

- Bust/chest: measure the widest point you want the vest to fit.
- Body length: shoulder to hem (or from underarm to hem if you prefer).
- Armhole depth: from shoulder top down to where you want the arm opening to end.
- Neckline depth: from shoulder top down to V point (or crew depth).
- Hem width: determines how fitted or boxy the vest looks.
If you have your measurements and gauge, you can follow an original template that adapts to your yarn and size.
Original “Free Template” Vest Pattern: Panels Method (Measurement-Based Steps)
This template gives you a real, start-to-finish vest plan without copying anyone’s copyrighted pattern: you use your own gauge and measurements to calculate stitches and rows.
- Construction: two panels (front + back), worked bottom-up, then seamed at shoulders and sides.
- Stitch choice: pick one simple body stitch you can repeat cleanly (hdc or dc are common choices).
- Sizing method: convert inches to stitches/rows using your swatch gauge.
What you need from your swatch:
- stitches per inch (or per 4 inches)
- rows per inch (or per 4 inches)
Core calculations (write these down):
- Panel width (inches) = (finished bust circumference ÷ 2) + (ease ÷ 2)
- Starting stitches = panel width (inches) × stitches per inch
- Body rows to armhole = (armhole start length in inches) × rows per inch
Back panel outline:
- Crochet hem (optional ribbing) to your desired width.
- Work straight up to armhole start (use your row count target).
- Shape shoulders/neckline (simplest: straight across with minimal shaping, or a shallow scoop).
Front panel outline:
- Match the back panel hem and body height to armhole start.
- Choose neckline style:
- easiest: higher/straight neckline with minimal shaping
- classic: V-neck shaping (see the V-neck section below)
- Finish to shoulder height, matching the back panel height.
Seaming:
- Seam shoulders first.
- Try on (or pin) for armhole comfort before you close side seams fully.
-
Boundary notes:
- If you swap stitch patterns, your gauge changes—recalculate panel width and row counts.
- If you plan wide edging, leave a little space so the finished vest doesn’t feel tight.
To make this template easy to follow, use the step sequence below and stop to measure at the checkpoints.
Template Steps: Hem → Body → Armholes → Neckline → Seam
-
Hem (optional but recommended):
- Crochet a ribbed band (or a firm edging) first, then join to start the body.
-
Body:
- Work in your chosen stitch until you reach the armhole start length.
- Check width before you continue (this is the easiest point to correct).
-
Armholes:
- Simplest approach: keep body straight and create armholes by seaming less of the side seam.
- More shaped approach: reduce stitches at the side edges over a few rows.
-
Neckline:
- Simplest approach: keep neckline high and straight.
- V-neck approach: split the front panel into two sides and decrease toward the center.
-
Seam:
- Seam shoulders.
- Pin and try-on for armhole comfort.
- Seam sides, leaving desired armhole opening.
- Block and re-measure before final edging if the fabric relaxes noticeably.
-
Boundary notes:
- If your two panels don’t match, block them before forcing a seam—blocking can correct small differences.
- Use stitch markers at armhole start and neckline start so both panels mirror each other.
Once the body is done, finishing is what makes the vest look “store-bought” instead of handmade-in-a-rush.
Finishing That Looks Professional: Neckline + Armholes + Hem
Neat finishing comes from two things: stable edges and consistent stitch spacing—most wavy necklines and gaping armholes are caused by adding too many stitches or working too loosely around curves.
- Stabilize first: block panels before you edge if your fabric shifts or grows.
- Count and space stitches: especially around curves and corners.
- Choose an edging with structure: simple single crochet edging is often more stable than taller stitches.
- Try-on before final ribbing: small tweaks are easier before you commit.
Finishing workflow (reliable for most vests):
- Block your pieces (or the finished vest) to settle the fabric.
- Mark quarters around neckline and each armhole (helps even spacing).
- Work a foundation edging round (often sc) to stabilize the edge.
- Add ribbing/trim if desired:
- vertical ribbing (worked in rows and attached) can look very “sweater-like”
- simple rounds can be faster but may stretch if loose
-
Check stretch:
- neckline should lie flat
- armholes should feel comfortable without gaping
- Weave ends carefully and do a final light block if needed.
-
Boundary notes:
- Elastic fibers (some wools and blends) can relax with wear; slightly firmer edging helps.
- Ribbing changes final measurements, so if the vest already feels snug, use a lighter edging.
If something looks off, the mini-fix table below can save you a lot of time before you redo an entire edge.
Mini Troubleshooting: Wavy Neckline / Gaping Armhole / Curling Edge
| Problem | Most likely cause | Quick fix |
|---|---|---|
| Wavy neckline | too many stitches, loose tension | undo last round; reduce stitch count or tighten tension; stabilize with sc first |
| Gaping armhole | edge too loose or too tall a stitch | switch to sc edging; add fewer stitches; add a firmer ribbing |
| Curling edge | fabric is tight/uneven or edging too tight | block first; loosen edging; add an extra stabilizing round |
If you’re making a V-neck, shaping choices matter—so it’s worth treating it as a separate step you can opt into.
V-Neck Shaping (Optional): Depth Control + Preventing Ride-Up
A neat V-neck comes from symmetry: mark the center, split the front panel cleanly, and decrease at a steady cadence so both sides mirror each other.
- Mark the center line early so your V stays centered.
- Choose your depth (shallow vs deep) in inches, then convert to rows using your row gauge.
- Decrease consistently at the neckline edge so the angle is smooth.
Simple V-neck approach (works for many panel vests):
- Decide where the V starts (in rows) and place a center marker.
- Split the work into left and right sides (work them separately).
- On each side, decrease at the neckline edge:
- decrease every X rows (your choice based on desired angle and stitch height)
- Keep the armhole edge straight (unless you’re also shaping armholes).
- Stop when each side reaches shoulder width; then seam shoulders.
Preventing “front ride-up”:
- A too-shallow V can pull upward; increasing depth slightly can help.
- If the neckline edge is too tight, loosen edging tension or use a more elastic edging.
- Confirm the back panel isn’t significantly longer/heavier than the front.
-
Boundary notes:
- Stitch height changes the V angle; dc creates a different slope than hdc.
- Always test the neckline before final edging—pinning and trying on can reveal issues early.
If your vest still looks uneven, the full troubleshooting table below covers the most common garment problems and the fastest fixes.
Troubleshooting Table: Uneven Panels, Wavy Edges, Gaping Armholes, Weird Necklines
Most crochet vest problems fall into two buckets: gauge/tension drift or edge/shaping math. Diagnose which bucket you’re in before you “fix” the wrong thing.
- Start with measurements (width/length) before aesthetics (edging style).
- Fix the root cause first; decorative edging won’t hide a size problem.
- Blocking can solve small distortions, but it won’t magically fix a major gauge mismatch.
| Symptom | Likely cause | Fix | Prevent next time |
|---|---|---|---|
| Front and back panels different lengths | row count drift, tension change | block panels; if still off, add/remove rows to match | track rows; measure every few inches |
| Panels different widths | gauge/tension difference, missed stitches | block; if off, adjust seam allowance or redo narrower panel | use stitch markers; count edge stitches |
| Neckline wavy after edging | too many stitches, loose edging | undo edging; re-edge with fewer stitches and firmer stitch | mark quarters; stabilize with sc first |
| Armholes too tight | armhole depth too short, seam too high | open side seam more; reduce shaping; re-edge gently | try-on/pin before final seams |
| Armholes gaping | too loose edging, too tall stitches | switch to sc edging; reduce stitch count; add firmer rib | stabilize edge; check spacing |
| Neckline too tight | edging too firm, too small opening | redo edging looser; use elastic-friendly trim | test-fit neckline before finishing |
| Vest twists or distorts | uneven tension, unblocked fabric | block thoroughly; recheck seam alignment | block before seaming; pin seams |
-
Boundary notes:
- If the problem began at gauge, fixing finishing alone rarely solves it cleanly.
- If the fabric “grows” after blocking, plan slightly firmer finishing edges.
When you’re unsure whether to redo or adjust, use this quick decision sequence.
Quick Diagnostic Sequence (When to Fix vs When to Frog)
- Measure first: is the vest the right width and length?
- If size is wrong by a lot, check gauge—fixing edging won’t help.
- If size is close but edges look bad, check stitch spacing on the edging round.
- If only one panel is off, try blocking it before redoing.
- If seams create distortion, pin and re-seam before changing the fabric.
- If you’re redoing anything, redo the smallest unit first (edging round before whole panel).
If your base vest fits and finishes well, small style changes become easy without breaking sizing.
Style Variations: Cropped, Oversized, Textured, Motif-Based
Once your template fits, you can change the look safely by changing one variable at a time.
- Cropped: shorten body length, but keep armhole start in a comfortable place.
- Oversized: add ease to panel width, and consider deeper armholes for layering comfort.
- Textured: swap stitch patterns, but re-swatch—texture changes gauge and thickness.
- Motif-based look: use granny squares for the body and keep finishing firm to avoid waviness.
-
Boundary notes:
- Any stitch change can change gauge; re-check before committing to full panels.
- Wider ribbing/edging increases yarn use and can tighten openings if too firm.
If you’re turning a crochet-inspired vest into a product, the next section shows what specs make sampling smoother and reduce back-and-forth.
For Brands (Optional): From Crochet Inspiration to Brand-Ready Specs
If you want to sell a vest inspired by a crochet concept, you’ll get better samples (and faster quotes) when you translate the idea into clear measurements, materials, and construction notes.
- The goal: communicate the look and fit in a way a production team can reproduce consistently.
- The key lever: a clean measurement spec + material/BOM + construction notes + approval process.
- A good spec reduces revisions because everyone is building toward the same target.
A practical sampling workflow (high level):
- Create a minimal spec pack (measurements, materials, reference images, target hand-feel).
- Request a sample with a clear timeline and revision plan.
- Review fit and construction, then give structured comments (measurements + photos + notes).
- Approve a final sample before bulk.
-
Boundary notes:
- Minimums, lead times, and material availability vary by supplier—confirm early.
- Some crochet textures are difficult to replicate exactly in bulk; focus on the visual effect and hand-feel you need.
To make this actionable, use the checklist below as a copy/paste starting point for your request.
Quote-Ready Spec Checklist (Copy/Paste Template)
Design & references
- Product name: Sweater vest (style name)
- Reference images or sketch (front/back/close-ups)
- Target silhouette: fitted / relaxed / oversized
- Key design details: neckline type, armhole shape, hem finish
Measurements & sizing
- Size range (e.g., XS–XL or S–3XL)
- Finished garment measurements per size (bust, length, shoulder, armhole depth, neckline depth)
- Ease targets (how much room vs body)
Materials (BOM)
- Yarn/fiber direction (and any must-have properties: softness, warmth, easy-care)
- Colorways (Pantone/visual references if available)
- Trims (buttons, labels, tags)
Construction & finishing
- Fabric look: smooth / textured / “crochet-inspired” effect
- Seams: shoulder/side seam preference
- Neckline + armhole finish direction (ribbing vs simple edging look)
- Packaging notes (folding, bagging, hang tags) if relevant
Commercial & logistics
- Target price tier (optional)
- Target quantity per color/size (even if rough)
- Deadline and ship-to location
- If anything is unknown, mark it “TBD” instead of guessing
If you’re just making one for yourself, the FAQ below answers the most common questions people ask before they start.
FAQ
-
Q: Can I crochet a vest as a beginner?
A: Yes—start with two simple panels in an easy stitch, then seam and edge them. Choose a method with minimal shaping, and make a small gauge swatch so your sizing doesn’t drift. -
Q: What yarn is best for a crochet vest?
A: The best yarn depends on your goal: drape-first, warmth-first, or easy-care. Use a standard yarn weight category as a starting point, then confirm with a swatch because fiber and brand differences can change stretch and edge stability. -
Q: How many skeins of yarn do I need for a sweater vest?
A: It depends on size, length, stitch density, and how much ribbing/edging you add. A reliable approach is to swatch, measure/estimate the vest’s fabric area, and scale up from the swatch, adding a buffer for finishing and mistakes. -
Q: Do I need to make a gauge swatch for a sweater vest?
A: If you want a predictable fit, yes. Even a small swatch helps you calculate panel width correctly and prevents the “it looked right until I seamed it” problem—especially when you change yarn or stitch patterns. -
Q: What’s the easiest crochet sweater vest construction method?
A: For most beginners, two flat panels are easiest because measuring is straightforward and you can correct width or length early. Granny squares feel simple to crochet but can be harder to join and edge neatly, while one-piece styles reduce seams but demand more shaping attention. -
Q: Why does my neckline look wavy or stretched out?
A: Most often it’s from adding too many stitches or working too loosely around the curve. Undo the edging, stabilize with a firm base round (often single crochet), and re-edge with fewer stitches and more even spacing; blocking first can also help.
Summary + Next Steps
If you want a vest you’ll actually wear, focus on method choice, gauge, and finishing—not just the stitch pattern.
- Choose a construction style you’ll enjoy (panels, motifs, or one-piece).
- Pick yarn for your goal (drape/warmth/care), then swatch to lock gauge.
- Measure and plan ease before you commit to stitch counts.
- Finish edges with stable stitches and controlled spacing to avoid waviness and gaping.
- Diagnose problems by measuring first, then fixing root causes (gauge vs edging).
If you’re making a one-off for yourself, start with panels and a simple neckline, then add V-neck shaping only if you want it. If you’re developing a product, prepare a measurement spec and materials direction first—clear inputs make sampling smoother.
Optional: Work With a Manufacturer (XTCLOTHES)
If you’re turning a sweater vest concept into a sellable product under your brand, having a clean spec pack (measurements, materials direction, and finishing details) makes sampling and pricing much faster.
XTCLOTHES positions itself as a knitwear/sweater manufacturer offering OEM/ODM support, sampling to bulk production, custom labels/packaging, and logistics/customs support (as stated on xtclothes.com). For best results, share your sketch or references, size range, measurement spec, material direction, target quantities, and timeline so the supplier can advise feasibility and sampling steps.
:%20Panels%20vs%20Granny%20Squares%20+%20Fit%20%26%20Neckline%20Fixes)