
Drop-Shoulder Sweater Knitting Pattern: Construction, Fit & a Beginner Workflow
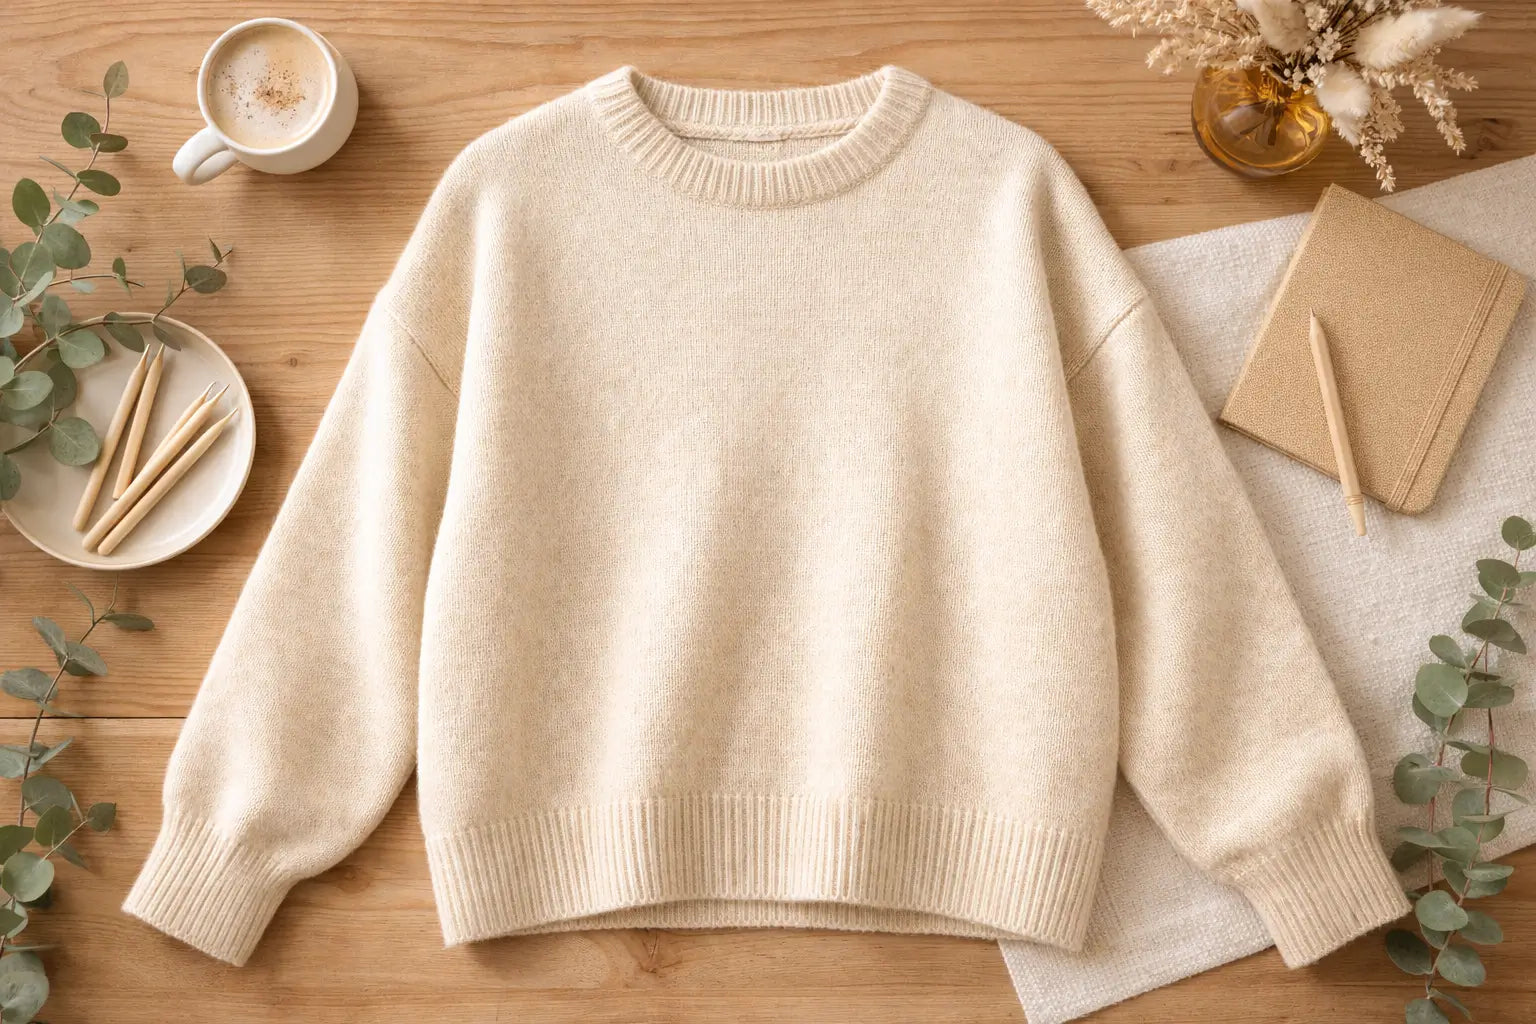
Drop-Shoulder Sweater Pattern at a Glance
A drop-shoulder sweater is a sweater where the sleeve seam sits lower than your shoulder point, creating a relaxed “boxy” silhouette with minimal shaping. Many drop-shoulder patterns use a simple body shape and straightforward sleeve attachment, which is why they’re often recommended as a first sweater construction.
Quick definition + quick build (6 steps)
Drop-shoulder sweaters are built with a boxy body and sleeves attached at openings on the sides, so the sleeve seam “drops” down the upper arm rather than sitting on top of the shoulder.
Generic build (follow your pattern for details):
- Swatch and confirm gauge
- Choose size based on finished garment measurements and your fit goal
- Knit the body (often in pieces or a simple tube)
- Create neckline shaping/finishing as directed
- Make sleeves, then seam on or pick up around the armhole opening
- Finish edges (cuffs/hem/neck) and block
Boundary note: Exact steps and stitch counts depend on the specific designer’s pattern and your gauge.
Quick fit/ease chooser (no math-heavy)
Ease = finished garment measurement − your body measurement.
- If you want neater/closer: choose modest positive ease and confirm the sleeve seam won’t drop too far.
- If you want relaxed: choose comfortable positive ease and check arm mobility at the underarm.
- If you want oversized/drapey: ensure the pattern is designed for that look (schematic + photos), because too much ease can create bulk at the underarm.
If you’re unsure, measure a sweater you already love and compare it to the pattern’s finished measurements.
What Is a Drop-Shoulder Sweater? (And How It Differs From Raglan/Set-In)
A drop-shoulder sweater is a construction where the body is relatively boxy and the sleeves attach at side openings with little to no underarm shaping, so the seam connecting body and sleeve sits lower on the arm.
Key points that matter for fit:
- The “drop” is created by shape + ease: a boxier body plus extra room shifts the seam down your arm.
- Drop-shoulder can feel simpler to knit because it often uses less shaping than other constructions.
- The trade-off: if the armhole is too deep or the sleeve is too wide, the underarm can look bulky or feel restrictive.
Mini-table: Drop-shoulder vs Raglan vs Set-in
| Construction | Where the “shoulder” is shaped | Typical shaping level | Common look | Common trade-offs |
|---|---|---|---|---|
| Drop-shoulder | Seam sits lower on upper arm | Low (often boxy body) | Relaxed / casual | Can droop or bulk if ease/armhole depth isn’t balanced |
| Raglan | Diagonal lines from underarm to neck | Medium (shaping along raglan lines) | Sporty / flexible movement | Fit is influenced by raglan depth and neckline style |
| Set-in sleeve | Sleeve cap “fits into” armhole curve | Higher (armhole + sleeve cap shaping) | More tailored / structured | More shaping and/or seaming complexity |
Boundary note: None of these is “better.” Choose based on the silhouette you want and how much shaping/seaming you’re comfortable doing.
Beginner Workflow: How to Knit a Basic Drop-Shoulder Sweater
The simplest drop-shoulder sweater workflow is: confirm gauge, knit the body to the right measurements, create sleeves that match the armhole opening, then assemble and finish edges cleanly.

Before-you-start checklist (tools, measurements, notes)
- Take measurements: full chest/bust, desired body length, sleeve length, upper arm (bicep)
- Read the pattern for finished measurements: don’t choose size by label alone; use the schematic/size chart
- Swatch for gauge in the pattern’s stitch pattern (not just plain stockinette) and wash/block it the way you’ll treat the sweater
- Write down: your gauge, needle size, yarn details, and any size adjustments you plan
Step-by-step build (6–8 steps)
- Swatch + block: confirm your real gauge and fabric drape
- Choose size by finished measurements: pick your fit goal (neat/relaxed/oversized) and confirm ease
- Knit the body: in pieces (front/back) or as directed (some patterns are seamless)
- Shape/finish the neckline: follow the pattern’s method (bind-offs, short rows, ribbed collar, etc.)
- Make sleeves: ensure sleeve top width matches the armhole opening approach (seamed or picked up)
- Assemble: join shoulders, attach sleeves, then seam side and sleeve seams (if seamed)
- Finish edges: cuffs/hem/neckline ribbing or edging
- Block: final shaping and stitch evening
Boundary note: This is a generic workflow; always follow the designer’s instructions for stitch counts, shaping, and finishing details.
Fit & Ease: How to Choose Size for Relaxed vs Oversized Looks
The safest way to choose drop-shoulder sizing is to decide the silhouette you want, then select the pattern size using finished garment measurements + ease, and validate how far the sleeve seam will drop on your arm.
What “ease” means in plain English
Ease equals garment circumference minus body circumference. Positive ease means the garment is bigger than your body.
Patterns typically tell you the intended ease (or show it through the finished measurements). For example, one published sweater pattern lists 5–8 inches of ease as its intended fit—this isn’t a universal rule, but it shows how patterns commonly specify ease.
A simple way to pick ease (goal → check → validate)
-
Pick a silhouette goal
- Neat/closer: sleeve seam drops a little, but still feels clean
- Relaxed: clearly drop-shoulder, comfortable movement
- Oversized/drapey: intentionally roomy, more “slouch” than shape
-
Check finished measurements
- Look for finished chest/bust circumference and compare to your body measurement.
-
Validate the drop
- Look at photos and schematic: if the seam sits mid-upper arm in photos, it will feel and look more relaxed.
- If possible, measure a sweater you love and compare it to the pattern’s finished measurement and sleeve placement cues.
About numeric “rules” for ease (use as examples, not laws)
- Many fit teachers suggest small positive-ease ranges for “relaxed” vs “oversized” fits in general sweater sizing discussions (for example, 0–3 inches relaxed and 3–6 inches oversized in one teaching example). Treat these as category examples, not universal requirements.
- Some drop-shoulder designs are intentionally very oversized; one designer-oriented discussion suggests about 6–12 inches of positive ease to achieve that “flow from the shoulders.” Use this only as a reference point and defer to the pattern’s schematic and photos.
Boundary note: Gauge, yarn, and fabric drape can change how the same numeric ease looks on a real body—so the schematic + photos matter as much as the number.
Top-Down vs Seamed: Which Construction Should You Choose?
Top-down sweaters are easier to try on and adjust as you knit, while seamed sweaters can offer more structure and make it easier to correct mistakes with less “work lost” because you’re working in smaller pieces.
Decision table + “choose this if…” bullets
| Factor | Top-down (often seamless) | Seamed (worked in pieces) |
|---|---|---|
| Fit adjustments | Easy to try on as you go | Easy to adjust individual pieces before assembly |
| Construction feel | Continuous knitting; less finishing | More finishing, but adds stability/structure |
| Mistake recovery | Ripping back can be “big” | Smaller sections mean less to undo |
| Portability | Can get heavy on needles as it grows | Smaller pieces are easier to carry |
| Final look | Depends on pattern; neat when executed well | Seams can help shape and support the fabric |
Choose top-down if:
- You want to try on frequently and tweak length as you knit
- You dislike large finishing sessions and prefer one continuous project
Choose seamed if:
- You want a more structured feel and don’t mind assembly
- You prefer working on smaller pieces and fixing mistakes locally
Boundary note: Drop-shoulder can be done either way. Follow the pattern’s intended method unless you’re confident adapting construction.
Sleeves & Underarm Comfort: Attach Sleeves Without Bulk
In drop-shoulder construction, sleeves are commonly attached by seaming a sleeve to a relatively straight opening, or by picking up stitches around an armhole opening and knitting the sleeve from there.
Two common approaches: seam-on vs pick-up sleeves (and how to check comfort)
Approach A: Seam-on sleeves (classic piecework)
- Join shoulder seams
- Align sleeve top to the armhole edge and pin/clip evenly
- Seam sleeve to body, then seam side + sleeve seams
- Reinforce underarm joins (this area takes stress)
Approach B: Pick-up sleeves (common in many patterns)
- Create the armhole opening per pattern
- Pick up stitches evenly around the opening
- Knit sleeve down, checking mobility as you go
3 quick comfort checks (before you commit to finishing):
- Raise your arms: do you feel pulling at the underarm?
- Look in a mirror: do you see excess bunching at the underarm?
- Rotate your arms: do sleeves twist (often a sign of mismatch or uneven pickup/seaming)?
Quick fixes (pattern-dependent):
- Bulky underarm: reduce overall ease, or choose a “modified drop shoulder” pattern with some armhole shaping
- Tight underarm: confirm sleeve top width and opening size match the pattern’s intended ease
- Twisting sleeves: ensure even distribution (pickups or seaming) and check that both sleeves are worked identically
Boundary note: If the armhole is very deep, the sweater can look droopy; if it’s too tight, movement suffers. Validate with real try-on checks rather than relying on “ideal depth” formulas.
Troubleshooting: Droopy Shoulders, Bulky Underarms, Twisting Sleeves
Most drop-shoulder fit problems come from an imbalance between ease, armhole depth, and sleeve width—fixing the root cause usually matters more than changing one small detail.
Problem → likely cause → fix (6–10 bullets)
- Shoulders look droopy/slouchy (more than intended) → too much ease or very deep armhole → choose a smaller size (if pattern allows), or pick a “modified drop shoulder” design with more shaping
- Underarm looks bulky → sleeve too wide at top or opening too large for sleeve → match sleeve top width to opening, redistribute pickups/seaming evenly
- Underarm feels tight → opening/sleeve mismatch in the other direction → re-check gauge and sleeve top width; consider more ease at bicep
- Sleeves twist → uneven pickup or asymmetric seaming → count and match pickups; mark quarter points before seaming
- Neckline stretches out → edge not stabilized or picked up too loosely → use a firmer edge treatment (pattern-dependent) and block carefully
- One sleeve fits differently from the other → tiny gauge drift or different pickup counts → count stitches/rows and keep notes; re-measure openings before attachment
- Body length surprises you after blocking → blocked gauge differs from unblocked gauge → always swatch and block first; measure as you go
Boundary note: Some fixes require partial re-knitting (especially if gauge is off). It’s better to diagnose early than to “finish and hope.”
Troubleshooting checklist (prevention-first)
- Swatch + block in the stitch pattern you’ll actually use
- Choose size using finished measurements and intended ease (not just size label)
- Confirm sleeve top width vs armhole opening before attachment
- Mirror-check sleeve seam placement (how far down it drops)
- Keep consistent notes for both sleeves (counts, rows, pickups)
For Brands: Factory-Ready Spec Checklist for a Drop-Shoulder Sweater
If you’re producing a drop-shoulder sweater for a brand, a “pattern idea” isn’t enough—factories need a clear measurement set, construction notes, and material/knit structure details to sample accurately.
A factory-ready spec for a drop-shoulder sweater should define the intended silhouette (how relaxed, how much drop), include a complete measurement set and size chart, specify knit structure and yarn details, and document finishing/trims so the sample matches your expectations.
Spec checklist + measurement mini-table (what factories need)
A) Tech pack / spec checklist
- Reference: photos, sketch, or a physical sample you want to match
- Silhouette intent: “relaxed” vs “oversized,” and where you expect the sleeve seam to land (described clearly)
- Size range + size chart: list sizes you’ll produce and graded measurements
- Measurement set (POM list): see table below
- Knit structure: stitch/structure choice (e.g., jersey, rib placements, texture panels), and any artwork method (jacquard/intarsia/print) if relevant
- Yarn spec: fiber blend, yarn count/weight, color codes, handfeel expectations
- Construction notes: top-down vs seamed, sleeve attachment method, neckline finish, rib specs (width, stretch intent)
- Trims: labels, hangtags, care label content, packaging requirements
- Quality checkpoints: what must match (fit, drape, stitch definition, finishing cleanliness)
B) Measurement mini-table (starter set)
| Area | Examples of points of measure (POM) |
|---|---|
| Body | chest width/circumference, body length, hem width, shoulder width (if applicable) |
| Sleeve | sleeve length, bicep width, cuff width, sleeve opening/armhole match notes |
| Neck | neckline width/depth, collar height, neckline finish method |
| Edges/Finish | rib widths (cuff/hem/neck), seam/edge finishing requirements |
Boundary note: Final fit and handfeel must be confirmed through sampling, because yarn choice and knit structure affect drape and measurements.
If you’re developing a drop-shoulder sweater for your brand and want to reduce back-and-forth during sampling, send your tech pack (or reference photos + measurement targets). Include your target quantity, yarn preference, size range, and any artwork method (jacquard/intarsia/print) so the sample brief is unambiguous.
For Brands: Sample Approval & QC Checkpoints Before Bulk Production
Before bulk production, approve the sample by checking measurements and silhouette, sleeve/underarm comfort, finishing consistency (neck/hem/cuffs), and trim/label/packaging accuracy—then document a clear “pass standard” for the factory to follow.
Sample checklist + documentation notes (how to reduce rework)
Sample approval checklist (fit + build)
- Silhouette matches intent (relaxed vs oversized; seam placement looks right)
- Measurements match your size chart targets (confirm key POMs across at least one core size)
- Sleeve/underarm comfort: no unexpected pulling or excessive bulk
- Stitch appearance: evenness, pilling risk awareness (no guarantees), color consistency intent
- Neckline finish: stable, comfortable, visually clean
- Edge finishing: cuffs/hem sit correctly; rib stretch intent matches expectations
- Make/trim: labels, hangtags, packaging match your spec
Consistency checklist (bulk readiness)
- Re-check key areas that commonly drift in production: neckline finish, rib tension, sleeve match, overall length after washing/blocking
- Confirm the factory is working from the latest spec revision (version control)
Documentation notes (fast, practical)
- Record issues as: photo → issue description → location → required correction
- Keep a short “must-not-change” list (your non-negotiables) and a “flexible” list (acceptable variations)
Boundary note: Exact QC tolerances differ by brand and market positioning. If you use numeric tolerances, define and document them in your spec rather than assuming a default.
For bulk planning, it helps to align early on MOQ and lead time expectations (which can vary by design complexity, yarn availability, and order quantity). If you’re ready, share your target ship date, target price range, quantities, and yarn/fiber preferences so the production plan can be scoped accurately.
FAQ
-
Q: What is a drop-shoulder sweater in knitting?
A: It’s a sweater where the sleeve seam sits lower on the upper arm because the body is boxier with little to no underarm shaping, creating a relaxed silhouette. -
Q: What’s the simplest way to knit a basic drop-shoulder sweater?
A: Swatch and confirm gauge, choose size by finished measurements, knit the body, make sleeves that match the opening method, assemble, finish edges, then block. -
Q: How much ease should a drop-shoulder sweater have?
A: Enough positive ease to achieve your intended look (neat/relaxed/oversized) while keeping underarm comfort; use the pattern’s finished measurements and validate with photos/schematic rather than relying on one universal number. -
Q: Should I knit a drop-shoulder sweater top-down or in pieces and seam it?
A: Top-down is easier to try on and adjust as you knit; seamed construction can be easier to manage in smaller pieces and can add structure—choose based on your preferences and the pattern design. -
Q: How do you attach sleeves on a drop-shoulder sweater?
A: Either seam sleeves onto the body at the armhole opening, or pick up stitches around the opening and knit sleeves from there, depending on the pattern method. -
Q: Why does my drop-shoulder sweater look droopy or bulky—and how can I fix it?
A: It’s usually too much ease, too deep an armhole, or a sleeve/opening mismatch; re-check gauge and finished measurements, and adjust size/ease or choose a modified drop-shoulder design with more shaping.
Summary: Key Takeaways + Next Steps
- Drop-shoulder is a relaxed construction where sleeve seams sit lower on the arm, often using a boxier body shape.
- Fit success comes from the combination of gauge + finished measurements + ease, not from size labels alone.
- Choose top-down for try-on adjustability; choose seamed if you prefer smaller pieces and a structured feel.
- Most “droop/bulk” issues trace back to ease/armhole depth/sleeve width balance—diagnose early.
- For brands, a clear tech pack and sample checklist reduces revision cycles and speeds up decision-making.
