
Crochet Vest Pattern Guide: Styles, Sizing, Yarn, Gauge, and a Brand-Ready Tech Pack Checklist
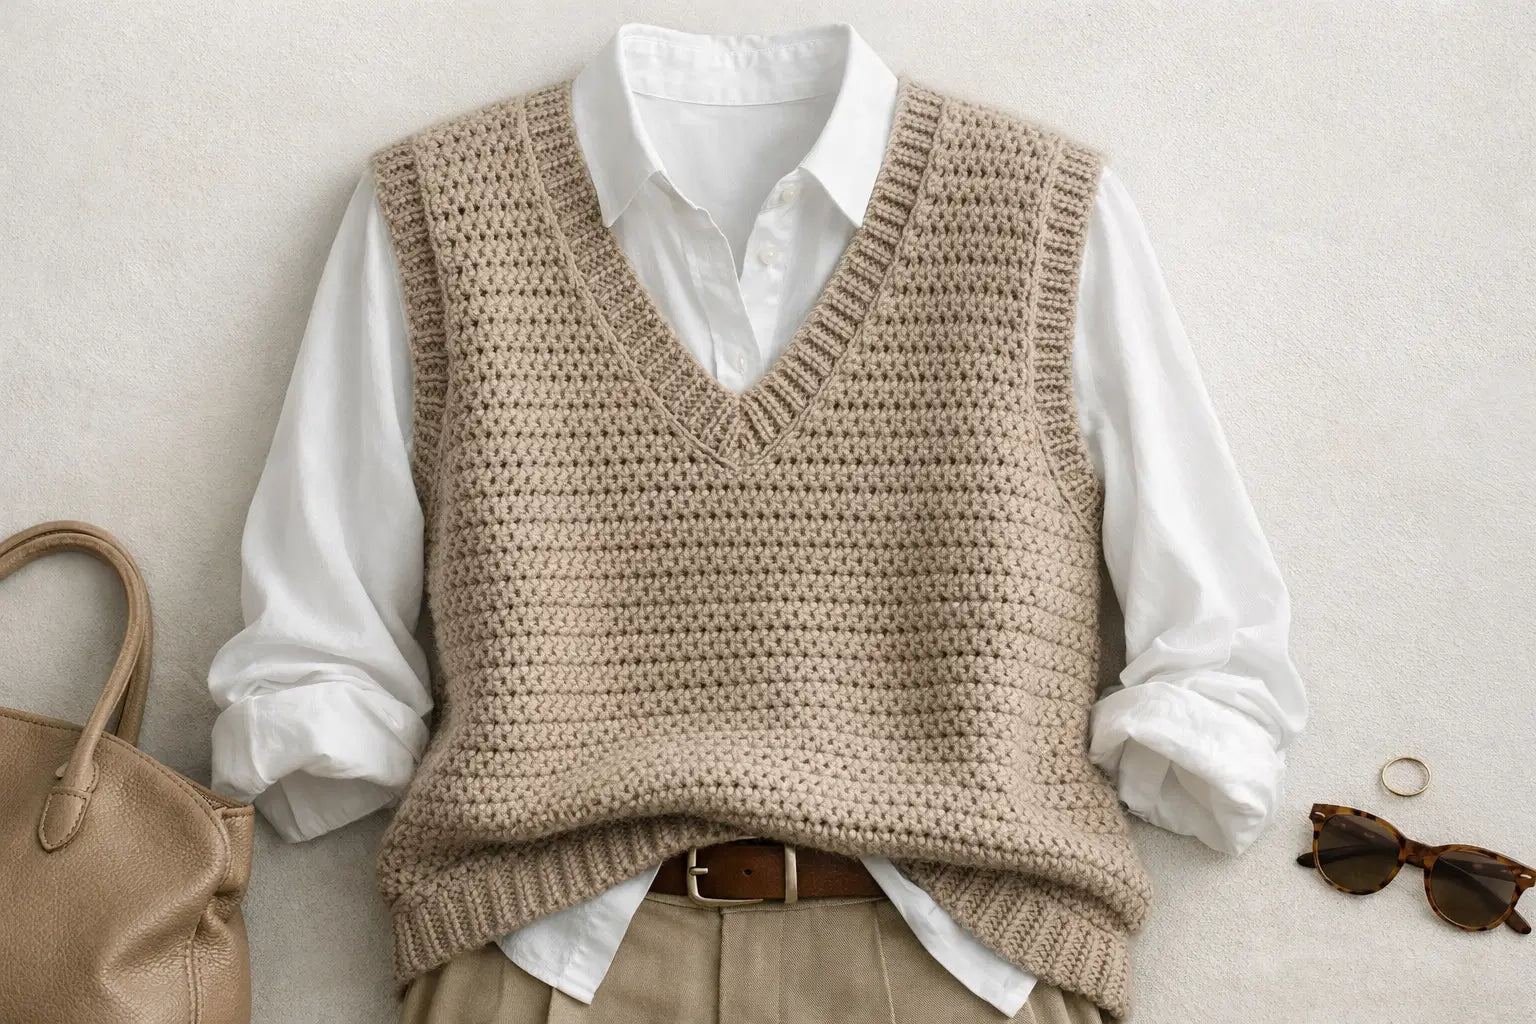
Pick a crochet vest pattern in 60 seconds
1) Choose a style (fast chooser)
| If you want… | Choose… | Why it’s easier |
|---|---|---|
| Most forgiving fit | Open-front / waistcoat | No pullover opening to “fit perfectly” |
| Classic layering look | V-neck pullover | Most “sweater vest” silhouette |
| Simplest neckline finishing | Crew/round neck | Less shaping than V-neck |
| Fast + trendy | Cropped | Less length; quick visual payoff |
| Warmth + drape | Longline | Great layering, but length control matters |
2) Do this 3-step workflow before you commit
- Pick your size by finished measurements, not only the size label.
- Decide ease (how loose you want it) based on what you’ll wear underneath.
- Swatch gauge (even a small swatch) and adjust hook/yarn if needed.
3) If you only remember one rule
If you don’t want to swatch gauge, choose a more forgiving silhouette (open-front, relaxed armholes, simple edging). If you want a sharp “store-bought” fit, expect more measuring and finishing.
Styles explained: V-neck, crew, open-front, cropped, longline
The keyword “crochet vest pattern” covers multiple silhouettes. The best choice depends on two things:
- Fit tolerance: how precise the openings and width need to be
- Finishing complexity: how much neckline/armhole shaping + edging matters
Quick chooser table: style → skill level → fit tolerance
| Style | Beginner friendliness | Fit tolerance | Finishing notes | Best use |
|---|---|---|---|---|
| Open-front / waistcoat | High | High | Edge stays neat = big visual impact | Layering, flexible sizing |
| Crew neck pullover | Medium–High | Medium | Neckline can stretch if edging is loose | Casual sweater-vest vibe |
| V-neck pullover | Medium | Medium–Low | V needs symmetry + stable edging | “Classic” sweater vest |
| Cropped vest | High | Medium | Armhole comfort becomes the “fit focus” | Trendy, quick projects |
| Longline vest | Medium | Low | Drape + length exaggerate errors | Warm layering, statement |
Style tips (pattern-agnostic):
- Open-front: easiest to get wearable quickly because small size drift is less obvious.
- Pullover: opening (neck + armholes) must be comfortable; too small feels restrictive.
- V-neck: looks polished when symmetrical—measure the V depth and edge tension.
- Longline: re-measure length mid-project so you don’t accidentally build a tunic.
Beginner-friendly patterns: what “easy” really means
A beginner-friendly crochet vest pattern usually has:
- Simple shaping (straight panels or minimal decreases)
- Clear sizing info (finished measurements or a schematic)
- Repeatable stitch pattern (easy to count and keep consistent)
- Construction you can pause and measure (panels are great for this)
- Finishing that’s not fussy (simple edging, stable seams)
Beginner risk checklist (use this before you choose a pattern)
- ✅ The pattern tells you finished measurements (or includes a schematic)
- ✅ The pattern explains armhole depth / opening in a way you can measure
- ✅ The stitch pattern repeat is easy to track (you won’t “lose the pattern”)
- ✅ You’re comfortable with the construction method (panels vs in-the-round)
- ✅ You can identify where the neckline and armhole shaping happens
If a pattern is “easy” but uses a very textured stitch, it can still be time-consuming—simple doesn’t always mean fast.
Sizing & ease: choose the right size and adjust fit safely
Most vest fit problems come from one of these:
- Choosing size by label instead of finished measurement
- Not planning ease for layering
- Gauge drifting (your fabric ends up bigger/smaller than intended)
- Armhole/neckline openings not matching your body comfort

5-step sizing workflow (measure → ease → choose size → check openings → commit)
- Measure your body where the vest will sit (usually chest/bust, plus desired hem area).
- Decide ease (how much room you want). If you’ll layer over a shirt, plan extra room.
- Choose size by finished garment measurement (not only “M/L/XL”).
- Check openings: armhole opening and neckline depth should feel comfortable for you.
- Commit after a quick gauge check, especially if you changed yarn or hook.
Safe modifications you can do on many patterns
- Lengthen/shorten: adjust rows/rounds in a straight section (keep stitch repeats intact).
- Wider/narrower body: add/remove repeats if the stitch pattern allows it (don’t break the repeat).
- Armhole comfort: often improved by adjusting armhole depth or shaping earlier—not by forcing a tight edging at the end.
Boundary condition: if a pattern is motif-based (granny squares, patchwork), “easy sizing” depends on how the motifs join. In those cases, the cleanest adjustment is often adding/removing motifs and then refining the edging.
Yarn & gauge: choose yarn, swatch once, and keep the size predictable
Yarn selection changes:
- Drape (fluid vs structured)
- Warmth and seasonality
- Stitch definition (crisp texture vs soft blur)
- How easily edges stretch or recover
Yarn chooser table (goal → fiber/weight notes → what changes)
| Your goal | Yarn/fiber direction (general) | What changes in the finished vest |
|---|---|---|
| Crisp stitch definition | Cotton/cotton blends | Cleaner texture; can feel heavier; may stretch less |
| Soft warm layering | Wool blends | Warmth and bounce; may need careful blocking |
| Easy care / budget | Acrylic blends | Often soft and washable; definition varies by yarn |
| Cool-weather drape | Blends with smoother hand | Fabric may hang longer; re-check length mid-project |
| Light summer layering | Breathable fibers/blends | More airflow; structure depends on stitch density |
Important: Yarn “weight” systems differ by country and label. If you substitute yarn, treat it like a new pattern until gauge is confirmed.
Gauge fix playbook (when to change hook, yarn, or stitch choice)
- Swatch the stitch pattern used in the vest, not a different stitch.
- Measure stitch gauge and row gauge the way the pattern tells you (some use blocked, some unblocked).
- If your fabric is too big/loose (fewer stitches per area than intended):
- Try a smaller hook
- Or choose a slightly thicker yarn only if you want a denser fabric (but size may change)
- If your fabric is too small/tight (more stitches per area than intended):
- Try a larger hook
- Or choose a yarn with better drape if your fabric feels stiff
- Test your finishing edge on the swatch (a loose edging can ruin a great body gauge).
Boundary condition: Some stitches “grow” after blocking more than others. If you plan to wash/block the vest, wash/block the swatch the same way and then measure.
Construction choices: panels vs in-the-round (and neat seaming)
Not every vest pattern explains why it uses a construction method—but you can use the method to predict how easy it will be to fit and finish.
| Construction | Pros | Cons | Best for |
|---|---|---|---|
| Panels (front/back, then seam) | Easy to measure and adjust width/length; seams add structure | Seaming skill matters; alignment affects fit | First wearables, cleaner fit control |
| In-the-round | Fewer seams; continuous fabric | Harder to adjust without unraveling; openings must be planned carefully | Simple shapes, consistent stitch patterns |
| Hybrid (panels + join + edging) | Balance of control + fewer seams | Needs careful transition points | Many modern “sweater vest” patterns |
Neat seaming checklist (fast)
- Match stitch counts before seaming (don’t “stretch to fit”)
- Use the same tension for seaming as you used for crochet
- Reinforce shoulders (it helps shape and prevents neckline stretch)
- Check symmetry: measure both armholes before you finish the edge
Finishing that looks professional: neckline, armholes, hems
Finishing is where a vest can go from “handmade” to “intentional.” Most edge problems come from:
- Adding stitches unevenly around curves
- Using a finishing stitch that’s too tall or too loose
- Not reinforcing shoulders before edging
- Blocking the edge too aggressively

Neckline & armhole stability checklist
- ✅ Reinforce shoulder seams before you edge (stability first, decoration second)
- ✅ Keep stitch placement consistent around curves (count and mark quarters)
- ✅ Use an edging with controlled height (shorter stitches often stretch less)
- ✅ Consider a smaller hook for edging if the edge flares or ripples
- ✅ Avoid “accidentally increasing” around the edge (it creates waves)
- ✅ Test edge stretch on a swatch before committing
Finishing steps that reduce “digging in”
- Put the vest on (or pin it to a similar garment) before final edging.
- Check armhole opening: can you move comfortably?
- If it feels tight, fix the opening size first (shaping/rows), then edge gently.
- If it feels loose, use a more stable edging (and don’t over-stretch during blocking).
Blocking: when it matters most
- Blocking is most helpful when:
- Stitch texture needs to open up or relax
- Seams need to settle flat
- Length/drape looks uneven
- Blocking can also reveal the “real final size,” which is why measuring after blocking is smart.
Troubleshooting: problem → likely cause → fix
Use this table to diagnose across most crochet vest patterns.
| Problem | Likely cause | Fix (fast) | Prevention next time |
|---|---|---|---|
| Vest is too big overall | Gauge too loose; yarn substitution; fabric grew after blocking | Change hook size, re-swatch; shorten or rework if early | Wash/block swatch; confirm gauge before full body |
| Vest is too small/tight | Gauge too tight; fabric too stiff | Larger hook; different yarn; loosen tension | Swatch using vest stitch pattern |
| Armholes dig in | Armhole depth too shallow; opening too small | Rework shaping/rows; avoid “tight edging” as a band-aid | Check armhole opening before finishing |
| Neckline stretches out | No shoulder reinforcement; loose edging; too-tall edge stitches | Reinforce shoulders; smaller hook; more stable edge | Test edging on swatch; keep edge stitch count consistent |
| Hem flares or ripples | Too many edge stitches; uneven tension | Reduce stitches; smaller hook | Count stitches; mark quarters |
| Vest twists or hangs unevenly | Uneven tension; seam misalignment; stitch pattern bias | Reblock; check seams; rework if severe | Measure both sides; keep repeat counts aligned |
| V-neck looks uneven | Asymmetrical decreases/edge tension | Measure V depth; match row counts; stabilize edge | Place markers; count decrease rows |
Boundary condition: If the schematic and the written row counts conflict, prioritize measurements—that’s what determines fit.
If you’re turning this into a product: tech pack checklist (OEM/ODM)
This section is optional. If you’re a brand using a crochet vest pattern as inspiration for a sellable design, the goal is to turn “pattern language” into manufacturer-ready specs.

What to include in a crochet-look vest tech pack (practical checklist)
A) Design intent
- Front/back reference images (and close-ups of the texture)
- Silhouette callout: V-neck / crew / open-front, cropped / standard / longline
- Fit intent: relaxed vs fitted, layering target
B) Measurement spec (POMs)
- Finished garment measurements (key points)
- Chest width, body length, shoulder width
- Armhole opening, neckline depth/width
- Hem width / rib width (if applicable)
- Tolerance notes (how strict each measurement needs to be)
- Keep this realistic; tighter specs can increase sampling iterations
C) Materials
- Fiber content target (e.g., cotton blend, wool blend)
- Yarn characteristics: hand-feel, thickness range, twist/texture goals
- Colorways and color standards (if you have them)
D) Fabric/texture definition
- Stitch/texture reference: “crochet-look” direction with photos
- Repeat size (if relevant) and where it must align (center front, side seams)
- Edge treatment: rib, single crochet edge, binding look, etc.
E) Construction
- Panels vs in-the-round (for production, this becomes construction method + join approach)
- Seaming/finishing requirements (flat seams, reinforced shoulders, edge stability)
- Label placement, trims, packaging requirements
F) Sampling & approval checkpoints
- What to confirm on the first sample:
- silhouette and openings comfort
- edge stability (neckline/armholes)
- drape and length
- measurement spec alignment
- What to confirm before bulk:
- repeatability across sizes (grading logic)
- color consistency and hand-feel targets
- finishing consistency
Reality check: crochet vs scalable production
Hand-crochet-heavy designs can be difficult to scale consistently. Many brands aim for a crochet-look texture with more repeatable methods, depending on the look, quantity, and consistency requirements.
Want a factory feasibility check?
Send: reference photos, target size range, target quantity, fiber preference, and any must-have texture details. A sampling team can tell you what’s realistic and what substitutions keep the look while improving repeatability.
Factory feasibility: “crochet” vs scalable crochet-look options + quote info checklist
If your goal is consistent bulk production, the key decision is usually how the texture is achieved.
Crochet vs scalable options (comparison)
| Approach | Visual result | Consistency at scale | When it makes sense |
|---|---|---|---|
| Hand-crochet-heavy | True handmade crochet look | Can vary by maker and time | Small runs, artisan positioning |
| Crochet-look texture | Similar vibe depending on stitch/structure | More repeatable | Brands needing consistency |
| Hybrid (details by hand, base by repeatable method) | Crochet accents + stable base | Medium–high | When the “handmade” look is localized |
Boundary condition: feasibility depends on stitch density, amount of handwork, size range, and the consistency standard you need. Avoid locking in a timeline or cost until the spec is clear.
Quote request checklist (send this to a manufacturer)
- Design references: photos/sketch, and what must not change
- Size range + fit intent (relaxed vs fitted; layering target)
- Quantity target (per colorway if known)
- Material direction (fiber content target; feel and drape goals)
- Construction constraints (must-have neckline/armhole finish, any reinforced areas)
- Labels/packaging requirements
- Target ship date window (so feasibility can be assessed realistically)
QC checkpoints worth calling out (for vests)
- Openings comfort: armhole and neckline measurements
- Edge stability: no rippling, no over-stretching
- Symmetry: left/right armholes and V-neck balance
- Hand-feel and drape: matches the intended season and layering use
FAQ
What is the easiest crochet vest pattern for beginners?
Open-front vests and simple panel-based pullover vests are usually easiest because you can measure and adjust width/length as you go. See: “Beginner-friendly patterns” and “Sizing & ease.”
How much ease should a sweater vest have for layering?
Enough that you can move comfortably over what you’ll wear underneath. If you want it over a shirt, plan more room than a fitted tank-style vest. Start with finished measurements, not size labels.
Can I substitute yarn and keep the same size?
Sometimes—but only if your gauge matches the pattern. Yarn substitutions often change drape and stretch, so swatch the vest stitch pattern and measure after blocking if you plan to block the final garment.
Why is gauge important for a crochet vest?
Because small differences in stitch size multiply across the width and length of a wearable. Gauge is the simplest way to control finished size across most patterns.
How do I stop the neckline from stretching?
Reinforce shoulders before edging, keep edge stitch counts consistent, and use a stable edging (often with a smaller hook). Loose edging is a common cause of stretched necklines.
Do I need to block a crochet vest?
Not always, but blocking is helpful when you need seams to lie flat, texture to open up, or drape/length to settle. If you plan to wash the vest, test-wash and block the swatch.
Can factories make crochet vests?
They can make crochet-look or handwork-heavy styles depending on design and scale, but “true crochet by hand” can be harder to keep consistent at large volume. For brands, the best path is a clear spec and a feasibility check.
What’s the minimum info to start a tech pack for a vest?
Design references, silhouette and fit intent, key measurements (POMs), material direction, and finishing requirements (especially neckline/armholes). Add grading intent if you’ll sell multiple sizes.
Summary: your next step (maker path vs brand path)
Maker path (DIY):
- Pick a forgiving style if you want the easiest win
- Choose size by finished measurement + plan ease for layering
- Swatch gauge (and test edging on the swatch)
- Finish with stability in mind: shoulders → openings → edging
Brand path (product):
- Define the silhouette + crochet-look intent with clear references
- Build a tech pack checklist (measurements, materials, construction, finishing)
- Align sampling checkpoints and QC expectations before bulk
If you’re developing a crochet-look sweater vest for your brand, send your references + size range + material direction + target quantity. You’ll get clearer feasibility feedback (and fewer sampling surprises) when the spec is complete.
Sources (terminology & reference, for further reading)
- Craft Yarn Council — Standard Yarn Weight System: https://www.craftyarncouncil.com/standards/yarn-weight-system
- Example pattern directory (style browsing UX reference): https://www.yarnspirations.com/collections/patterns?filter.p.m.global.project_type=Vests&filter.p.m.global.skill_type=Crochet
- Example pattern marketplace category (filtering UX reference): https://www.lovecrafts.com/en-us/l/crochet/crochet-patterns/crochet-patterns-by-project/waistcoats-crochet-patterns
- Example single-pattern tutorial format reference: https://stitchberryblog.com/2025/01/23/textured-crochet-sweater-vest-free-crochet-pattern/
- Example tutorial (construction overview reference): https://vivcrochets.com/crochet-v-neck-sweater-vest/
