How to Crochet a Cardigan Sweater: Beginner-Friendly Roadmap
Crocheting a cardigan is absolutely doable if you treat it like a small set of decisions (method, yarn/stitch, size, gauge) followed by a repeatable build sequence. This guide gives you a pattern-agnostic roadmap you can use with almost any cardigan pattern.
Pick a method and follow the roadmap
You’ll get the best results fastest by choosing a beginner-friendly construction method, confirming gauge early, and following a simple build sequence with a few try-on checkpoints. If you do only one “extra” thing, make the gauge swatch.
Pick a construction method in 30 seconds
- Choose a method based on how much you tolerate seaming and how much fit control you want.
- Simpler shapes reduce shaping stress, but gauge and sleeve comfort still matter.
| Method | Best for beginners who… | Main trade-off |
|---|---|---|
| Cocoon / rectangle-based | want simple shapes and predictable steps | sleeves/armholes can feel bulky if gauge is off |
| Panels (front/back + sleeves) | don’t mind seaming and want classic structure | more seams = more alignment/tension discipline |
| Top-down (raglan/yoke) | want try-on-as-you-go fit control | neckline/shoulder shaping varies by pattern |
- Boundary conditions:
- The “same method” can be implemented differently by different patterns (counts, joins, shaping details).
- Your yarn, stitch choice, and tension change how the fabric drapes and fits.
This quick pick makes the rest of the setup much easier—now gather tools and choose yarn with gauge in mind.
The 8–12 step cardigan roadmap
- Pick a construction method (cocoon, panels, or top-down).
- Choose a pattern (or at least a target gauge and finished measurements).
- Decide your intended fit (fitted vs relaxed/oversized) and measure key body points.
- Choose yarn and a starting hook size based on the pattern’s gauge info.
- Make a gauge swatch in the exact stitch pattern used for the cardigan.
- Adjust hook size and re-swatch until gauge is close enough for the size you want.
- Crochet the body (or yoke) and check width/length at the first try-on checkpoint.
- Shape/split where needed (front opening, armholes, or sleeve separation points).
- Crochet sleeves (or attach and build sleeves), checking upper-arm comfort early.
- Seam and assemble (if your method requires it), then do a full try-on before weaving ends.
- Add edging/ribbing (front band, cuffs, hem) to stabilize openings.
- Finish: weave ends neatly, block appropriately for the fiber, and add optional details (buttons/pockets).
- Boundary conditions:
- The order can shift (especially for top-down patterns where sleeves may be integrated).
- If you change yarn or hook mid-project, re-check gauge and fit before continuing.
If you want a clearer comparison before committing, the next section breaks down each method and its trade-offs.
Starter checklist: what you need before you begin
- Yarn (enough for your size and length, per your chosen pattern’s yardage guidance)
- Crochet hook(s) in your starting size plus one smaller and one larger (for gauge adjustment)
- Stitch markers (for size lines, raglan increases, and sleeve attachment points)
- Tapestry needle (weaving ends and seaming)
- Measuring tape + a ruler (for gauge measurement)
- Scissors, notebook/row counter (optional but helpful)
- Boundary conditions:
- Exact yardage and hook size are pattern-dependent; use the pattern’s gauge line as your starting point whenever possible.
- Buttons, pockets, and special notions depend on the design.
With method and tools in place, you can choose the construction style that fits your patience and preferences.
Choose a cardigan construction method
The “best” construction method is the one that matches your tolerance for seaming, your need for fit control, and how much shaping you want to manage. Beginners usually do best with cocoon/rectangle-based cardigans, simple panel builds, or a clearly written top-down raglan.

- Key points:
- Less shaping doesn’t eliminate fit work—it shifts the work to gauge, ease, and sleeve comfort.
- More seams can look structured, but they demand better alignment and consistent tension.
| Method | What you crochet | Why beginners like it | Watch-outs |
|---|---|---|---|
| Cocoon / rectangle-based | one or two big rectangles, folded and seamed | simple shapes, fewer “math” moments | sleeves/armholes can feel bulky if fabric is too stiff |
| Panels | separate back/front panels + sleeves | classic sweater structure, easy length adjustments | seaming needs careful alignment to avoid twisting |
| Top-down (raglan/yoke) | start at neckline, build body and sleeves downward | try-on-as-you-go fit control | shaping details vary widely; follow pattern instructions closely |
- Boundary conditions:
- “No-sew” claims depend on the pattern; many “minimal sew” styles still need some joining.
- Stitch choice and yarn weight can change drape and how seams behave.
Once you pick your method, it’s much easier to choose yarn, hook, and a stitch pattern that creates the fabric you want to wear.
Cocoon and rectangle-based cardigans
Cocoon and rectangle-based cardigans are beginner-friendly because the main pieces are simple shapes, and the garment takes form through folding and seaming.
- Key points:
- Great for a first wearable if you prefer straightforward repetition.
- Fit often depends on fabric drape and how roomy you want the sleeves to feel.
- Boundary conditions:
- A stiff stitch + bulky yarn can create a boxy, heavy cardigan; swatch for drape.
From here, decide whether you want a more structured look (panels) or more fit control (top-down).
Panel cardigans
Panel cardigans are a classic “sweater-making” approach: you crochet pieces, then join them into a garment.
- Key points:
- Easy to customize length by adding rows to panels.
- Seaming gives structure, but it requires careful alignment.
- Boundary conditions:
- If your stitch pattern is thick, seams can get bulky—plan seam placement and tension.
If you’re willing to seam carefully, panels can look very polished with the right finishing.
Top-down cardigans
Top-down cardigans shine when you want to check fit as you go and adjust length without reworking finished pieces.
- Key points:
- You can often try on early and adjust body/sleeve length as you crochet.
- Patterns vary: some use raglan increases, others use yokes or different shaping schemes.
- Boundary conditions:
- Neckline and shoulder shaping varies widely; rely on the pattern schematic and try-on checkpoints.
With your method selected, the next step is choosing yarn and tools that help you hit gauge and get the fabric behavior you want.
Quick pick rules: if you want X, choose Y
Use these shortcuts to decide quickly:
- If you hate seaming: choose top-down (or a cocoon style with minimal joins).
- If you want the most “classic sweater” structure: choose panels.
- If you want the simplest shapes and repetition: choose cocoon/rectangle-based.
- If fit surprises stress you out: choose top-down so you can try on earlier.
- Boundary conditions:
- Even “simple” methods still need gauge discipline for sleeves and overall length.
Now that you’ve chosen a path, let’s set up your yarn, hook, and tools for success.
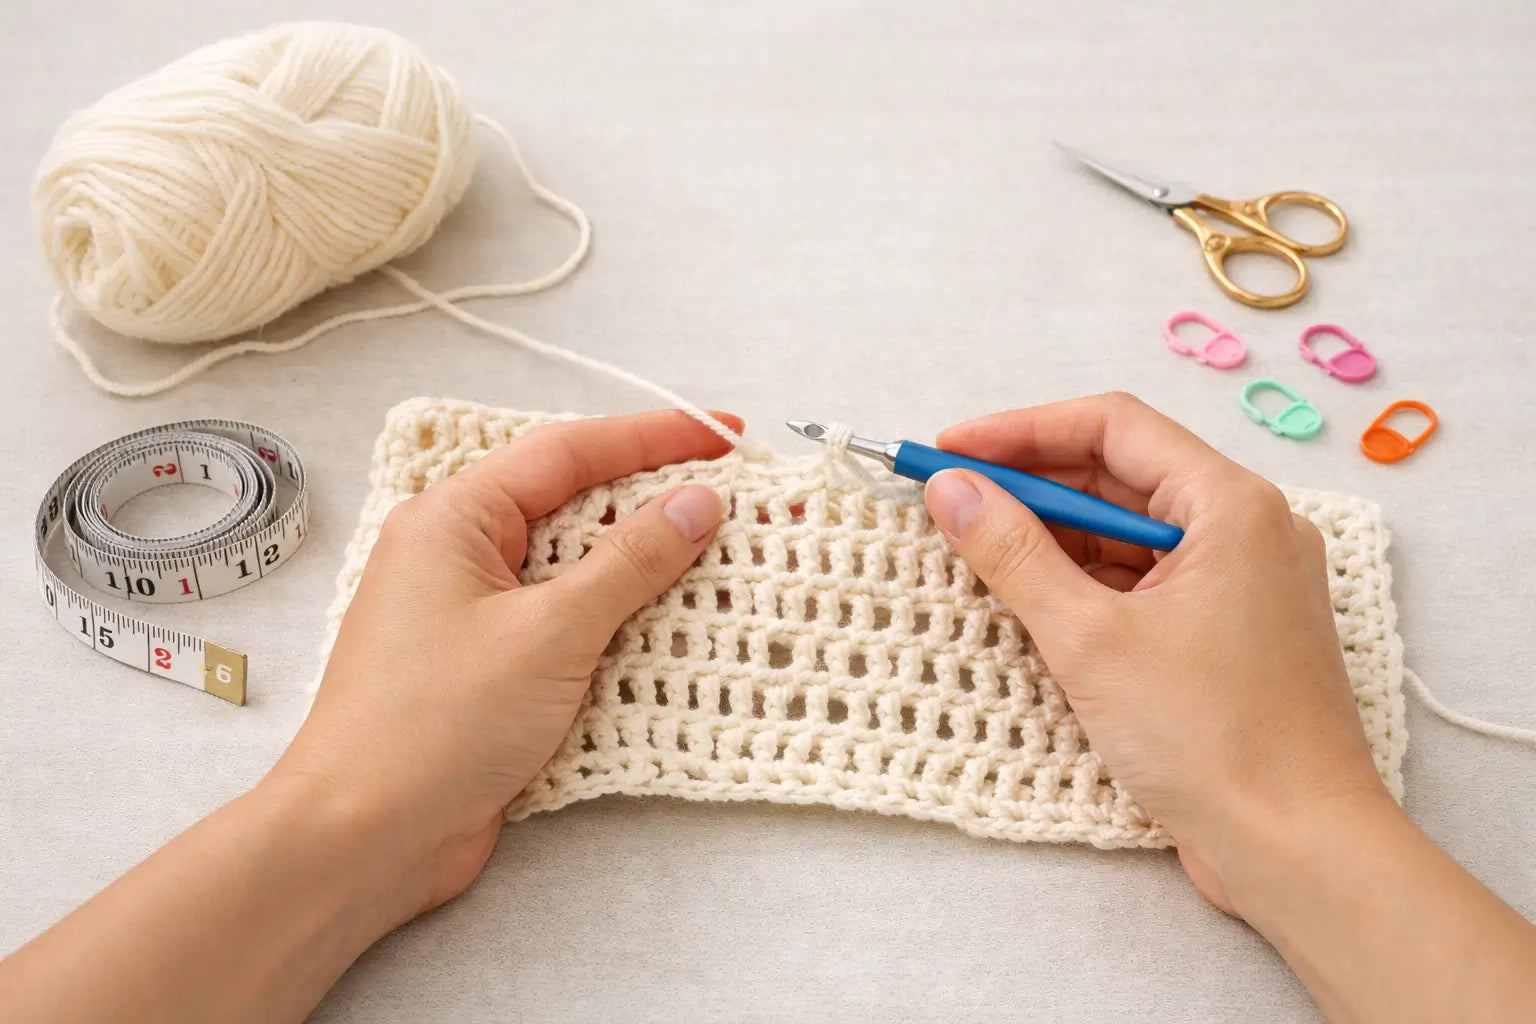
Tools and yarn checklist for a cardigan
Start with the pattern’s gauge information whenever you have it, then choose yarn and hook size to create the drape (or warmth) you want. Your tools list is simple, but your yarn-and-hook choices control the entire project.
- Key points:
- Yarn weight labels and hook-size charts are guidelines; your swatch is the truth.
- A garment needs measuring tools and markers more than small projects do.
- Essential tools checklist:
- Crochet hook(s) in a starting size + one smaller + one larger
- Measuring tape + ruler
- Stitch markers
- Tapestry needle
- Scissors
- Optional: row counter, blocking pins/mat (depending on fiber and finishing plan)
- Evidence links (standards/education):
- Yarn weight categories and typical hook size ranges: Craft Yarn Council – Standard Yarn Weight System
- Hook sizing and the “swatch, then adjust hook size” rule: Craft Yarn Council – Hooks & Needles
- Boundary conditions:
- Exact yardage and hook size depend on the pattern’s gauge and stitch pattern.
- Fiber and blocking can change measurements; plan to test with a swatch.
With your toolkit ready, you’ll get better results if you choose yarn for fabric behavior first, then confirm gauge.
Yarn choice for drape versus warmth
Choose yarn for the fabric you want to wear, not just for how it looks in the skein.
- Key points:
- Lighter yarns and airier stitches usually create more drape.
- Heavier yarns and denser stitches usually create more warmth and structure.
- Fiber matters: some fibers relax with blocking; others hold shape.
- Quick guidance:
- If you want a flowy cardigan: lean toward yarns that produce a flexible fabric and avoid overly dense stitch patterns.
- If you want a warmer, sturdier cardigan: choose yarn/stitch combinations that create a denser fabric.
- Boundary conditions:
- Two yarns with the same “weight” label can behave differently by fiber content and twist; swatch before committing.
Once you pick yarn behavior, hook size becomes a practical gauge-matching problem rather than guesswork.
Hook size: start from gauge, not guesses
The best starting hook size is the one the pattern uses for its gauge, and the correct hook is the one that matches your swatch to the pattern gauge.
- Key points:
- If your swatch is larger than the pattern gauge, try a smaller hook.
- If your swatch is smaller, try a larger hook.
- Re-swatch after any change; don’t “adjust later” and hope it works out.
- Evidence link:
- Boundary conditions:
- Gauge must be measured in the exact stitch pattern used in the cardigan.
Now that your tools and yarn are planned, sizing becomes the next big decision—especially how much ease you want.
Notions that matter for garments
Garments are easier when you can measure and track accurately.
- Key points:
- Stitch markers help you keep symmetry and track size lines.
- Measuring tools prevent “looks right” sizing errors.
- Boundary conditions:
- Buttons and pocket materials are optional and pattern-dependent.
With your supplies ready, you can choose a size and fit style that matches how you’ll wear the cardigan.
Sizing and ease for a cardigan that fits
Pick a size based on finished garment measurements (not just the label), decide your ease, then confirm everything with gauge. This keeps you from crocheting a whole cardigan only to discover it’s the wrong size.
- Key points:
- Measurements + ease determine your target finished dimensions.
- Gauge is what turns those dimensions into stitch and row counts.
- A simple sizing workflow:
- Measure your body (chest/bust, upper arm, body length, sleeve length).
- Decide your ease (fitted, relaxed, or oversized).
- Choose a pattern size using finished measurements and the schematic if available.
- Swatch for gauge in the cardigan stitch pattern.
- Reconfirm size choice after you see your real gauge and fabric drape.
- Boundary conditions:
- Stitch patterns and fibers stretch differently; “same size” can feel different across designs.
- Adjusting length/width changes yarn needs; avoid universal yardage claims.
With sizing decisions made, you’re ready to take the measurements that matter most and translate them into a plan.
Measurements to take for a cardigan
You can size most cardigans well with a small set of measurements.
- Key points:
- Chest/bust: controls overall body width.
- Upper arm: controls sleeve comfort.
- Body length and sleeve length: control proportions and wearability.
- Boundary conditions:
- Measure with the type of layers you plan to wear underneath (if relevant).
Once you have measurements, ease is the difference between “wearable” and “why doesn’t this fit like I expected?”
Ease explained in plain language
Ease is simply how much bigger (or sometimes smaller) the finished garment is compared to your body measurements.
- Key points:
- Positive ease = roomier fit (common in cardigans).
- Less ease = more fitted look, but requires more accurate gauge and shaping.
- Boundary conditions:
- Ease targets are pattern-specific; use the designer’s finished measurements if available.
After ease, the most reliable way to choose a size is to use finished measurements and schematics instead of labels.
Choosing a size using finished measurements and schematics
Finished measurements tell you what the cardigan will measure, which is what matters for fit.
- Key points:
- If you’re between sizes, decide whether you want more ease (size up) or a closer fit (size down), then verify with gauge and drape.
- Look for a schematic or a finished measurement table whenever possible.
- Boundary conditions:
- If a pattern doesn’t list finished measurements, swatch early and proceed cautiously.
Once the size is set, safe adjustments are about changing length/width without breaking symmetry or construction logic.
Adjusting length and width safely
Most cardigan patterns allow safe customization if you change length/width in controlled places.
- Key points:
- Add length by adding rows/rounds where the pattern repeats cleanly.
- Keep left/right and front/back changes symmetrical.
- Boundary conditions:
- Changing stitch pattern or repeats can change drape and yarn needs; swatch again if you make big changes.
Now let’s lock in the single biggest factor in cardigan fit: gauge.
Gauge swatch and fit troubleshooting
Gauge determines the finished size, so a swatch is not optional for wearables—it’s your fit insurance. If your cardigan is turning out too big or too small, you can usually fix it by adjusting hook size (first), then yarn choice or stitch count strategy (depending on the pattern).

- Key points:
- Measure gauge in the exact stitch pattern used in the cardigan body.
- Compare your swatch to the pattern gauge before you commit to the full garment.
- Adjust hook size and re-swatch until the fabric and size are acceptable.
- Evidence links (measurement and adjustment guidance):
- Swatch and adjust hook size to match pattern gauge: Craft Yarn Council – Hooks & Needles
- How to make and measure a larger swatch for accuracy: Lion Brand – Gauge Swatch 101
- Boundary conditions:
- Blocking and fiber behavior can change gauge; if you plan to wash/block the finished cardigan, test your swatch similarly.
- Your tension can differ from the designer’s even with the same hook and yarn.
Once you understand what gauge means and how to measure it, troubleshooting becomes a simple diagnose-and-adjust loop.
What gauge means for crochet garments
Gauge is the number of stitches and rows you get per measurement (often given over 4 inches/10 cm), using a specific yarn, hook, and stitch pattern.
- Key points:
- If your gauge is different, your finished cardigan dimensions will be different.
- Gauge also affects drape: “same size” can feel stiffer or looser depending on your fabric.
- Boundary conditions:
- Gauge is personal; even small tension differences matter more in garments.
With that definition, the practical skill is swatching in a way that produces an accurate measurement.
How to swatch and measure correctly
A good garment swatch is big enough to measure the center area without edge distortion.
- Key points:
- Swatch in the exact stitch pattern used in the cardigan.
- Make the swatch larger than the measuring area (so edges don’t skew results).
- Lay it flat without stretching and measure the center.
- If you plan to wash/block the finished cardigan, treat the swatch the same way.
- Evidence link:
- Boundary conditions:
- Different fibers can relax or tighten with blocking; test first if you’re unsure.
Once you can measure accurately, fixing “too big” or “too small” becomes straightforward.
If your cardigan is too big or too small: a simple fix flow
Most sizing surprises come from gauge mismatch, and the first fix is usually a hook-size change.
- Key points:
- Too big (fabric too loose / too many inches): try a smaller hook, then re-swatch.
- Too small (fabric too tight / not enough inches): try a larger hook, then re-swatch.
- If the fabric feel is wrong even when size is right: consider yarn or stitch pattern changes (then swatch again).
- Boundary conditions:
- Some patterns include explicit “if you can’t match gauge” modification guidance—use that when available.
With troubleshooting in hand, a short checklist helps you avoid the most common gauge mistakes.
Common gauge mistakes to avoid
- Skipping the swatch entirely.
- Swatching in a different stitch pattern than the cardigan uses.
- Measuring the edges instead of the center.
- Stretching the swatch while measuring.
- Changing hook, yarn, or tension mid-project without rechecking gauge.
- Ignoring how washing/blocking changes measurements.
- Boundary conditions:
- If a fiber changes a lot with blocking, treat the swatch like the final garment before deciding.
With gauge locked in, you can choose stitches that create the cardigan fabric you actually want to wear.
Stitch choices for drape, warmth, and ribbing
The best stitch for a cardigan is the one that produces the fabric behavior you want—drape, warmth, stretch, and stability—at a gauge you can reliably achieve. Use a larger swatch to compare fabrics before committing.
- Key points:
- Denser stitches usually feel warmer and more structured.
- More open stitches can feel lighter and drapier but may need stabilization at edges.
- Ribbing/edging needs structure to keep openings from stretching out.
| Stitch family (example behaviors) | Fabric feel | Good for | Watch-outs |
|---|---|---|---|
| Simple, even stitches | smooth, consistent | first wearables, easy counting | can feel stiff if too dense |
| Textured stitches | thicker, cozy | warm cardigans, visual interest | uses more yarn/time (qualitatively) |
| Open/lacy stitches | lighter, drapier | spring layers, airflow | needs stable edging; can stretch |
| Ribbing-style stitches | elastic, structured | cuffs, hems, front bands | can pull in; match tension carefully |
- Boundary conditions:
- Stitch behavior depends on yarn, hook, and tension; swatch is the truth.
With a stitch strategy, it’s easier to choose edging methods that finish cleanly and hold shape.
Stitch decision table for cardigan fabric
Use this quick table to choose based on how you want the cardigan to feel.
- Key points:
- If you want drape, prioritize flexibility and avoid overly dense fabric.
- If you want warmth, prioritize density and thickness.
- Boundary conditions:
- Make a larger swatch than you think you need; garment-scale drape is different from coaster-scale drape.
After the body fabric, think about ribbing and edging as “structure,” not decoration.
Ribbing and edging stitches that work
Edging matters because cardigans have openings and edges that want to stretch.
- Key points:
- Use edging that adds structure to the front opening and hems.
- Test edging on a small sample to see whether it flares or pulls in.
- Boundary conditions:
- Some edging methods stretch more than expected; small tests prevent big rework.
With stitch and edging choices made, quick swatch tests can confirm drape and stretch before you start the full cardigan.
Quick swatch tests for drape and stretch
A few simple tests can reveal whether your fabric will feel good as a garment.
- Key points:
- Hang test: hold the swatch by one edge and see how it falls.
- Stretch test: gently stretch widthwise and lengthwise; note recovery.
- Wash/block test (if relevant): see how the fabric changes after finishing.
- Boundary conditions:
- Always test with the same yarn and hook you’ll use for the cardigan.
With decisions confirmed, the full build sequence becomes a predictable set of steps rather than a mystery.
Start-to-finish cardigan roadmap with checkpoints
A cardigan build is easiest when you treat it as a sequence with checkpoints: measure, swatch, build, check fit early, then finish. This section expands the roadmap and shows where to pause to prevent major rework.
- Key points:
- Checkpoints are most important before sleeves and before finishing.
- Different construction methods move checkpoints earlier or later.
- The universal cardigan build sequence:
- Choose method and pattern (or target gauge + finished measurements).
- Measure and decide ease.
- Swatch for gauge in the project stitch pattern.
- Start body/yoke and confirm width early.
- Confirm armhole or sleeve separation points before committing.
- Build sleeves and confirm upper-arm comfort early.
- Assemble (if needed) and do a full try-on.
- Add edging/ribbing to stabilize openings.
- Weave ends, block appropriately, and add optional details.
- Boundary conditions:
- Some patterns require strict step order; follow the pattern if it conflicts with this general roadmap.
Once you know the universal sequence, it helps to identify where your chosen method typically allows (or doesn’t allow) try-on fitting.
The universal cardigan build sequence
The key to a smooth first cardigan is to “test fit early” rather than hoping it works at the end.
- Key points:
- First checkpoint: body width/length (before sleeves or heavy finishing).
- Second checkpoint: sleeve comfort (before you commit to the second sleeve).
- Third checkpoint: full try-on after assembly (before weaving ends and blocking).
- Boundary conditions:
- Some methods don’t allow try-on until seaming; plan for extra measuring.
With checkpoints in mind, method-specific timing becomes easier to predict.
Try-on checkpoints by construction method
Different methods change when you can check fit.
- Key points:
- Top-down: try on early and adjust length as you go.
- Panels: check piece measurements against target dimensions before seaming.
- Cocoon/rectangle: check drape and sleeve openness before finishing edges.
- Boundary conditions:
- If try-on isn’t possible yet, measure pieces carefully and compare to your target finished measurements.
If your method involves seaming or sleeve attachment, the next section helps you keep joins neat and comfortable.
Assembly: seaming and attaching sleeves neatly
Neat assembly is mostly alignment plus consistent tension. If you mark key points, attach sleeves evenly, and try on before final closure, your cardigan will look dramatically more polished.
- Key points:
- Align first (markers and stitch counts), then seam.
- Check symmetry early—don’t wait until both sleeves are attached.
- Simple assembly steps:
- Lay pieces flat and align edges; use markers to match key points (underarm, shoulder, sleeve top).
- Attach sleeves starting at the underarm point; distribute any extra stitches evenly.
- Seam with consistent tension; pause to check the right side for neatness.
- Try on before weaving ends so you can fix issues easily.
- Boundary conditions:
- Seam choice depends on stitch thickness and yarn bulk.
- Some top-down patterns minimize seaming; adapt these steps accordingly.
Good assembly sets you up for finishing that stabilizes edges and makes the cardigan look “wearable,” not unfinished.
Prep pieces before you seam
Prep is what prevents twisted sleeves and lumpy joins.
- Key points:
- Use markers to match key points before stitching anything together.
- Lay pieces flat to spot uneven edges early.
- Boundary conditions:
- Blocking can help alignment, but fiber response varies; test on a swatch if unsure.
After prep, sleeve attachment becomes a simple alignment problem rather than a guess.
Sleeve attachment steps that look neat
Sleeves look best when they’re attached symmetrically and evenly.
- Key points:
- Mark the underarm point and the sleeve top.
- Match those points first, then distribute the rest evenly.
- Keep tension consistent so the join doesn’t pucker.
- Try on after one sleeve to confirm comfort before attaching the second.
- Boundary conditions:
- Some patterns build sleeves in the round; adapt steps accordingly.
If seams look bulky or uneven, a few small fixes can prevent a full redo.
Quick fixes for bulky or uneven seams
Most seam issues are alignment or tension issues.
- Key points:
- Bulky seam: reduce tension slightly and avoid stacking stitches into the same spot.
- Uneven seam line: re-mark key points and re-seam a small section.
- Twisted sleeve: remove the join early and reattach with clear top/underarm markers.
- Boundary conditions:
- If the issue is structural, fixing it early is faster than “hiding it” with edging later.
Once your cardigan is assembled, finishing choices determine whether the front opening stays stable and the fabric looks intentional.
Finishing: edging, blocking, button bands, pockets
Finishing makes a cardigan look complete: it stabilizes openings, improves drape, and cleans up ends and edges. Keep finishing systematic and fiber-safe.
- Key points:
- Stabilize the front opening and hems so they don’t stretch out.
- Weave ends cleanly before blocking so nothing loosens later.
- Finishing checklist:
- Weave in ends neatly (especially at seams and edge transitions).
- Add edging/ribbing to cuffs, hem, and front opening as needed.
- Do a full try-on before final trimming and blocking.
- Block appropriately for the fiber to improve drape and settle stitches.
- Boundary conditions:
- Blocking method depends on fiber; test on a swatch first if you’re unsure.
- Button spacing, pocket placement, and exact counts depend on the pattern and size.
With finishing in mind, a tight checklist helps you avoid common “it looks homemade” issues.
The finishing checklist that makes it look wearable
A cardigan looks better when finishing is intentional and consistent.
- Key points:
- Use the same edging approach on both fronts so the opening hangs evenly.
- Clean ends and stable edges do more for polish than “fancy” stitches.
- Boundary conditions:
- Optional details (buttons, pockets) may require extra stabilization depending on fabric stretch.
If you’re unsure whether blocking is necessary, a quick test on your swatch gives you the answer safely.
Blocking: when it helps and how to be fiber-safe
Blocking is most useful when you want the fabric to relax, even out, and drape better.
- Key points:
- Block if your fabric needs to settle or your measurements need slight adjustment.
- Test first on a swatch if the fiber response is unknown.
- Boundary conditions:
- Different fibers respond differently; avoid assuming one method works for everything.
Once you’ve stabilized edges, optional details like button bands and pockets should be treated as “structure” additions.
Optional details: button bands and pockets
Button bands and pockets are easiest when you plan for stability.
- Key points:
- Use edging that supports the front opening before adding buttonholes.
- Reinforce pocket attachment points if the fabric is stretchy.
- Boundary conditions:
- Exact spacing and stitch counts depend on the pattern and size.
With the build complete, it helps to set expectations—especially if this is your first wearable.
Beginner reality check: difficulty, easiest first cardigan, common mistakes
A beginner can absolutely crochet a cardigan, but it feels “hard” when you skip gauge, pick an overly stiff fabric, or choose a pattern that’s unclear about sizing. The easiest first cardigan is usually a simple construction method plus a simple stitch pattern and disciplined checkpoints.
- Key points:
- Most cardigan difficulty comes from fit control, not from the basic stitches.
- A “simple-looking” cardigan can still fail if gauge is ignored.
- What makes cardigans feel hard:
- Fit and ease decisions (choosing the right size and silhouette)
- Gauge mismatch (causing big size surprises)
- Seaming and sleeve attachment (alignment and tension)
- Project stamina (it’s a longer project than a scarf)
- Boundary conditions:
- Difficulty varies by stitch complexity, seaming tolerance, and size.
- “Beginner-friendly” labels vary; use your own checklist and swatch results.
If you want a confidence-boosting start, the next three mini sections tell you how to choose a first-cardigan path that matches your style.
Can a beginner crochet a cardigan
Yes—especially if you choose a simple construction and treat gauge as non-negotiable.
- Key points:
- Choose a beginner-friendly method (cocoon/rectangle, simple panels, or a well-written top-down).
- Choose a simple stitch you can do consistently.
- Swatch and measure before committing.
- Boundary conditions:
- Skipping gauge is the fastest path to a disappointing fit.
If you understand what drives difficulty, you can avoid most first-cardigan frustrations.
What makes cardigans feel hard
Cardigans aren’t hard because of “advanced stitches”—they’re hard when fit control is missing.
- Key points:
- Gauge mismatch causes the biggest problems.
- Seaming feels hard when alignment isn’t marked.
- Boundary conditions:
- A low-shaping method can make a first cardigan surprisingly manageable.
With that in mind, choosing the “easiest path” is about matching your tolerance for seaming and your desire for try-on fit control.
The easiest first-cardigan paths
Pick a path that fits your preferences:
- Key points:
- If you want simplest shapes: cocoon/rectangle-based.
- If you want classic structure: panels (and accept seaming).
- If you want fit control: top-down (and follow shaping instructions closely).
- Boundary conditions:
- Your best first cardigan is the one you’ll actually finish; choose the path that fits your patience.
If you’re using a pattern (recommended), a few reading tips prevent the most common “US vs UK” and size-line mistakes.
Pattern selection and reading tips including US versus UK terms
You’ll have a smoother cardigan project if the pattern includes finished measurements, clear gauge instructions, and a schematic. The most common beginner trap is assuming terminology (US vs UK) without checking the pattern key.
- Key points:
- Choose patterns with clear sizing, gauge, and construction steps.
- Always read the pattern key and terminology notes before you start.
- Track your size line with markers and notes.
- Evidence link (terminology standards):
- Boundary conditions:
- Abbreviations vary by designer; verify with the pattern’s own key.
- Some patterns mix terminology; confirm before crocheting.
With a good pattern and clear terminology, your project becomes far more predictable.
How to choose a beginner-friendly cardigan pattern
Beginner-friendly usually means “clear, repeatable, and well-graded,” not just “simple-looking.”
- Key points:
- Clear construction method explanation (and ideally a schematic)
- Finished measurements and intended ease
- A stated gauge in the stitch pattern used
- Multi-size instructions that are easy to track
- Boundary conditions:
- “Beginner” tags aren’t consistent; use this checklist rather than the label.
Once you’ve chosen a pattern, terminology is the next place beginners get tripped up.
US versus UK terms and abbreviations: avoid the common trap
US and UK crochet terms can name the same stitch differently.
- Key points:
- Check whether the pattern uses US or UK terms before you start.
- Use the pattern key as the source of truth.
- Evidence link:
- Boundary conditions:
- Don’t assume based on where the designer lives; always verify.
After terminology, tracking the correct size line is what prevents “I accidentally followed the wrong size” mistakes.
Following size grading without getting lost
You can make size grading easier with simple tracking habits.
- Key points:
- Highlight or circle your size counts before you crochet.
- Place markers at repeat boundaries and key shaping points.
- Write down your row/round count at checkpoints.
- Boundary conditions:
- If an instruction is unclear, pause and re-read before continuing; mistakes multiply in garments.
With the roadmap and decision tools in hand, the FAQ below answers the most common quick questions people ask before starting.
FAQ
-
Q: Can I crochet a cardigan as a beginner?
A: Yes—if you pick a simple construction method, use a simple stitch, and swatch for gauge early. The “easy” part is the stitching; the “hard” part is fit, so treat measuring and gauge as part of the project. -
Q: Are cardigans hard to crochet?
A: They can feel hard when sizing, gauge, and seaming aren’t managed. If you choose a low-shaping method and add a couple of try-on checkpoints, most beginners find the process manageable. -
Q: What crochet stitch is best for a cardigan?
A: The best stitch is the one that gives you the fabric behavior you want (drape, warmth, stretch) at a gauge you can match consistently. Swatch two stitch options and pick the fabric you’d actually want to wear. -
Q: What are the easiest crochet cardigan styles for a first wearable?
A: Cocoon/rectangle-based and simple panel cardigans are often easiest because the shapes are straightforward. Top-down can also be beginner-friendly if the pattern is very clear and you like trying on as you go. -
Q: What is gauge in crochet, and why does it matter for a cardigan?
A: Gauge is how many stitches and rows you get per measurement using a specific yarn, hook, and stitch pattern. It matters because different gauge changes the finished size and fit of the cardigan. -
Q: How do I fix a crochet cardigan that’s turning out too big or too small?
A: Stop early, measure your gauge in the project stitch, and adjust hook size (smaller for too big, larger for too small), then re-swatch. If the fabric feel is wrong even when size is right, consider yarn or stitch changes and swatch again. -
Q: Do I need to block a crochet cardigan sweater?
A: Often yes—blocking can help the fabric relax, even out stitches, and improve drape. Whether and how you block depends on fiber type, so test on your swatch first if you’re unsure.
If you follow the method → gauge → checkpoints approach, most “first cardigan” problems become small fixes instead of project-ending surprises.
Summary and next steps
A cardigan is easiest when you decide first (method, fabric behavior, size), then swatch for gauge, then build with checkpoints.
- Key takeaways:
- Choose a construction method that matches your seaming tolerance and fit-control needs.
- Swatch gauge in the exact stitch pattern you’ll use, and adjust hook size early.
- Choose size by finished measurements and ease, then confirm with gauge.
- Use checkpoints (body width, sleeve comfort, post-assembly try-on) to prevent rework.
- Stabilize edges with finishing; blocking is fiber-dependent, so test first.
- A simple next-action checklist:
- Pick your method (cocoon, panels, or top-down).
- Choose yarn for drape vs warmth, then pick a starting hook size.
- Swatch gauge, measure accurately, and adjust hook size.
- Choose size using finished measurements and ease.
- Start crocheting with checkpoints and finish with stable edging.
If you’re turning a cardigan concept into a repeatable product spec (for example, a crochet-inspired knitwear style), document the essentials first: construction method, target measurements, intended ease, yarn/fiber intent, gauge target, stitch pattern notes, and finishing details. When you reach out to a manufacturer for a quote, include your tech pack (or a clear spec sheet), quantity, size range, and target ship date so they can assess feasibility and timelines accurately.