
Sweater Mittens Pattern: Print, Cut, Sew (With Lining + Fit Fixes)
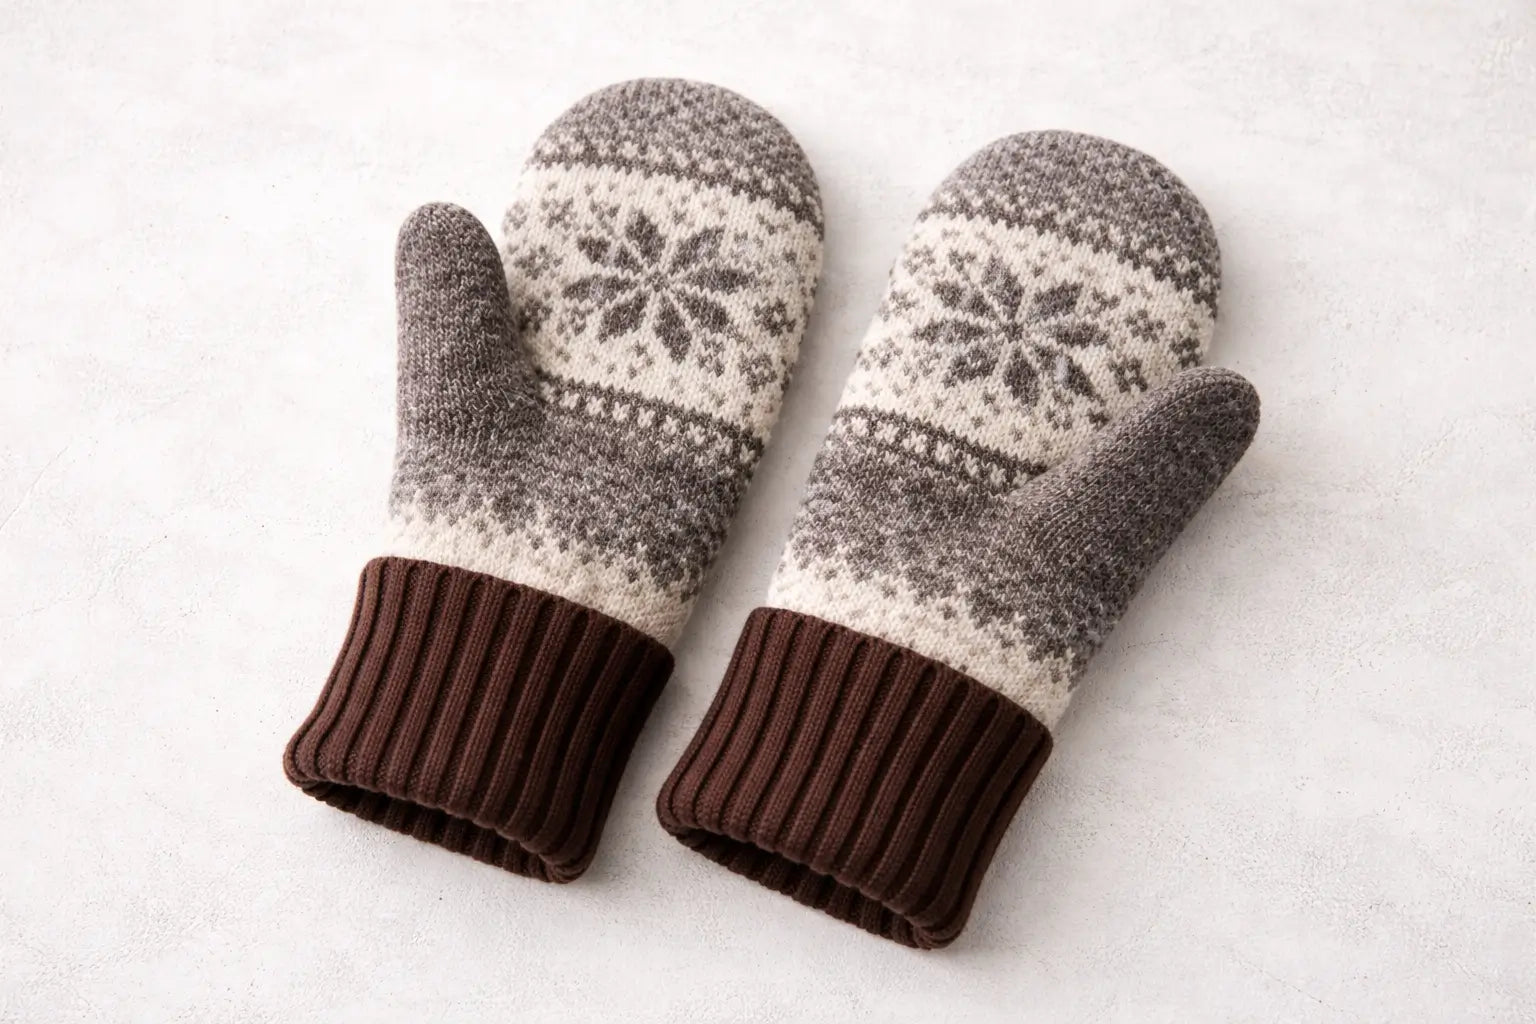
Want cozy mittens from an old sweater? The easiest path is a printable mitten pattern plus a quick scale check, then a simple “cut and sew” build. Fit is rarely “perfect on the first try” because sweater thickness and stretch vary—so plan on a fast paper test-fit and small tweaks.
If you’re deciding whether to felt the sweater or add a fleece lining, the comparisons below will help you choose the simplest route that still feels warm.
How to Make Sweater Mittens With a Printable Pattern
Quick Steps (Print → Cut → Sew → Finish)
- Choose a sweater with a dense knit (wool often works best); wash it first.
- (Optional) Felt the sweater to make it thicker and more stable.
- Print the mitten pattern at 100% / Actual Size and measure the test box if provided.
- Pick a size (or do a quick hand paper test-fit), then cut mirrored mitten pieces.
- Sew around the mitten shape, leaving the wrist open; clip curves at the thumb.
- Add cuffs and (optional) sew a fleece lining as a second mitten, then insert it.
- Turn right-side out, reinforce stress points, and test the fit—adjust next time if needed.
Fast Answer Box (Checklist + Mini Table)
Pattern success checklist (do this before cutting the sweater):
- Print at 100% / Actual Size (avoid “Fit to page”).
- Measure the test square (often 1–2 inches) with a ruler.
- Do a quick paper “hand check” (can you wiggle fingers and bend your thumb?).
- If you’re adding lining or using a thick sweater, you may need a little extra room.
| Your choice | Why you’d pick it | What to watch for |
|---|---|---|
| Felted sweater | Warmer, denser, easier to cut cleanly | Less stretch → fit can feel tighter; shrink varies |
| Not felted | Softer stretch, less shrink risk | Can feel thinner; seams may stretch more |
| Add fleece lining | Big warmth boost | Bulk at thumb/wrist → clip/trim carefully |
Boundary conditions
- A “correct” pattern can still fit differently depending on sweater stretch, thickness, and seam allowance.
- Felting/shrinkage is not identical across fibers and blends.
Choose a Sweater (and Decide Whether to Felt It)

Best Sweater Traits (Quick Bullets)
Look for these traits to make sewing easier and the mittens warmer:
- Dense knit + decent thickness (less “floppy” mitten and better wind resistance).
- Not overly stretchy (stretchy knits can distort while sewing and change the final fit).
- Good condition (avoid thin elbows, moth holes, and worn cuffs unless you plan to patch).
- Enough clean area to cut two mirrored mitten shapes plus cuffs/lining if desired.
Felted vs Not Felted (Comparison Table)
Felting (sometimes called “fulling” in knitting contexts) happens when wool fibers interlock under moisture, heat, and mechanical action, causing shrinkage and a denser fabric.
| Option | Pros | Cons | Best for |
|---|---|---|---|
| Felted (shrunk/densified) sweater | Warmer; edges fray less; fabric is more stable to cut | Less stretch; sizing is less forgiving; degree of shrink varies by fiber/blend | Outdoor warmth, sturdier “work mitten” feel |
| Not felted sweater | Softer stretch; less surprise shrink | Can be thinner; seams may stretch; edges can curl | Indoor/quick projects, softer feel |
Simple Prep (Wash, Dry, Plan the Cut)
- Wash and dry first so you don’t get surprise shrink after sewing.
- If you plan to felt: start with a sweater you’re okay experimenting on, and consider testing a small section first.
- Lay the sweater flat and “map” your best fabric zones (avoid bulky side seams unless you want them as a design feature).
Get the Pattern + Print It at the Right Size (Scale Check)

Printing errors are the #1 reason mittens come out too small or oddly proportioned. Many PDF sewing patterns include a test square (often 1–2 inches). Print one page first and measure it with a ruler before committing to the full pattern.
Print-Scaling Checklist (Do This Before Cutting)
- Open the PDF in a reliable viewer (many pattern makers recommend printing from a standard PDF reader).
In print settings:
- Choose Actual Size or set scale to 100%.
- Turn off “Fit to page” or “Scale to fit”.
Print the page with the test square first and measure it:
- If it’s off, adjust settings and reprint until it matches.
Tape/assemble pattern pages only after the scale is correct.
Pick a Size (and Add Ease for Thick Sweaters or Lining)
- Start with the pattern size that matches your hand measurement (or do a quick paper test-fit).
- If the sweater is thick or you’re adding a fleece lining, you may need a bit more ease—especially at:
- Wrist opening (so you can pull the mitten on comfortably)
- Thumb curve area (so your thumb can bend)
A simple test: wrap the paper pattern around your hand (or trace your hand) and confirm you can bend your thumb without the paper “pinching.”
No Pattern? Trace-Your-Hand Fallback (Beginner Method)
If you can’t access a printable template, you can draft a simple mitten shape:
- Place your hand on paper with fingers together and thumb relaxed.
- Trace around it, leaving extra room (a little “air gap”) for comfort.
- Add seam allowance all the way around.
- Round the thumb area instead of making sharp angles (sharp corners feel tight after turning).
Tools and Materials Checklist (Beginner-Friendly)
You don’t need fancy gear, but thick sweaters behave differently than quilting cotton. Test your stitch on a scrap first.
Must-have
- Sweater (one you can cut up)
- Paper pattern + printer (or hand-tracing method)
- Scissors (or rotary cutter + mat)
- Pins or clips
- Needle + strong thread
Optional (helpful)
- Sewing machine (faster and usually more durable)
- Fleece for lining (warmth boost)
- Seam ripper (everyone needs it)
- Fabric marker or chalk
- Fabric adhesive (for no-sew versions; durability varies)
Optional but Helpful (Clips, Walking Foot, Thimble)
- Clips can hold thick knits without distorting them.
- A walking foot (if you have one) can help feed bulky layers evenly.
- A thimble makes hand-sewing through thick seams much easier.
Cut the Sweater Pieces (Placement Tips to Avoid Seams/Holes)

Where you cut matters almost as much as how you sew.
- Use the body of the sweater (front/back panels) for the mitten shape when possible.
- Avoid cutting across bulky seams unless you want that bulk and can sew through it comfortably.
- If the sweater has ribbing at the cuffs, consider reusing it for a tidy mitten cuff.
Cutting Checklist (Mirror Pieces + Mark Notches)
- Cut two mirrored outer mitten pieces (left/right).
- If you’re lining:
- Cut two mirrored lining pieces from fleece using the same pattern.
Mark:
- Thumb curve area (if your pattern uses notches)
- Any “fold” lines or cuff placement points
Don’t stretch the knit while cutting—let it lie flat.
Sew the Outer Mittens (Machine + Hand-Sew Options)
If you’re choosing between methods, the table below makes the trade-offs clear.
Step-by-Step: Sew the Mitten Shape (Thumb Curve Tips)
- Place the two outer mitten pieces right sides together (or follow your sweater’s “right side” texture).
- Sew around the mitten shape, leaving the wrist open.
- At the thumb curve:
- Sew slowly and keep the curve smooth.
- After sewing, clip small notches into the seam allowance along the curve (do not cut the stitches). This helps the curve turn and move more comfortably.
- Turn the mitten right-side out and do a quick test-fit before adding lining/cuffs.
Method Comparison Table (Machine vs Hand-Sew vs No-Sew)
| Method | Durability | Speed | Skill | Best use |
|---|---|---|---|---|
| Machine sew | High (with secure seams) | Fast | Beginner–intermediate | Daily use, sturdier mittens |
| Hand sew | Medium–high (with strong stitches + reinforcement) | Slower | Beginner–intermediate | No machine; mindful, controlled sewing |
| No-sew (adhesive) | Low–medium (varies a lot) | Fastest | Beginner | Quick craft, light use, “try it once” |
Reality check: No-sew versions can work for a quick project, but they’re usually less wash-resistant and less durable at stress points (thumb base, side seams). If you want them to last, sewing is the safer bet.
Add Cuffs and Optional Fleece Lining (Warmth Without Bulk)

A fleece lining can make sweater mittens dramatically warmer, but the comfort depends on controlling bulk—especially at the thumb curve and wrist seam.
Lining Without Bulk: Do/Don’t Mini Playbook
Do
- Sew the lining as a separate mitten first, then insert it into the outer mitten.
- Clip curves at the thumb on both outer and lining where needed (carefully).
- Keep seam allowance consistent and trim excess bulk at thick intersections (a little at a time).
- Test-fit after inserting lining before final wrist finishing.
Don’t
- Add thick lining without leaving enough room—bulk steals interior space fast.
- Ignore the thumb curve: that’s where “I can’t bend my thumb” usually starts.
- Stack multiple thick layers at the wrist seam if you can avoid it.
Simple Lining Method (Insert + Secure)
- Sew lining mitten pieces together (leave wrist open).
- Insert lining into the outer mitten (wrong sides together inside).
- Align seams and thumb area, then secure at the wrist opening (stitch around, or secure under the cuff).
This “two mittens into one” approach is common in fleece-lined mitten builds.
Simple Cuff Options (Reuse Sweater Cuffs vs Add Rib Knit)
- Reuse sweater cuffs: Cut the cuff section and attach it to the wrist opening for a clean, stretchy finish.
- Add rib knit: If you have ribbing fabric, sew a cuff tube and attach it like a sleeve cuff.
Tip: keep the wrist opening comfortable—if it’s too tight, you’ll fight the mittens every time you put them on.
Finish Strong: Turn, Topstitch, and Reinforce Stress Points
Finishing is where “cute craft” becomes “actually wearable.”
- Turn right-side out fully and smooth the seam with your fingers (or a blunt tool).
- Optional: topstitch near the edge if your fabric allows (some knits stretch; test first).
- Reinforce stress points:
- Thumb base (high movement)
- Side seams near the palm
- Wrist seam if you pull the mittens on tightly
Fit Fixes and Troubleshooting (Thumb Tight, Wrist Small, Too Loose)
Even with a great pattern, these are the common failure modes—here’s how to fix them.
Common mistakes checklist (quick prevention)
- Skipped the print scale check → pattern printed smaller than intended.
- Cut without mirrored pieces → two “left” mittens.
- Didn’t clip the thumb curve → thumb feels tight after turning.
- Added thick lining without extra ease → mitten feels cramped.
- Sewed while stretching the knit → seams ripple and fit changes.
Symptom → Likely Cause → Fix (Bullet Grid)
-
Thumb feels tight or hard to bend
- Likely cause: curve too sharp, seam allowance too bulky, or not clipped
- Fix: clip small notches into seam allowance at the curve; trim bulk carefully; next time smooth the thumb curve and consider a touch more ease.
-
Wrist opening is too small
- Likely cause: pattern size too small, thick fabric/lining, or tight cuff
- Fix: widen the wrist area next time; choose a stretchier cuff or shorten the cuff height; avoid bulky seam stacks at the wrist.
-
Mittens feel too loose
- Likely cause: stretchy sweater, extra-large seam allowance, or oversized pattern
- Fix: sew a slightly deeper seam (small change), pick a denser sweater next time, or add a snugger cuff.
-
Seams feel bulky/scratchy
- Likely cause: thick layers at seam intersections
- Fix: trim seam allowance in the bulkiest areas (a little at a time); add a lining that feels softer against skin.
Quick Fit Adjustment Table
| Problem | Where to adjust | Small change that helps |
|---|---|---|
| Thumb tight | Thumb curve + seam allowance | Clip curve + trim bulk; next time add a little curve room |
| Wrist too tight | Wrist opening + cuff | Add width at wrist; use a stretchier cuff |
| Too loose | Side seam depth | Sew slightly deeper seam; rely on snug cuff |
| Bulky feel | Seam intersections | Trim/grade seam allowance; avoid stacked layers |
Variations: “Bernie-Style” Look and Easy Design Upgrades
If you want the “upcycled statement mitten” vibe, keep the core fit the same and treat style as a second layer.
5 Easy Variation Ideas (Quick List)
- Contrast palm fabric (use a sturdier scrap for grip).
- Longer cuff (more warmth; also helps a slightly loose mitten fit better).
- Decorative stitching around the cuff (keep it away from the thumb bend zone).
- Patch accents over thin spots (functional + cute).
- Buttons or tabs for a “vintage” look (avoid thick stacking at seams).
FAQ (Printing, Felting, No-Sew, Selling Items Made From Patterns)
-
Q: What seam allowance should I use?
A: Use the seam allowance your pattern specifies first; if it doesn’t, start with a modest seam allowance and test on scraps. Bigger seam allowance can make the mitten smaller inside, especially with thick sweaters or lining. -
Q: Can I make sweater mittens without a sewing machine?
A: Yes—hand-sewing works well if you use strong stitches and reinforce stress points like the thumb base. No-sew adhesive can work for quick crafts, but it’s usually less durable and less wash-friendly than sewing. -
Q: My test square doesn’t measure right—what do I do?
A: Reprint after switching to Actual Size / 100% and disabling “Fit to page,” then measure again with a ruler. Printing one page first is faster than cutting your sweater and discovering the pattern was scaled. -
Q: Should I felt my sweater first?
A: Felting can make wool sweaters denser and warmer, but the amount of shrink varies by fiber and agitation, so treat it as a test-and-observe step. If you’re unsure, start conservative and check the fabric after one cycle. -
Q: Can I sell finished mittens made from a free printable pattern?
A: It depends on the designer’s license terms—some allow selling finished items and some don’t. Check the pattern’s stated permissions, and if selling matters to you, consider using patterns that explicitly allow it or draft your own from a hand tracing.
Need custom knitwear for your brand (not DIY patterns)?
If you’re developing a knitwear line—like sweaters and other knit accessories— Xtclothes.com offers OEM/ODM support from sampling to bulk production, with options for labels and packaging. Share your tech pack or reference photos and target quantity to start a discussion.
)