
How to Make an Ugly Christmas Sweater Pattern (3 Ways): DIY, Digital, and Knit-Style Charts
What an “Ugly Sweater Pattern” Means (and Which Path to Pick)
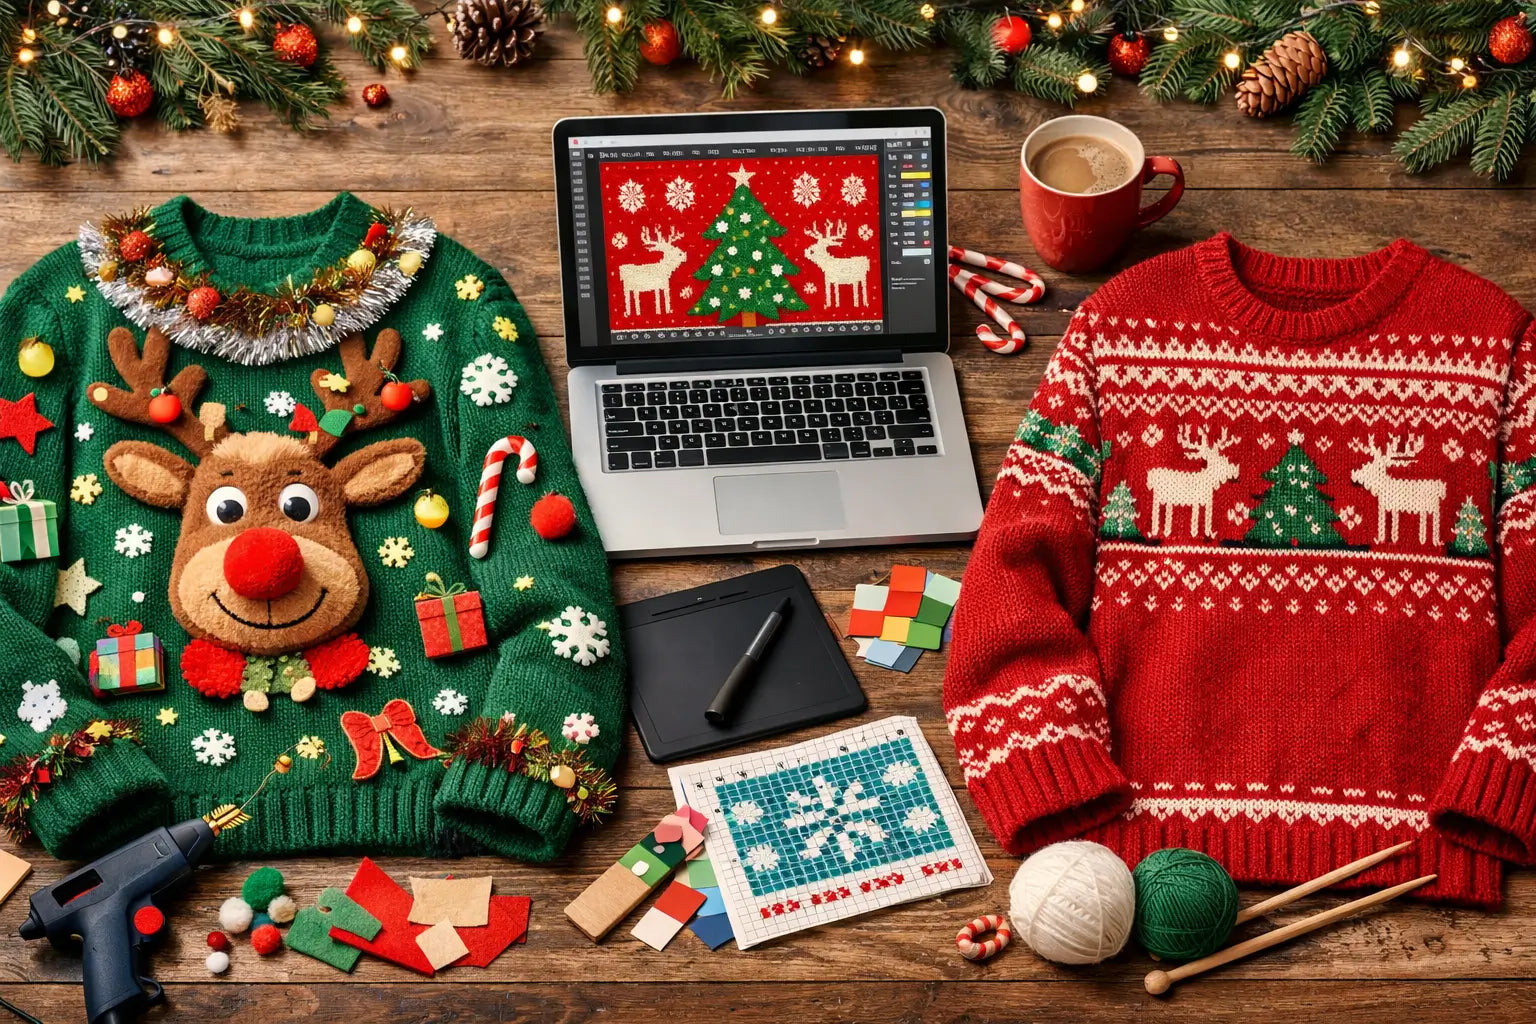
An ugly sweater pattern can mean (1) a decoration plan you assemble on a sweater, (2) a digital artwork layout you place on the sweater panels, or (3) a knit-style chart/repeat you build from motifs on a grid. Pick the path that matches your time, skills, and how many sweaters you need—then test it on a mockup before you commit.
- No-sew DIY (fastest): you need a party-ready sweater tonight.
- Digital layout: you want a cleaner look you can reuse (or order as a custom piece).
- Knit-style chart/repeat: you want the classic “busy patterned” look (even if you won’t literally knit it).
Decision Flow: Pick Your Pattern Path

- Do you need it today? → Yes → No-sew DIY
- Do you want a reusable pattern file (for printing/embroidery/custom orders)? → Yes → Digital workflow
- Do you want the classic knit-pattern look (motifs + borders + repeats)? → Yes → Knit-style chart/repeat
Your Goal → Best Path
| Your goal | Best path | Why it works |
|---|---|---|
| Last-minute party tonight | No-sew DIY | Fastest build, easiest supplies |
| Office contest (need “wow”) | No-sew DIY + knit-style planning | Big center motif + borders reads well |
| One-off custom order | Digital layout | Clean files + predictable placement |
| Team/event multiples | Digital + manufacturer-ready checklist | Easier to reproduce consistently |
| “Authentic knit look” | Knit-style chart/repeat + method choice | Motifs/repeats create that sweater vibe |
No-Sew DIY Ugly Sweater Pattern (Fast Build)
This is the fastest way to “make a pattern” because your pattern is basically: theme + layout plan + what goes where.
Supplies checklist (what you need + easy substitutes)
- Base sweater: thrift store sweater, sweatshirt, cardigan—anything you can glue/sew onto
- Attachment: hot glue, fabric glue, safety pins, needle & thread (even a few stitches help)
- Decorations: felt shapes, pompoms, ribbon, tinsel, lightweight ornaments, googly eyes
- Comfort helpers: soft fabric scrap to cover scratchy backs, bandage tape for poky bits
- Optional lights: battery pack string lights (keep the pack secure and away from skin)
8–10 step no-sew build recipe
- Pick a base sweater you can move in comfortably
- Choose a theme (tree, reindeer, gingerbread, “office meme”)
- Sketch your layout: center motif + borders + filler
- Dry-fit decorations using tape/pins before gluing
- Attach the big shapes first (center motif)
- Add borders (cuffs/hem/neckline stripes or garlands)
- Fill gaps with small repeats (snowflakes, dots, candy canes)
- Reinforce heavy items (a couple stitches or extra glue + backing)
- Make the inside wearable (cover scratchy backs, trim poky wire ends)
- Do a sit-test + arm-raise test before the glue fully cures
Comfort & durability quick checks
- Weight: spread heavy items across the sweater (don’t load one shoulder)
- Scratch factor: cover the backs of pins/ornaments with fabric or tape
- Movement: keep bulky items off underarms and inner elbows
- Washability: many no-sew builds are “one-night costume” quality unless reinforced
Common no-sew mistakes (and quick fixes)
- Too heavy in one spot → move pieces toward the center + distribute weight
- Decorations peeling off → roughen slick surfaces, use backing fabric, add 2–3 hand stitches
- Itches/pokes inside → cover backs with soft fabric patches or tape
- Looks chaotic in a bad way → commit to one theme, repeat 2–3 motifs, add borders to “frame” it
Knit-Style Ugly Sweater Pattern: Motifs, Repeats, and a Simple “Chart”
Even if you’re not literally knitting, a knit-style “chart” approach helps you design patterns that look like classic ugly sweaters: motifs + repeats + borders.

Step-by-step: build a repeat tile (the core of the pattern)
- Pick a theme + 3–6 motifs (example: tree, reindeer head, snowflake, candy cane)
- Draw each motif on a simple grid (think “pixel art”)
- Build a repeat tile (the smallest block that can repeat seamlessly)
- Add borders (simple stripe, zigzag, or repeating mini-motif band)
- Choose a limited palette (high contrast helps readability)
- Map it to panels: front, back, sleeves (see Placement)
- Test it at “real size” on a quick mockup: can you read it from a few steps away?
Rules of thumb (to make it look like a sweater pattern)
- Bigger shapes win: micro-details disappear at distance
- Contrast matters: light/dark separation reads “knit” faster than subtle gradients
- Repeat on purpose: repeating 2–3 small motifs makes the design feel intentional
- Frame the chaos: borders at cuffs/hem/neck instantly “sweater-ify” the look
Mini table: your look → best motif structure
| You want… | Use this structure | Why it works |
|---|---|---|
| A “main joke” sweater | Big center motif + simple borders | The joke reads instantly |
| Classic busy ugly sweater | All-over repeat tile | Looks patterned everywhere |
| “Premium ugly” | Center motif + repeat filler + borders | Balanced and intentional |
Digital Ugly Sweater Pattern (Design Software Workflow + Safe Export Bundle)
If you want a clean, reusable pattern (for printing/embroidery/custom orders), design it as panel-aware artwork: front, back, sleeves.
Workflow: from motif to layout
- Start with a simple panel plan (front/back/sleeves)
- Create your motif set (icons, snowflakes, stripes, text)
- Decide: placement layout (center motif) or repeat tile (all-over)
- Make a quick mockup (even a rough sweater outline is fine)
- Label your colors consistently (so “Red-01” means the same everywhere)
- Create a placement map: what goes on front/back/sleeves
- Export a safe default file bundle (below)
Mini export table (safe defaults by method)
File requirements vary by platform/manufacturer, so this is a safe default set to start with.
| Execution method | Best file types to provide | Notes |
|---|---|---|
| Print (digital/screen/overall) | Vector (AI/SVG/PDF) + high-res raster (PNG) | Keep text outlined if possible |
| Embroidery | Vector + a clear PNG preview | Simplify tiny details; avoid hairline strokes |
| Knit-style reference | PDF chart-style layout + PNG preview | Focus on bold shapes + repeats |
Placement preview tips
- Keep key motifs away from underarms and side seams
- If you use text, test readability from a few steps away
- Borders help designs look “intentional” even when busy
Print vs Embroidery vs Knit-Look vs DIY Add-ons (Which Should You Choose?)
If you’re choosing how to execute your “pattern,” start with the look you want and how hard the sweater needs to work (comfort, durability, quantity).
| Method | Look/texture | Comfort | Durability | Complexity | Best for |
|---|---|---|---|---|---|
| Flat, graphic, high-detail possible | Usually comfortable | Depends on print quality and care | Low–medium | Photos, gradients, big batches with consistent art | |
| Embroidery | Raised texture, “crafted” feel | Can be stiff if dense | Often durable | Medium | Logos, icon, premium accents |
| Knit-look execution | Classic sweater vibe, patterned feel | Usually soft if well made | Good when executed properly | Medium–high | Traditional ugly sweater aesthetic |
| DIY add-ons | 3D, chaotic, “costume” vibe | Can poke/scratch | Varies widely | Low–medium | One-night parties, contests, last-minute builds |
Pick this if…
- Print: your design is detailed (faces, gradients, lots of small elements)
- Embroidery: you want a textured, premium accent and simpler shapes
- Knit-look: you want the classic “patterned sweater” vibe with motifs and borders
- DIY add-ons: you want maximum ridiculousness fast
These are general tradeoffs; exact results vary by materials and execution. For a vendor example discussing embroidery vs print, see: Printful: embroidered vs printed.
Pattern Placement: Front, Back, Sleeves (and What Changes by Size)
Good placement makes your pattern look intentional—and keeps the sweater wearable.
Placement rules (5–7 practical guidelines)
- Put your main motif on the front chest/center where it won’t be hidden by arms
- Use borders at hem/cuffs/neckline to frame everything
- Keep bulky elements away from underarms and inner elbows
- If using stripes/repeats, plan how they meet at side seams (close enough is fine for DIY)
- On sleeves, simpler repeats (stripes, small motifs) look better than complex scenes
- Avoid placing scratchy pieces where they’ll rub the neck or wrists
- Leave “breathing room” so the design isn’t solid clutter everywhere
Size range notes (keep what’s fixed vs what scales)
- Often fixed: center motif position; border placement
- Often scalable: amount of repeat fill around the center; spacing between small motifs
Mini checklist: what to include in a placement map
- Front: center motif + border notes + any text placement
- Back: repeat fill or secondary motif notes
- Sleeves: stripe/repeat direction + spacing notes
- Color palette list (named consistently)
- Any “don’t place here” notes (underarms, seam-heavy areas)
Optional: If You Need Multiples (Events/Teams/Brands), Make It Manufacturer-Ready
Exact MOQ, lead time, and shipping vary by design, yarn/material choice, quantity, and destination—so keep your request clear and flexible.

What sampling typically confirms before bulk
- The look matches the artwork (color + placement)
- Comfort and hand-feel are acceptable
- Any constraints from the chosen execution method are surfaced early
- Fit and sizing expectations are aligned
In plain terms, a tech pack is a set of design and technical details used to communicate how a garment should be made. For a general explainer, see: Techpacker: what is a tech pack.
Soft CTA (optional): If you’re producing multiples, share your artwork/placement map, quantities by size, and target ship window to start a manufacturing conversation.
Templates & Inspiration: How to Use Them Without Copyright Headaches
Templates can save time, but you still need to respect licenses and rights—especially if you’ll sell the sweaters or use them commercially.
Do / Don’t (practical, non-legal-advice guidance)
- Do use your own drawings, original motifs, or properly licensed assets.
- Do check whether a template license allows commercial use.
- Don’t assume you can print famous characters, logos, or branded slogans on merch without permission.
- Don’t treat “it’s parody” as automatic protection—fair use is fact-specific and evaluated with multiple factors: U.S. Copyright Office: Fair Use.
- Do remember trademarks can also matter when using logos/brand identifiers: USPTO: trademark infringement.
“Originalize” checklist (make it yours)
- Change the motif set (swap icons, add new elements)
- Change composition (center motif vs all-over repeat)
- Change palette and borders
- Redraw in your own style
- Combine multiple inspirations into a new arrangement
Note: This is general information, not legal advice. For commercial use, confirm permissions/licenses.
Common Ugly Sweater Mistakes (Comfort, Weight, Durability) + Quick Fixes
- Too much scratchy stuff inside → cover backs with soft fabric patches
- Everything is glued in one thick cluster → spread elements, layer flatter first
- Design is unreadable → increase contrast, simplify motifs, add borders
- Sleeves become unwearable → keep sleeves simple (stripes/small repeats)
- Lights create discomfort or hazards → secure battery pack, avoid exposed button batteries, and keep components away from skin and kids. For general safety context on ingestion hazards, see: U.S. Consumer Product Safety Commission (CPSC).
FAQ
What makes an ugly Christmas sweater ugly (in a good way)?
It’s intentional: bold themes, clashing colors, oversized motifs, and repeated “too much” details—while still being wearable.
- Use 1 main joke + 2–3 repeating motifs
- Add borders (hem/cuffs/neck) to frame the chaos
- Keep the inside comfortable (scratchy backs ruin the fun)
What are the rules for an ugly sweater contest?
Rules vary by event, but common judging patterns include creativity, humor, effort, and how “on-theme” the sweater is.
- Check if DIY is required or if store-bought is allowed
- Ask if lights/sound props are allowed
- Wearability matters if you’ll be on stage or moving around
How do you make an ugly Christmas sweater without sewing?
Plan the layout first, then attach big shapes, borders, and repeats in layers.
- Checklist: base sweater, glue/attachment, decorations, comfort patches
- Steps: dry-fit → glue big shapes → add borders → fill repeats → reinforce heavy pieces
How do you design a knit-style ugly sweater pattern (repeat motifs + chart)?
Make a motif set, draw it on a grid, build a repeat tile or center + borders, then map it to panels.
- Keep shapes bold and high-contrast
- Repeat small motifs for a “patterned” feel
- Test readability on a mockup
Should you print the pattern or make it fully knitted?
Choose based on the look you want, comfort needs, and how repeatable it must be.
- Print: detailed graphics
- Embroidery: textured icons/logos
- Knit-look: classic ugly sweater vibe with motifs and borders
- DIY add-ons: fastest 3D chaos
What do you need to send a manufacturer to produce an ugly sweater design?
A clear placement map, color palette, sizes/quantities, and reference mockups make everything smoother.
- Front/back/sleeve artwork + placement notes
- Named colors + size range + quantities by size
- Preferred method (print/embroidery/knit-look) and target ship window
Exact MOQ/lead times vary by design and quantity.
How do you make a kids’ ugly Christmas sweater (safely and comfortably)?
Keep it soft, lightweight, and free of small detachable parts for young kids.
- Avoid sharp/poky decorations and easily swallowed pieces
- Keep sleeves simple (no bulky items near elbows/underarms)
- If using lights, keep battery components secured and out of reach
:%20DIY,%20Digital,%20and%20Knit-Style%20Charts)